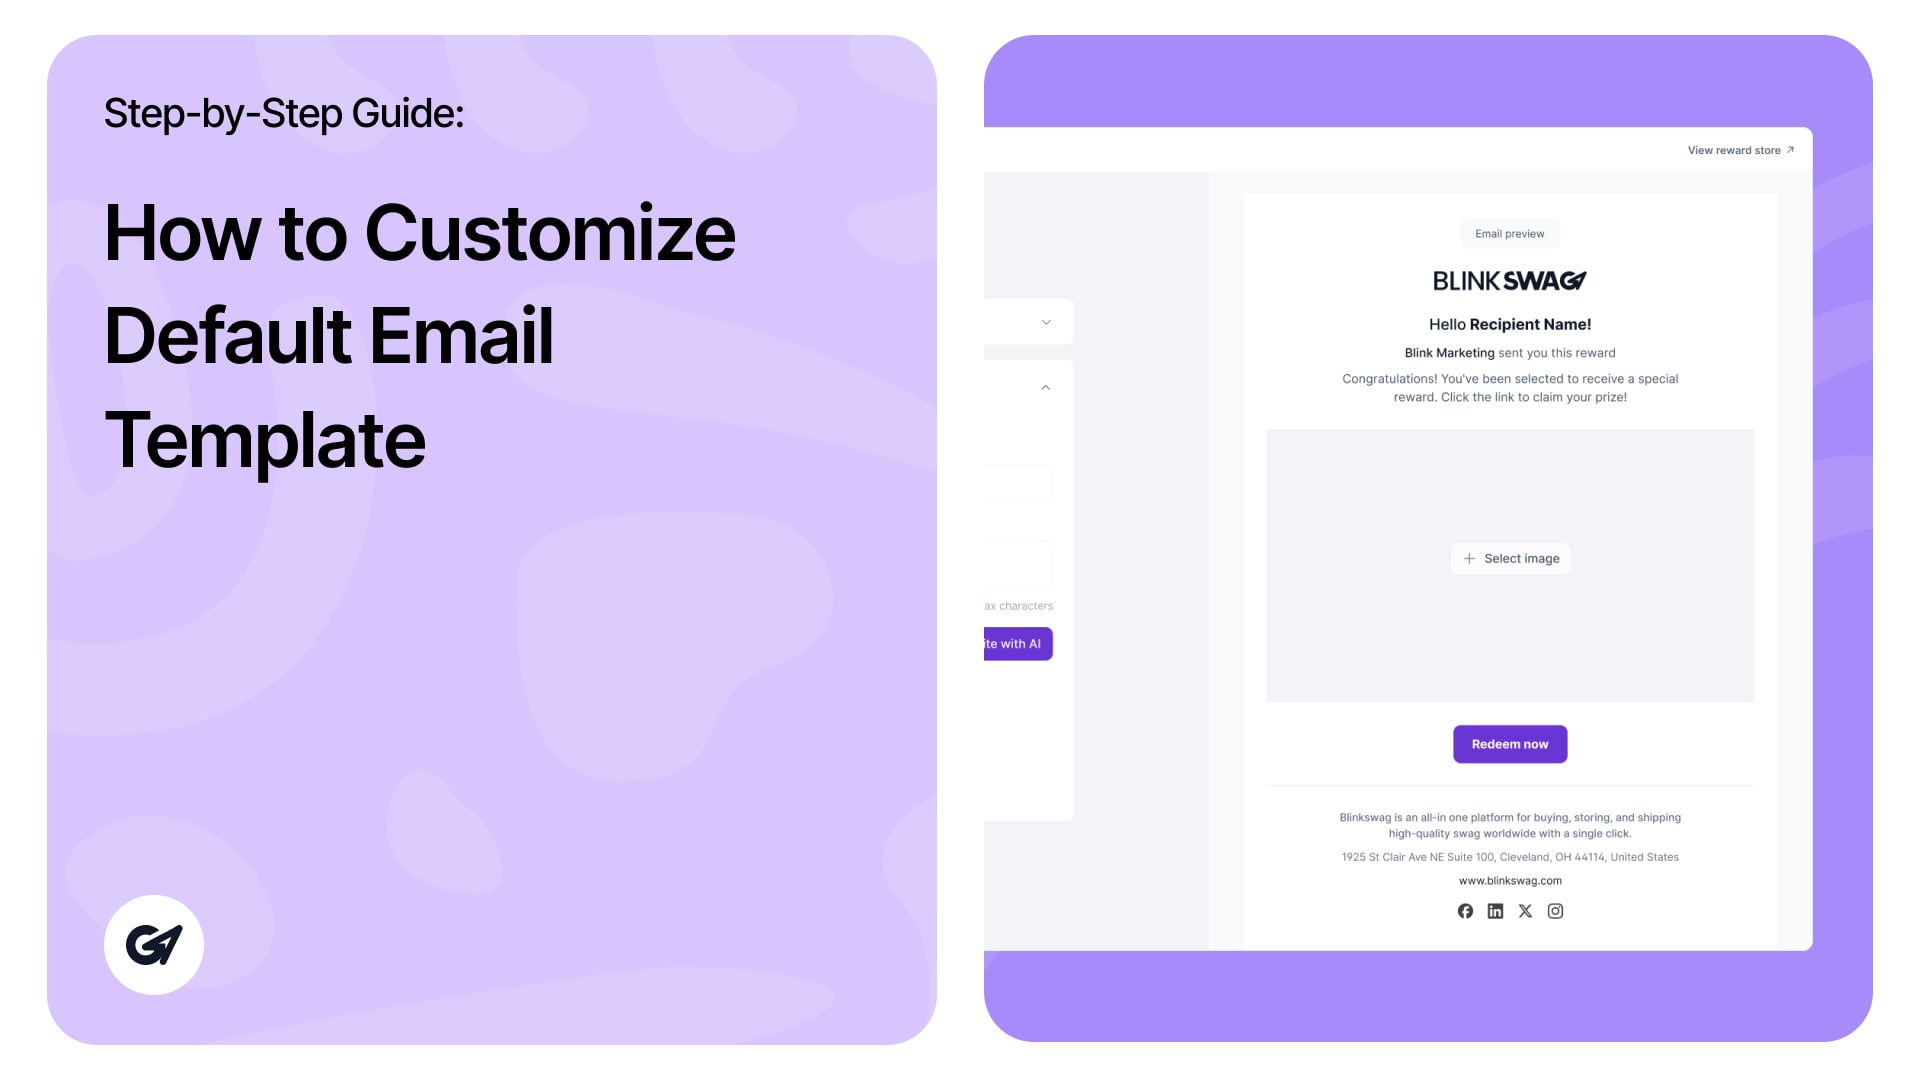
Step 1: Accessing Email Template Customization
To customize the default email template, navigate to the Reward Store dashboard.
1. Customize Store: In the top-right corner, click on the red-highlighted “Customize store” button. This button will open a set of customization options, including settings for the Reward Store’s appearance and default email template.
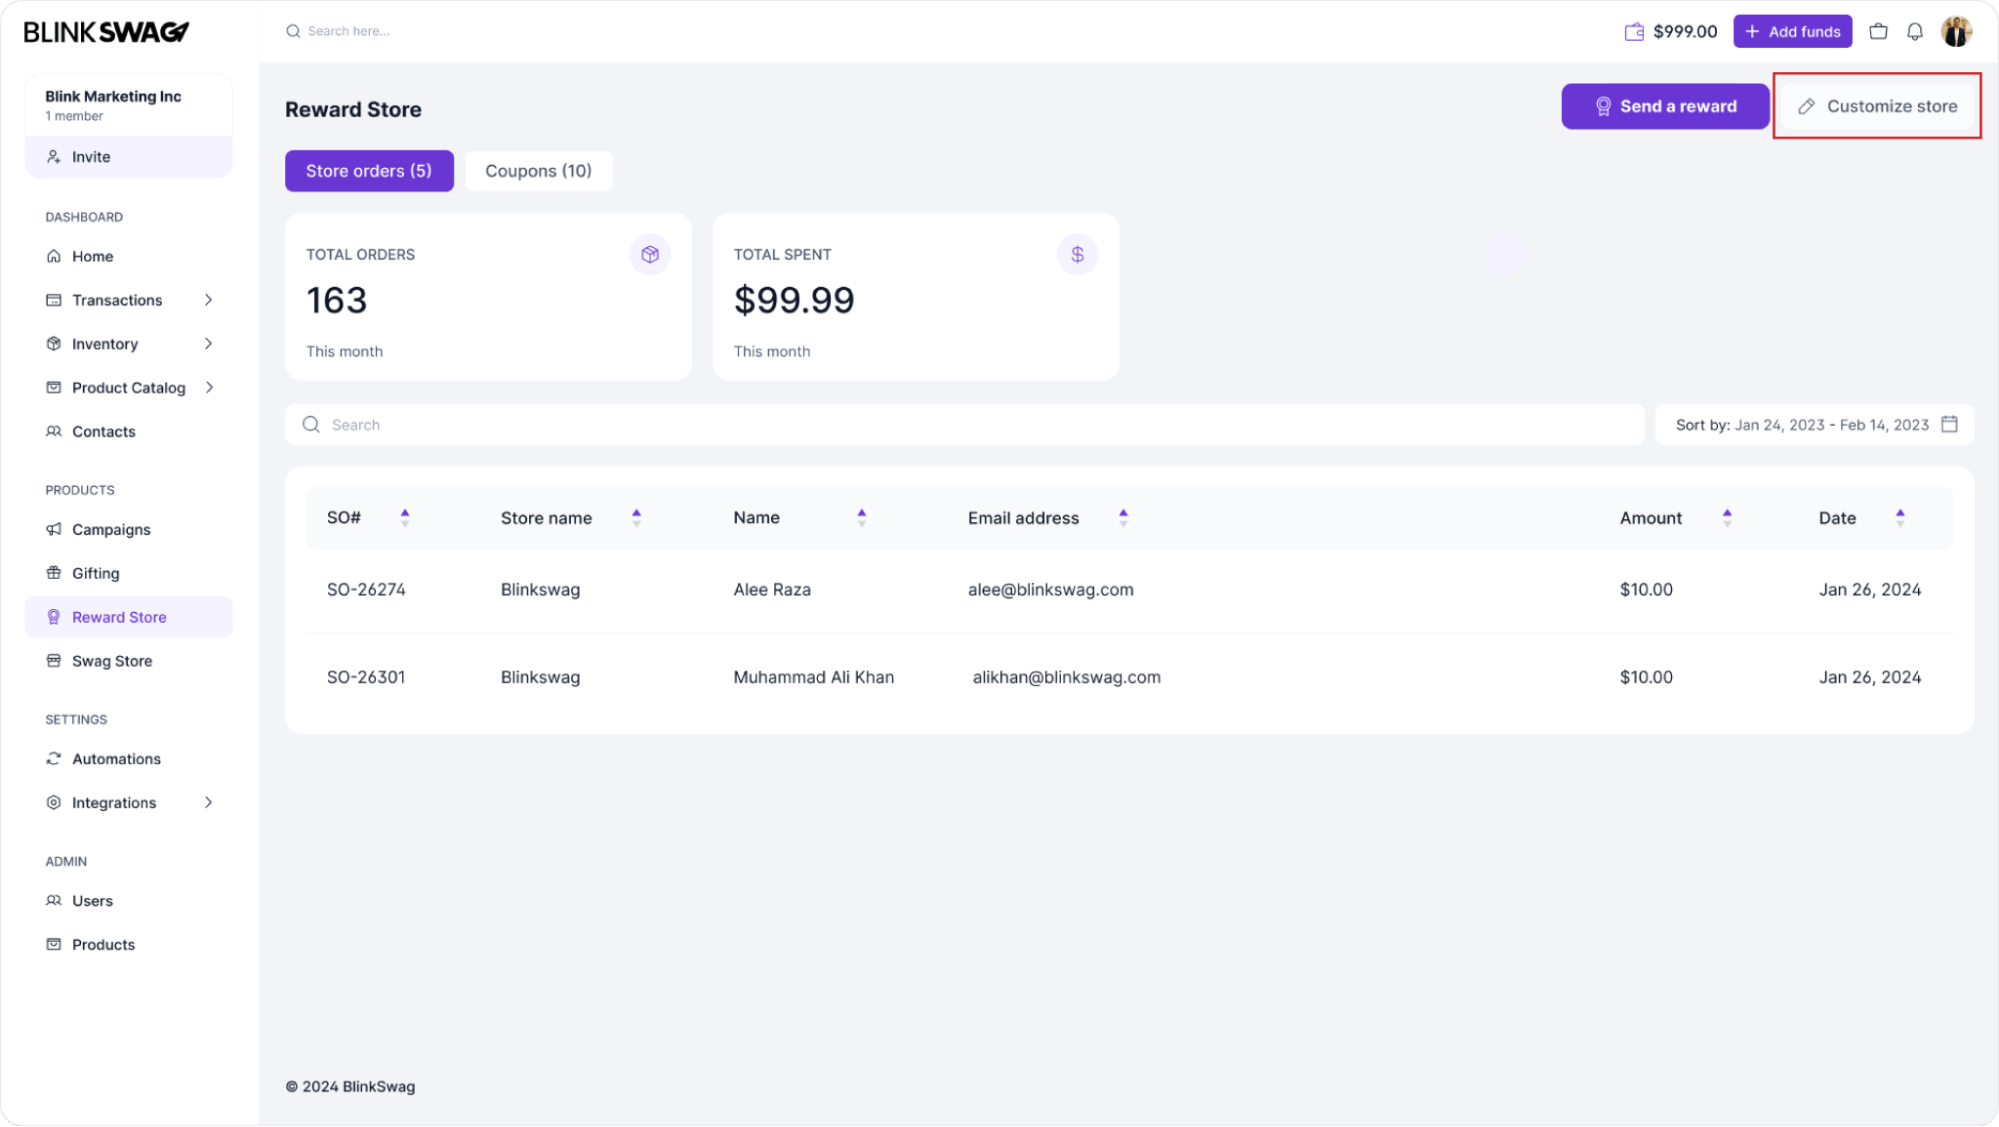
This will take you to a screen where you can further personalize the email template sent to recipients when they receive rewards.
After selecting Customize store from the previous screen, it will take you to a customization menu.
2. Customize Your Default Email: Click on the Customize your default email option, which is highlighted in red. This will open the email template editor, where you can modify the content and appearance of the emails sent from your Reward Store.
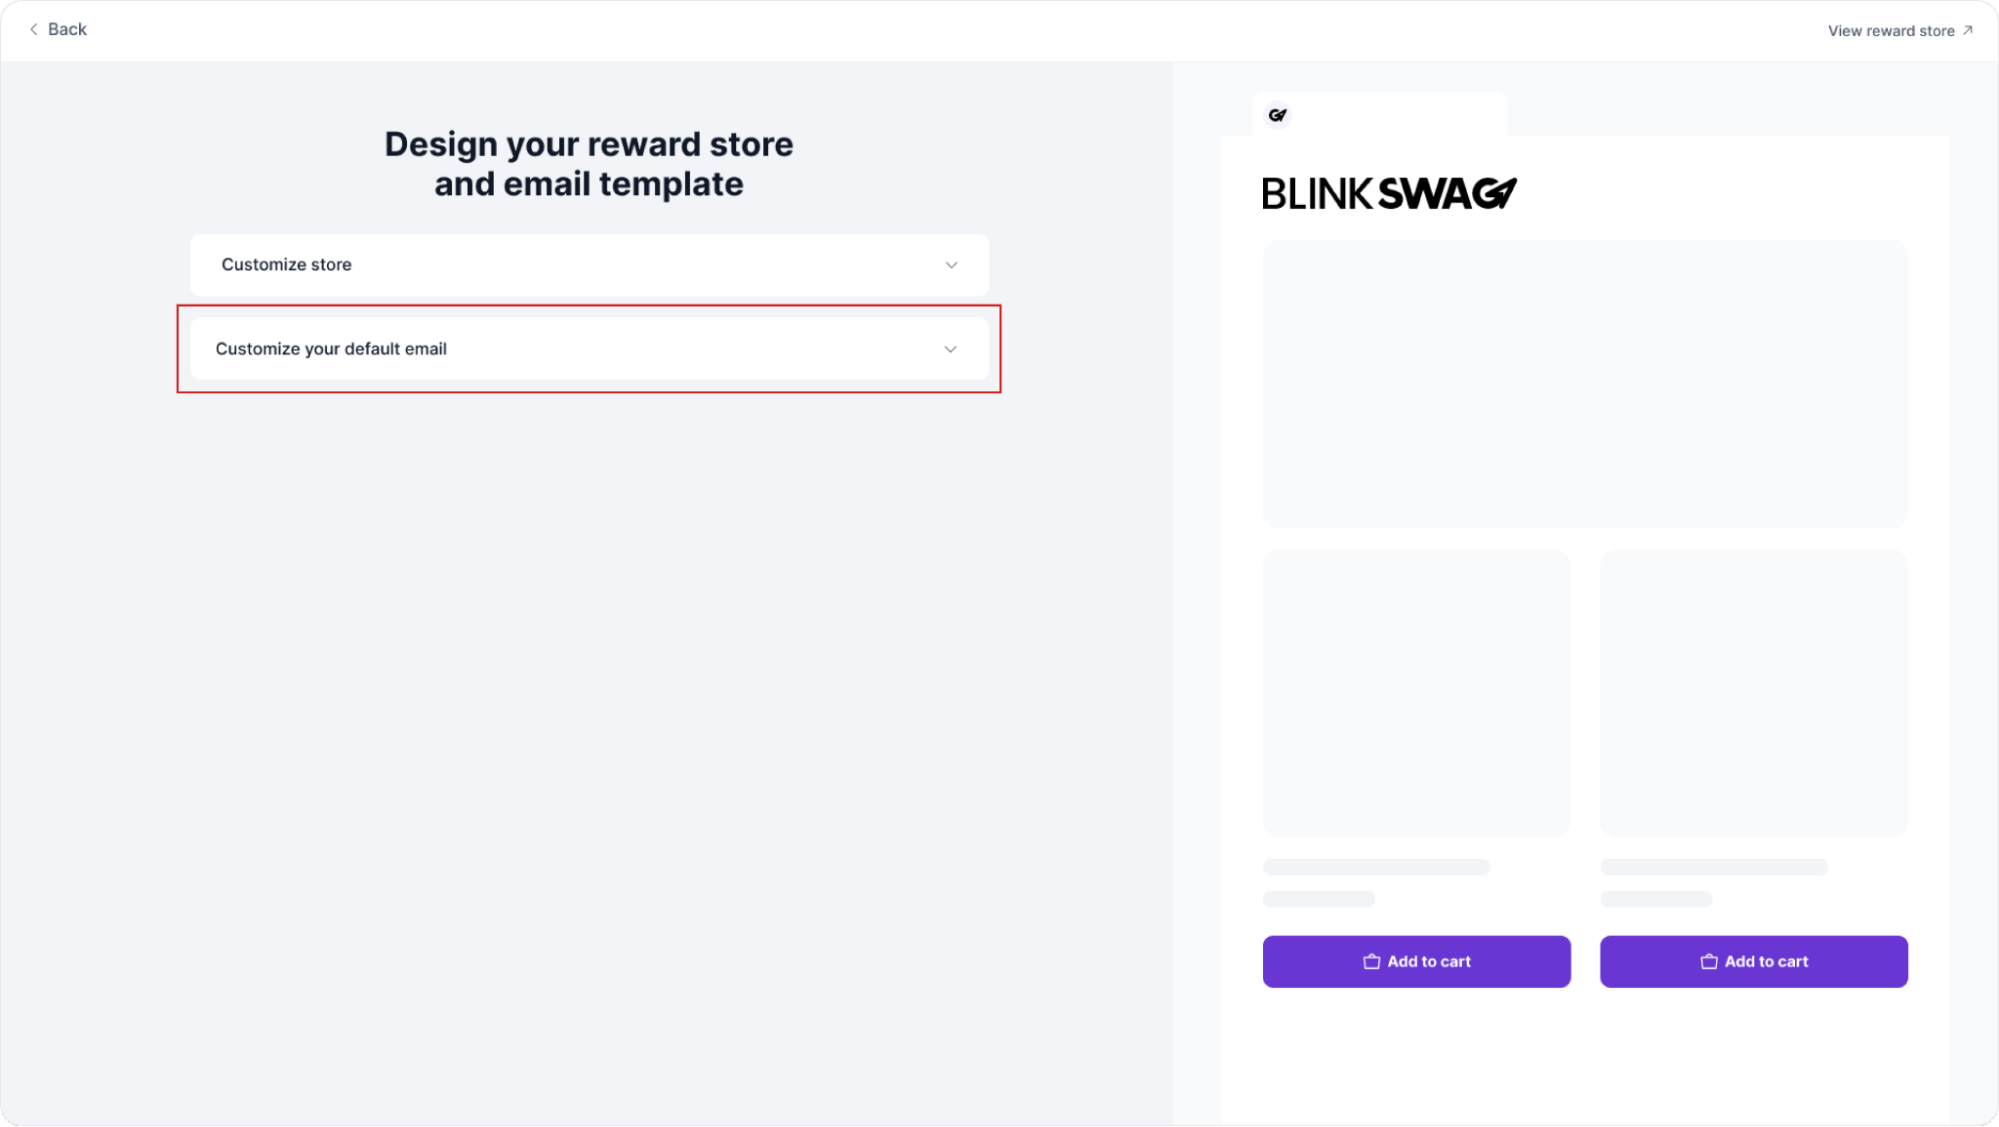
This option allows you to set a personalized email style that aligns with your brand, making each communication more recognizable and consistent.
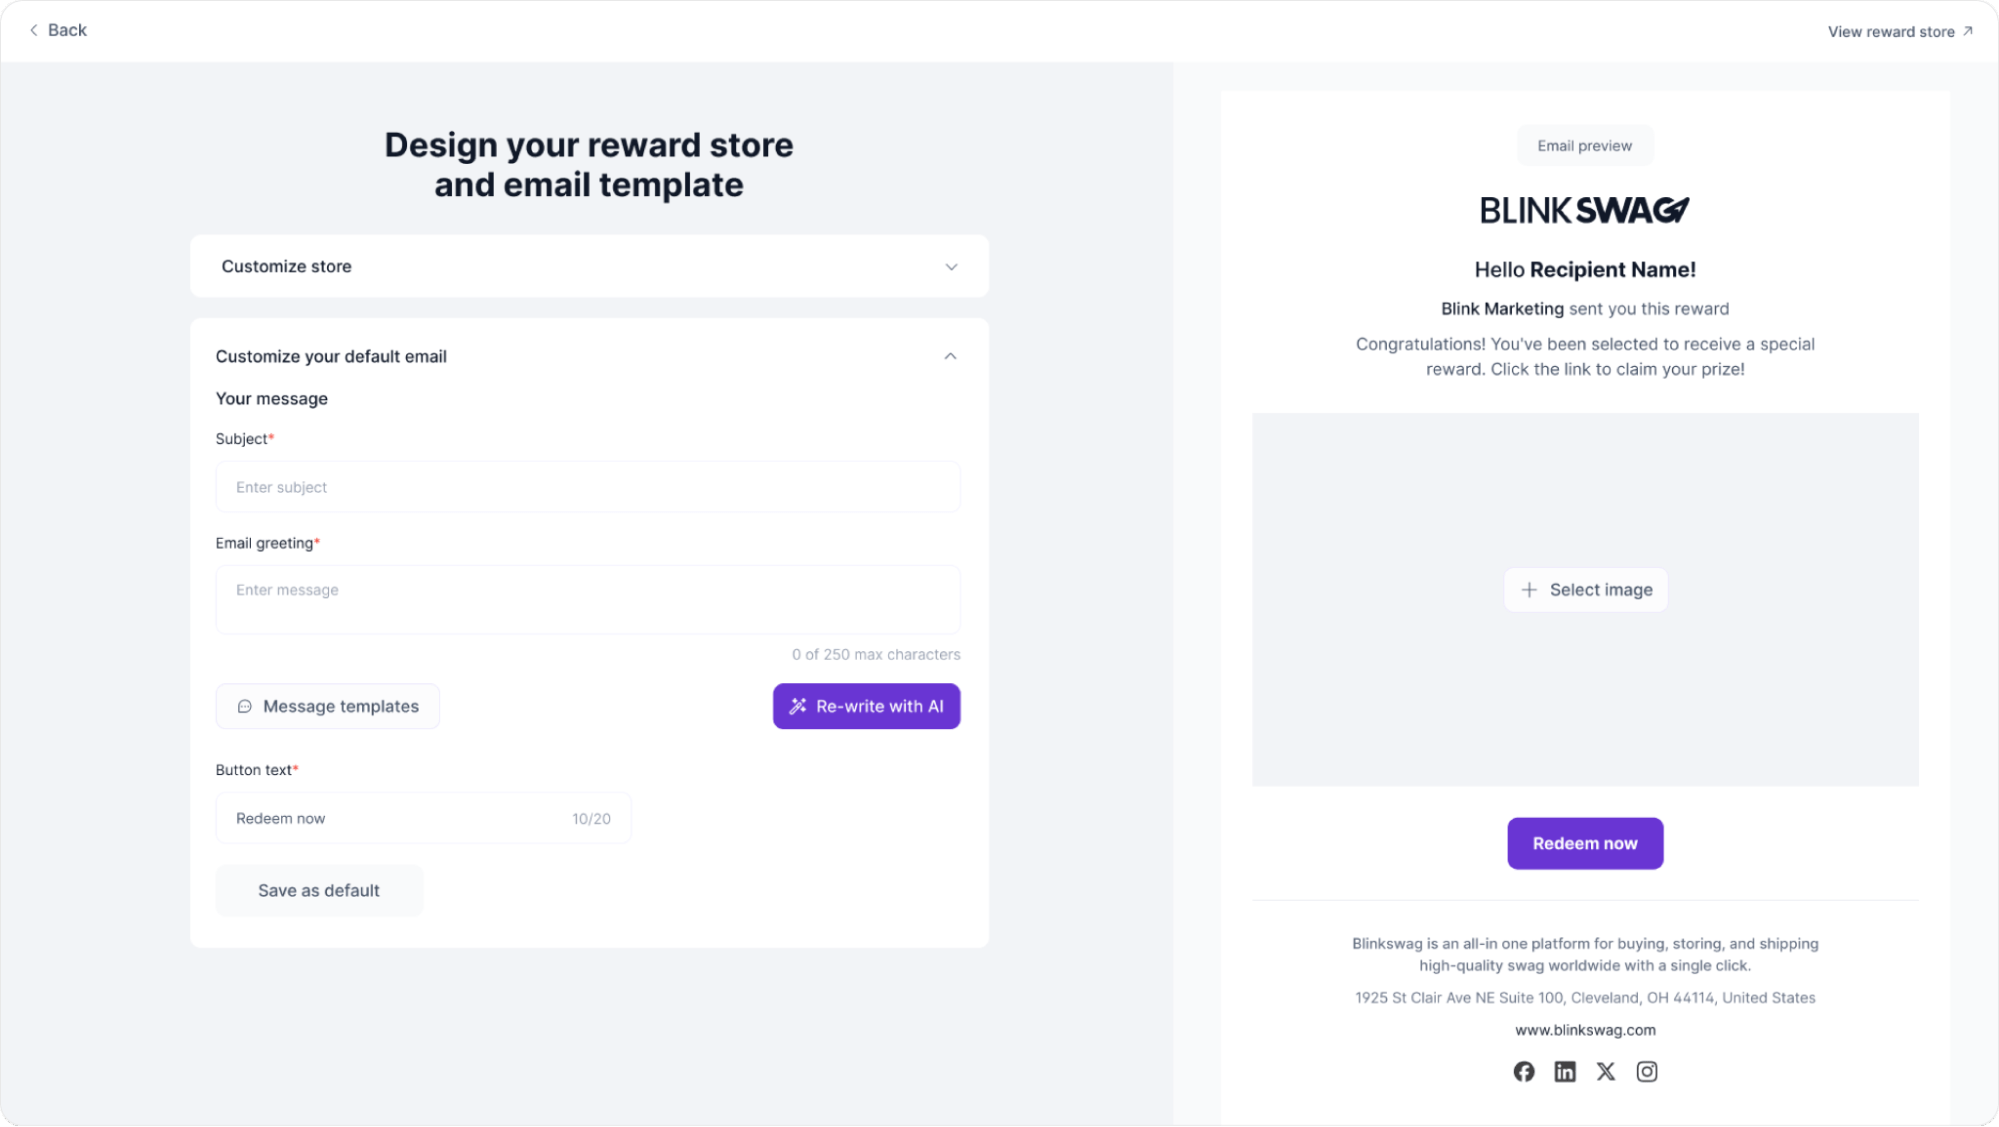
Step 2: Customizing the Email Content
This screen allows you to personalize the content of your default email template, which is sent to reward recipients.
1. Subject Line: In the Subject field, enter the subject line for your email. This is the first thing recipients will see, so make it engaging and relevant.
2. Email Greeting: Fill in the Email greeting field with a welcoming message. This message will appear at the top of the email body and help set the tone for the reward communication.
- You could choose to write on your own.
- Re-write the message with AI’s help by clicking the Rewrite with AI button.
- Choose pre-written content from Message Templates.
Step 3: Message Templates:
If you need quick and compelling text, you can select Message templates, which provide pre-written content to streamline the process.
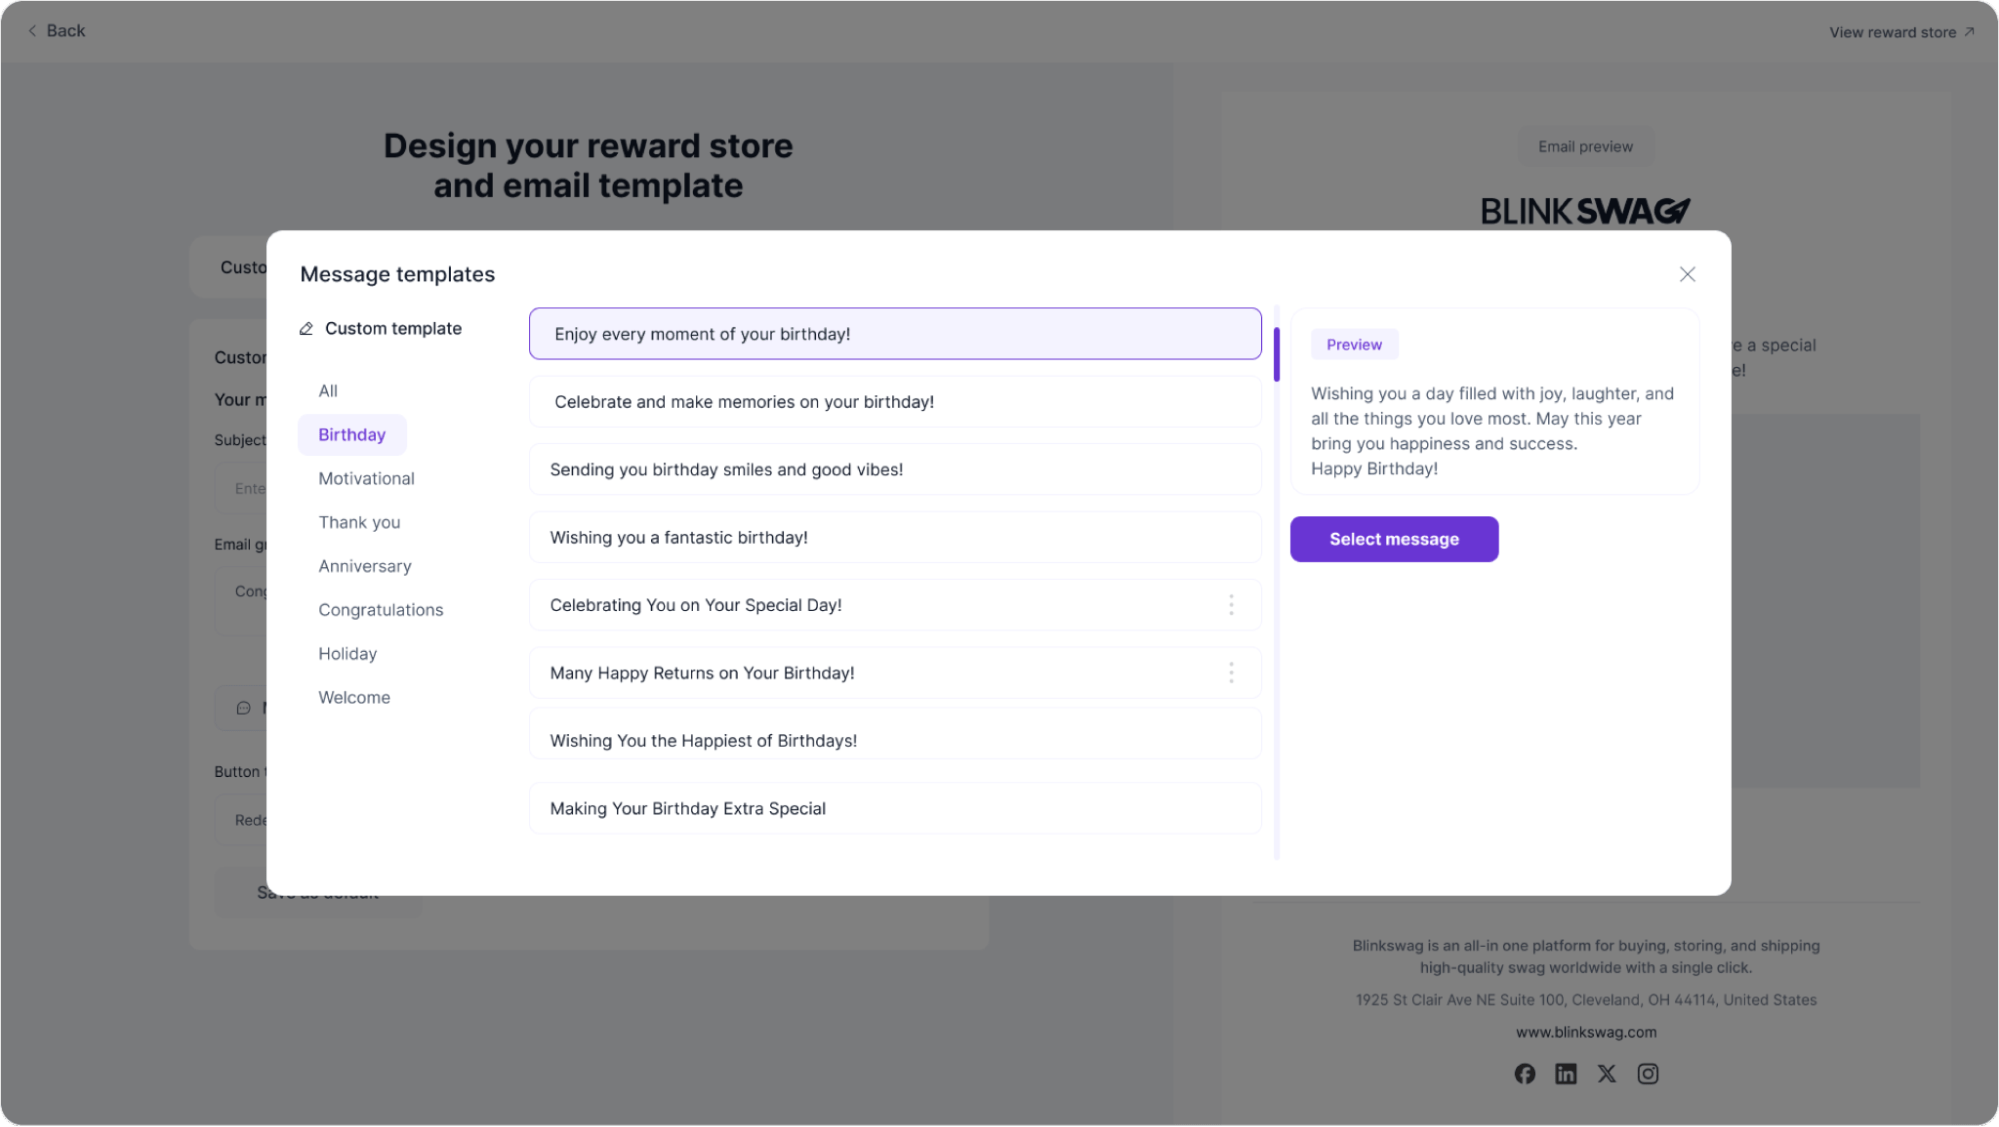
1. Template Categories: On the left side, you’ll find various categories, including Birthday, Motivational, Thank You, Anniversary, Congratulations, Holiday, and Welcome. Select a category to view the relevant templates, ensuring the tone and content suit the occasion or purpose.
2. Choose a Template: After selecting a category, select one of the template messages on the right. For example, in the Birthday category, you can choose messages like “Celebrate and make memories on your birthday!” or “Wishing you the happiest of birthdays!”
3. Preview the Message: After choosing a template from the list on the left, a preview will appear on the right side, displaying the entire message text. This helps you see the exact wording before applying it.
4. Select Message: Once satisfied with the message content, click the Select Message button. This action will insert the selected template into your default email settings for further customization or immediate use.
5. Adjust if Necessary: After selecting the message, you can still edit it within the main editor, allowing for further personalization to fit the specific occasion or recipient.
Step 4: Email Preview and Banner image for Email
On the right side, you can see a Preview of the email layout, showing how each section looks with your inputs.
1. Button Text: Customize the Button text to fit your call-to-action, such as “Redeem now” or “Claim your reward.” This button will direct recipients to their reward.
2. Add an Image: To enhance the email visually, add an image in the designated area. This could be your company logo, a promotional image, or a reward preview.
You can enhance your email by choosing a banner image from various sources in this step.
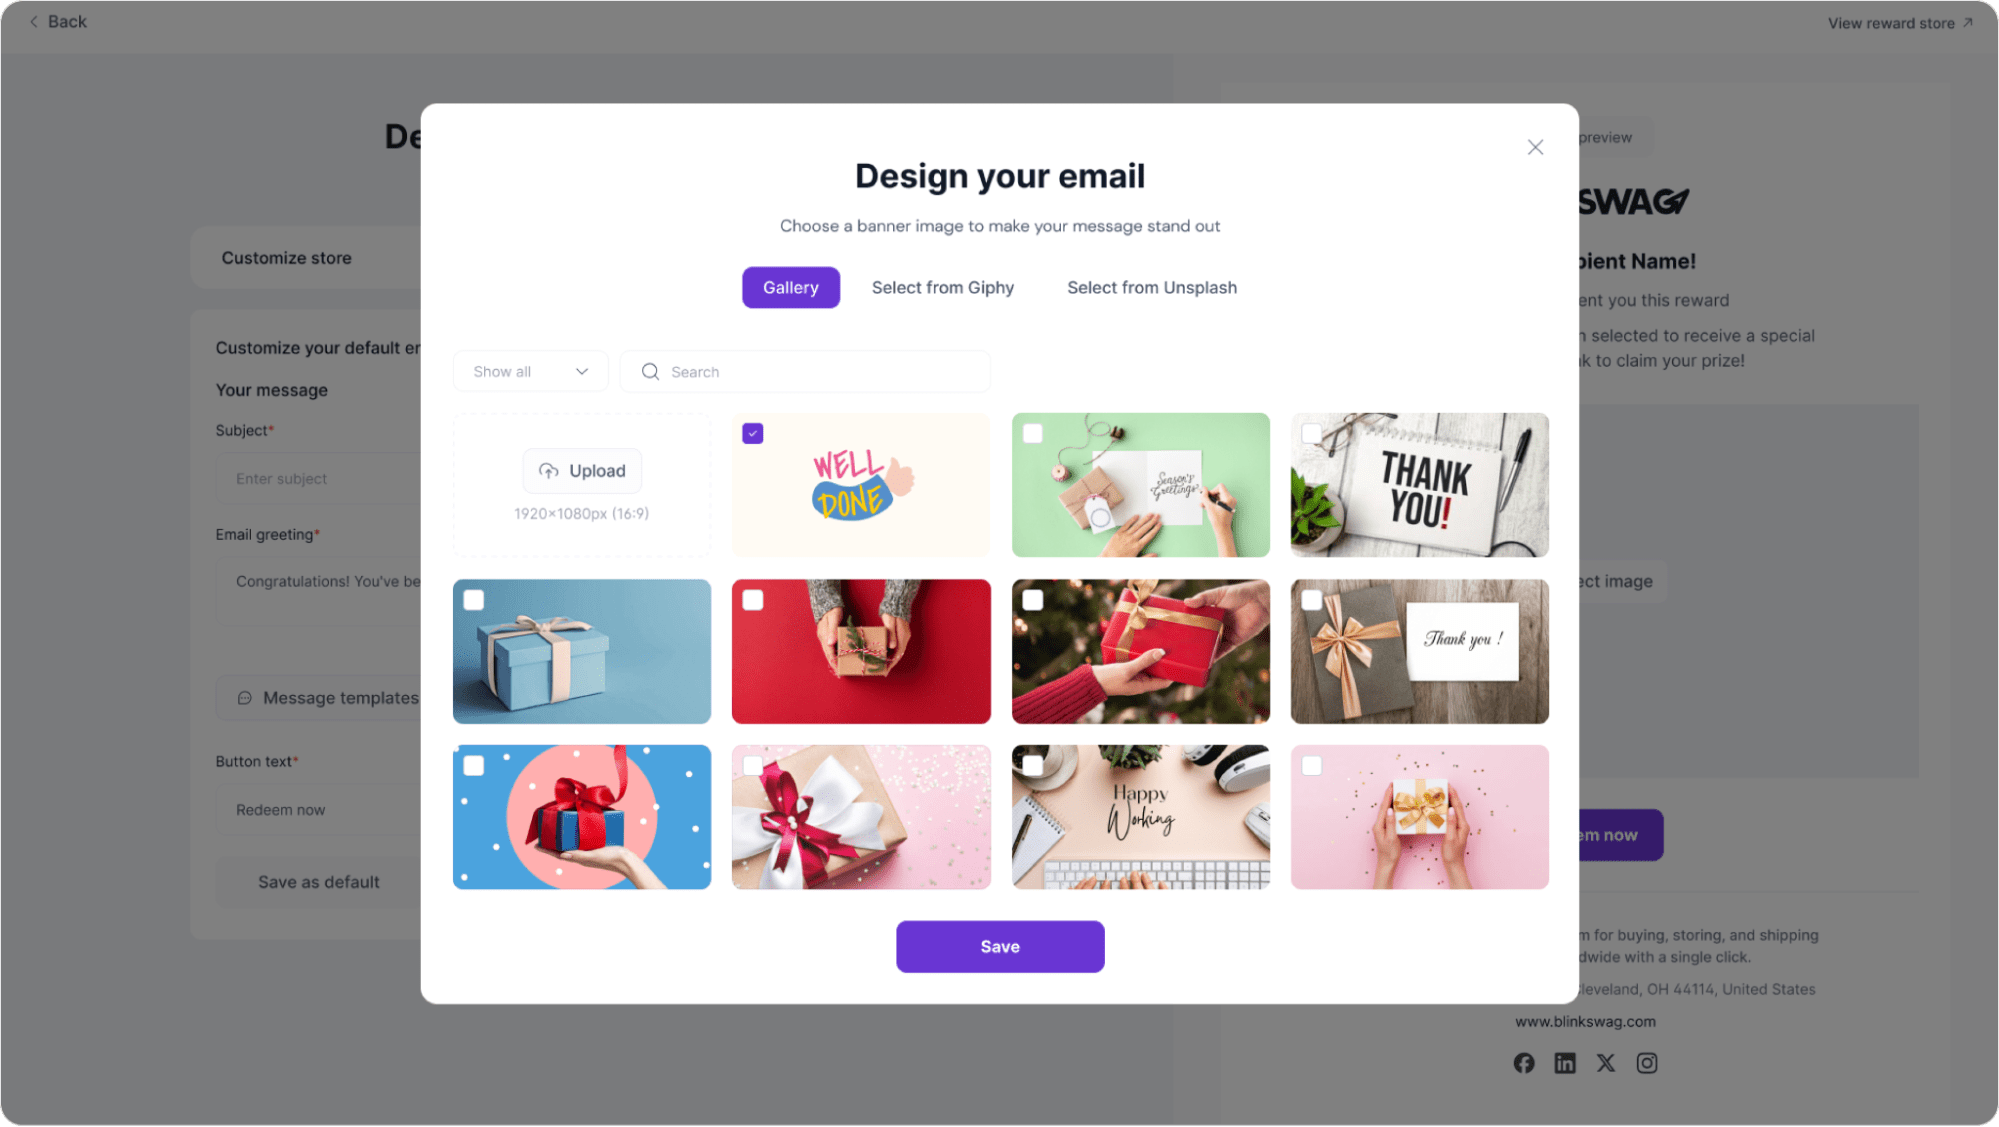
3. Gallery Options: The Design your email window offers multiple image sources:
- Gallery: Select images from the provided gallery, which includes themes like “Thank You” and gift images.
- Select from Giphy: Choose an animated GIF for a fun and dynamic touch.
- Select from Unsplash: Access high-quality, royalty-free images to match the tone of your email.
4. Upload Custom Image: If you have a specific image, click the Upload button to add a custom banner (the recommended size is 1920×1080 pixels).
5. Preview and Select: Click on an image to preview it within the email layout, ensuring it fits your intended style. Once you’ve made your choice, select the Save button to confirm.
Once satisfied with the changes, click Save as default to set this template as the standard for all outgoing reward emails.