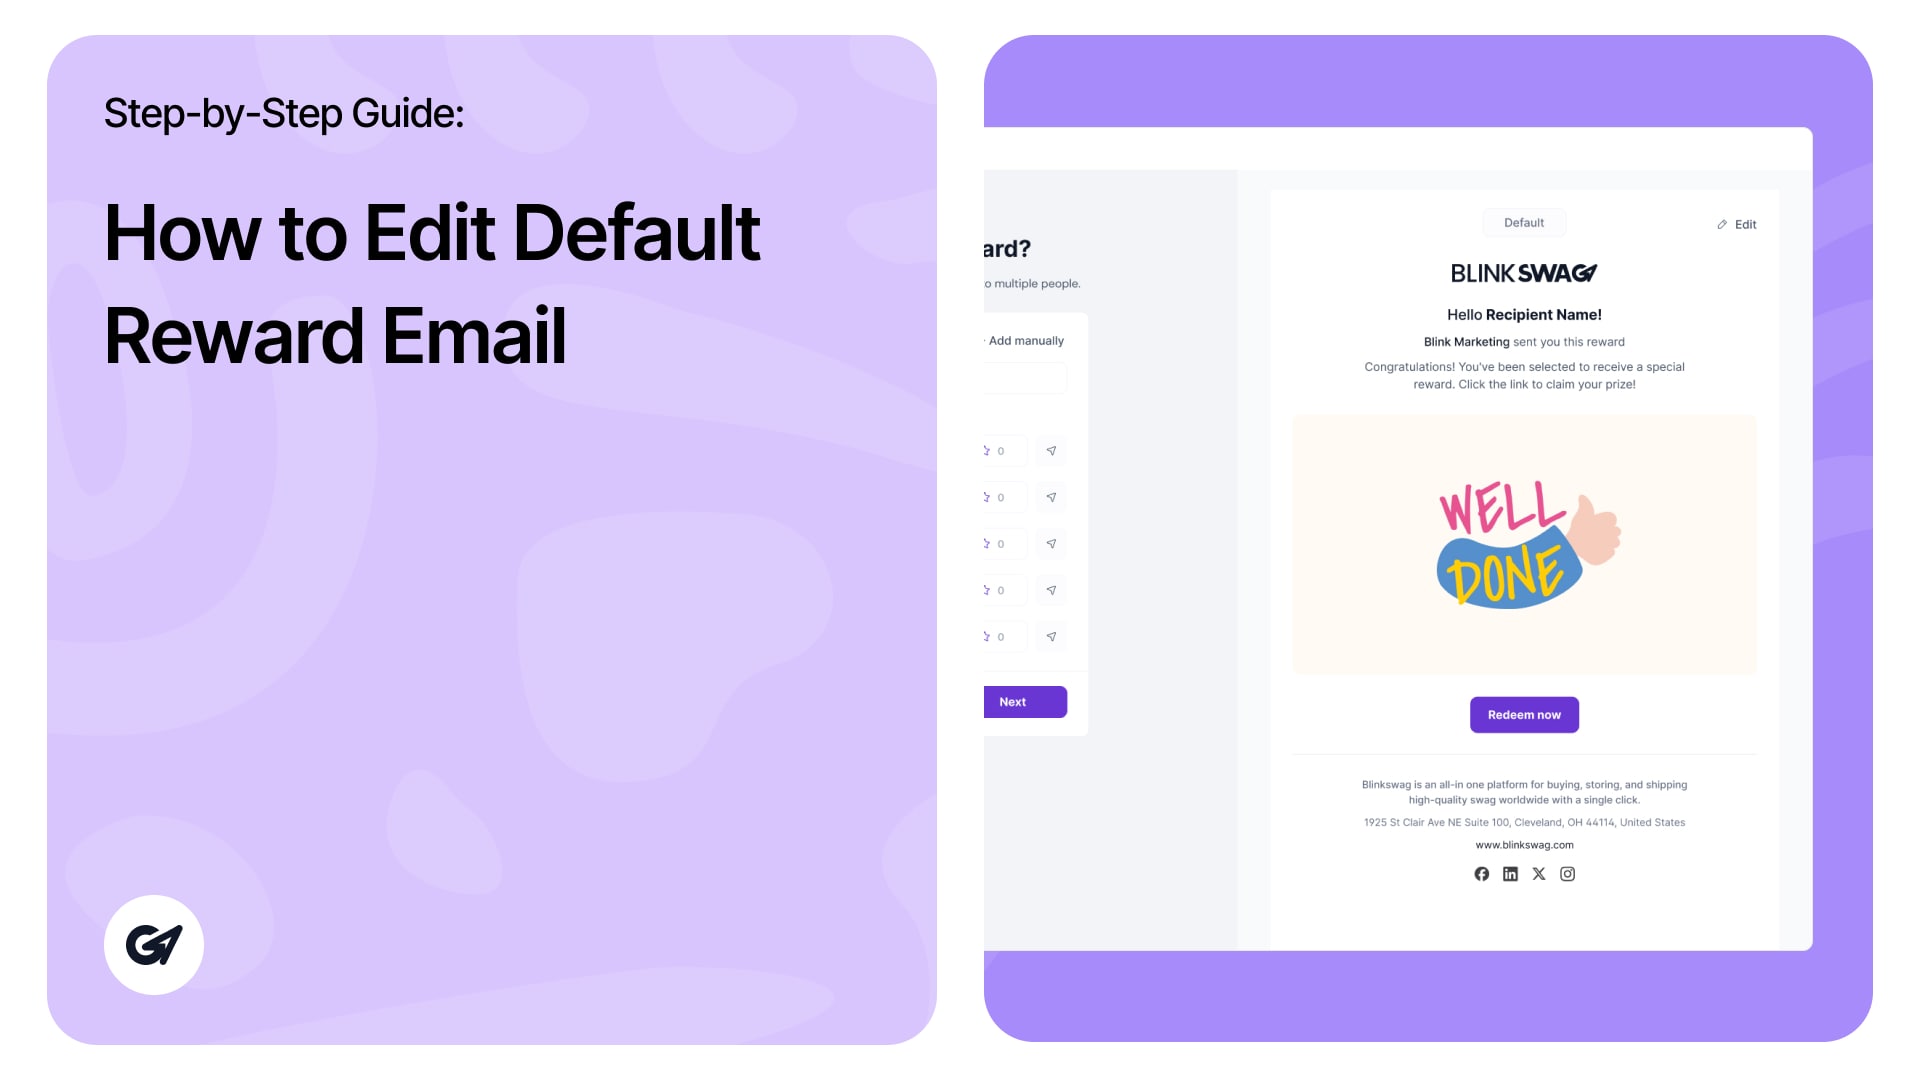
Editing the Reward Email
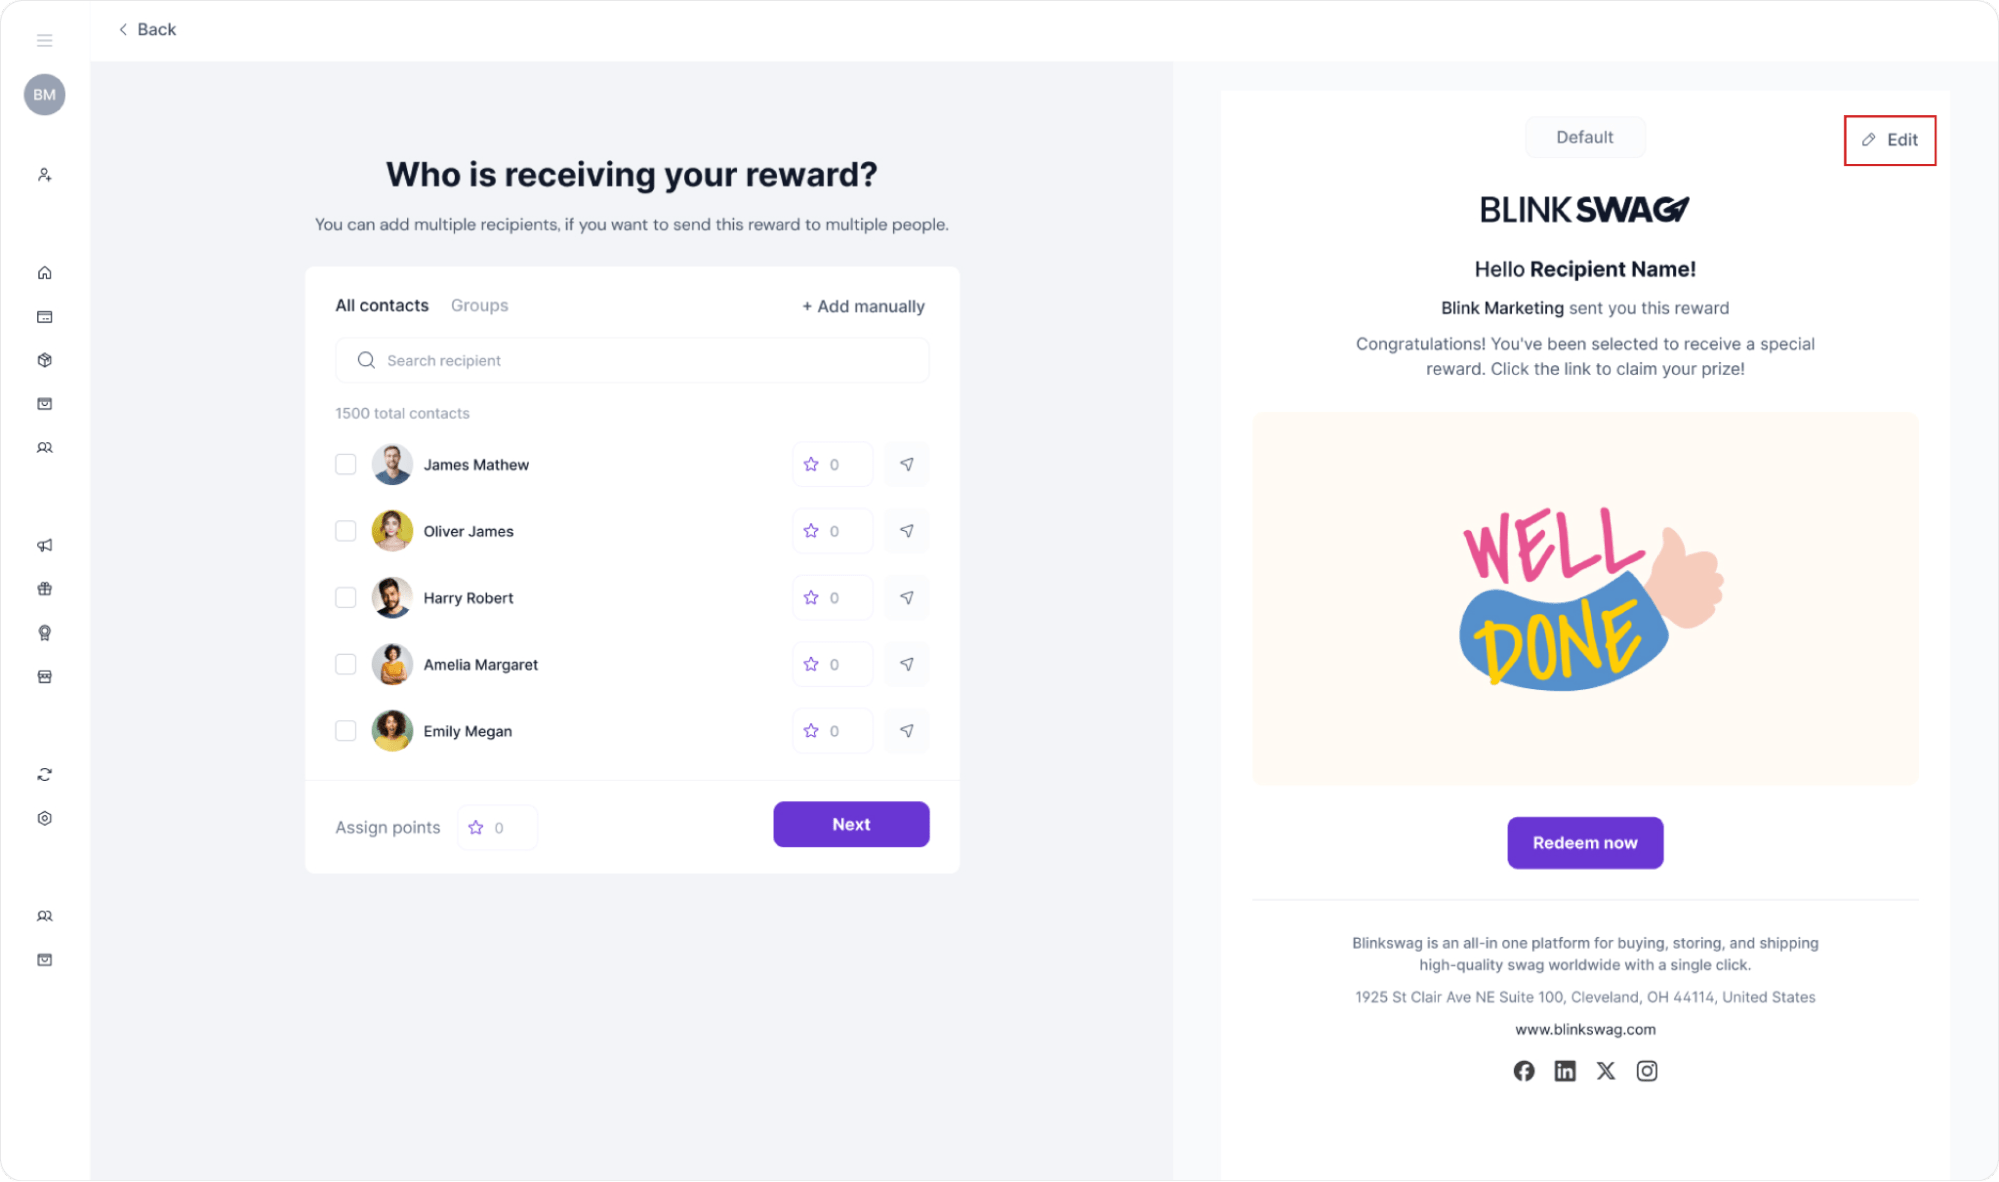
Click the Edit Button: Locate and click the Edit button on the right side of the screen above the email preview. This will open the email editor, allowing you to edit the default email for your rewards, including the email banner and personalized messages.
Customizing the Email Banner Image
To enhance your reward email with a personalized banner image, follow these steps:
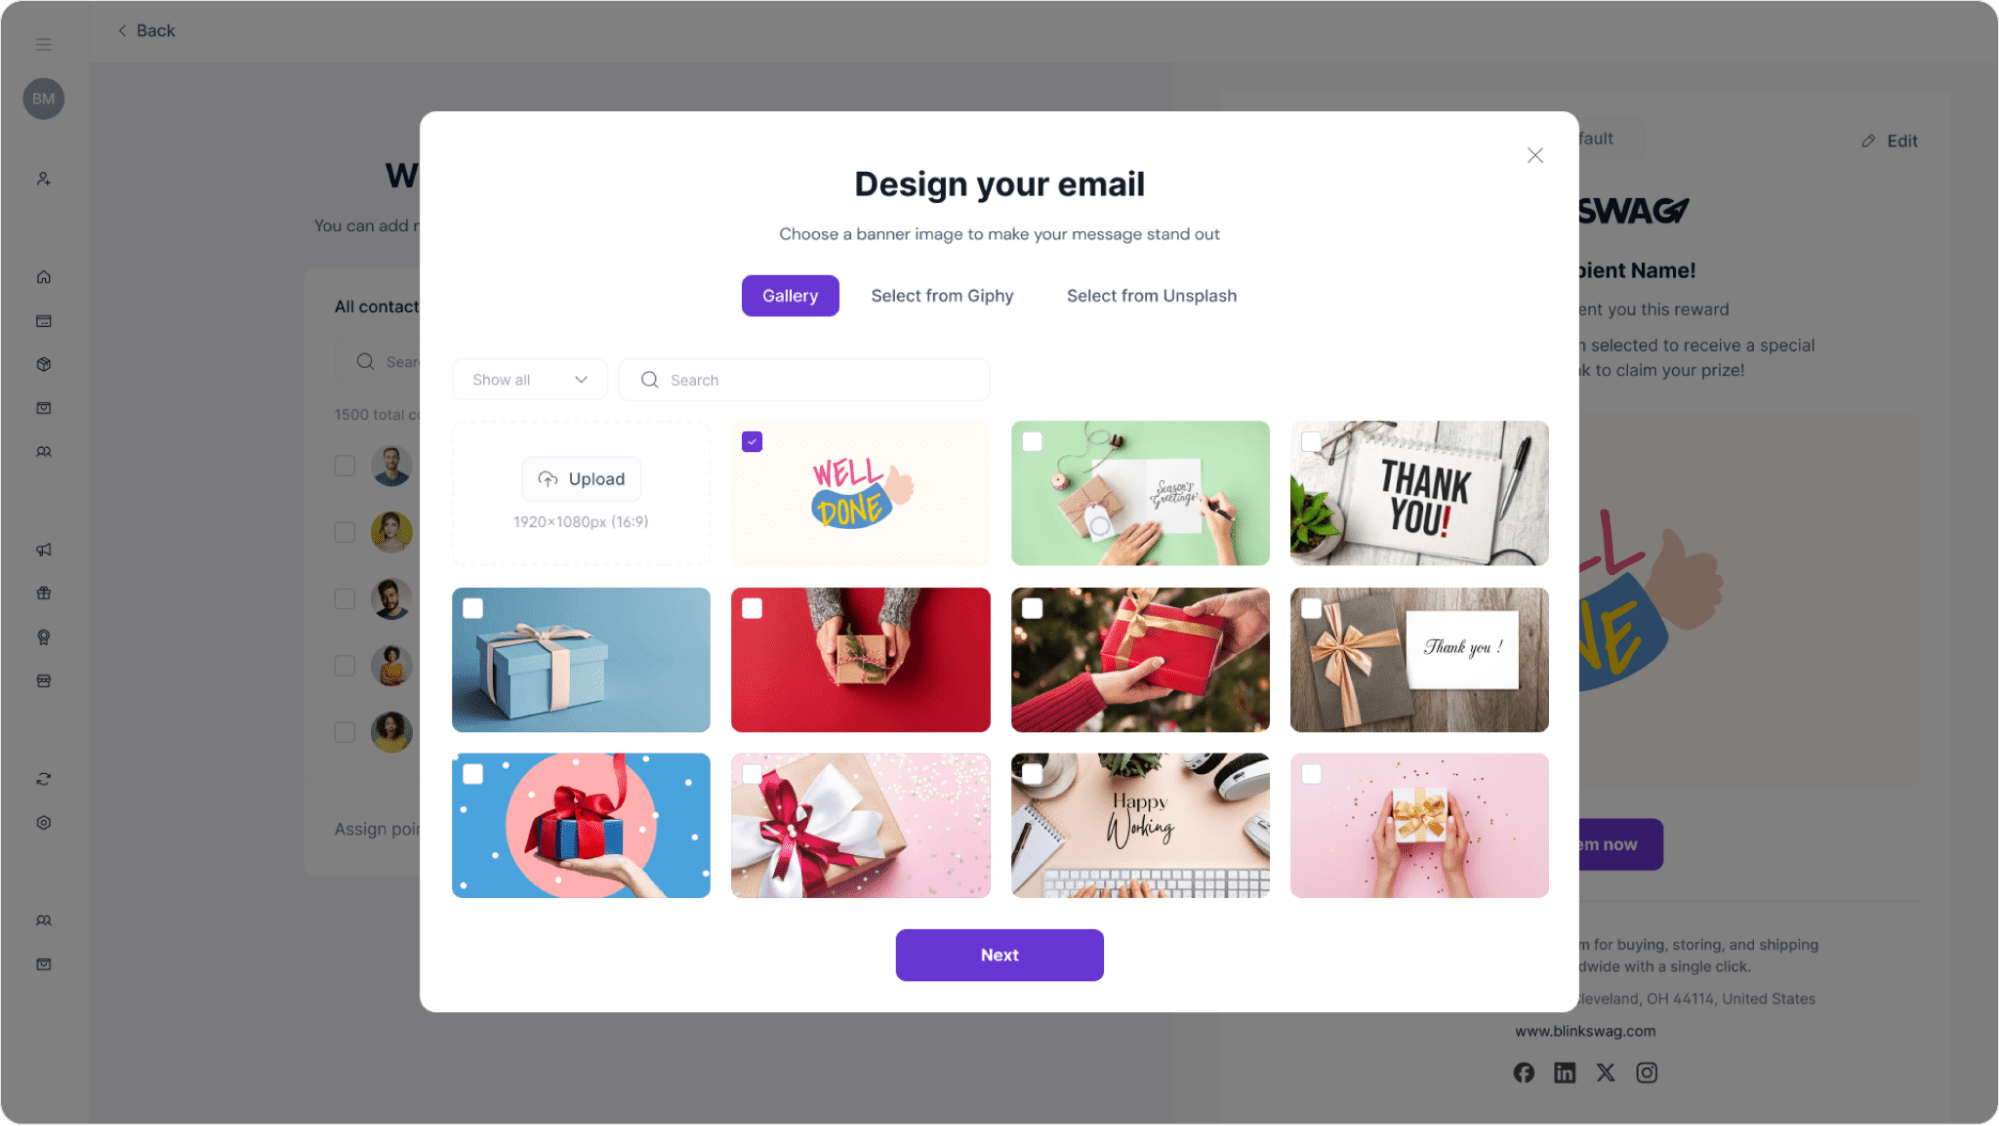
1. Open the Design Your Email Popup: After clicking Edit on the email preview, the Design Your Email popup will appear. This screen allows you to select a banner image for your email.
2. Choose a Banner Source: You have several options to select an image:
- Gallery: Browse pre-made images available in BlinkSwag’s gallery.
- Select from Giphy: Add an animated GIF from Giphy for a fun, dynamic look.
- Select from Unsplash: Access high-quality, royalty-free photos from Unsplash for a professional touch.
3. Upload Your Image: If you have a custom image, click Upload and select an image file from your computer. Ensure it matches the recommended resolution (1920x1080px for best quality).
4. Preview Your Selection: As you choose an image, it will show a checkmark. Click Next to confirm the selection and see it appear on the email preview on the right.
5. Finalize the Design: Review the overall look of your email. If everything looks good, proceed with the rest of the reward-sending process.
Edit Default Email Message for Your Reward
To customize the email message that accompanies your reward, follow these steps:

1. Open the Edit Email Message Popup: After selecting to edit your email message, the popup will appear. This allows you to customize various elements of your email.
2. Fill in the Subject: Enter a compelling subject line that captures the essence of your message. You have a maximum of 60 characters to make it engaging.
3. Compose the Email Greeting: Personalize your greeting. You can start with something like “Congratulations!” followed by a brief message about the reward. You have up to 250 characters to convey your message effectively.
4. Message Templates: To streamline the process, click on Message Templates to choose from pre-written options that can save time.
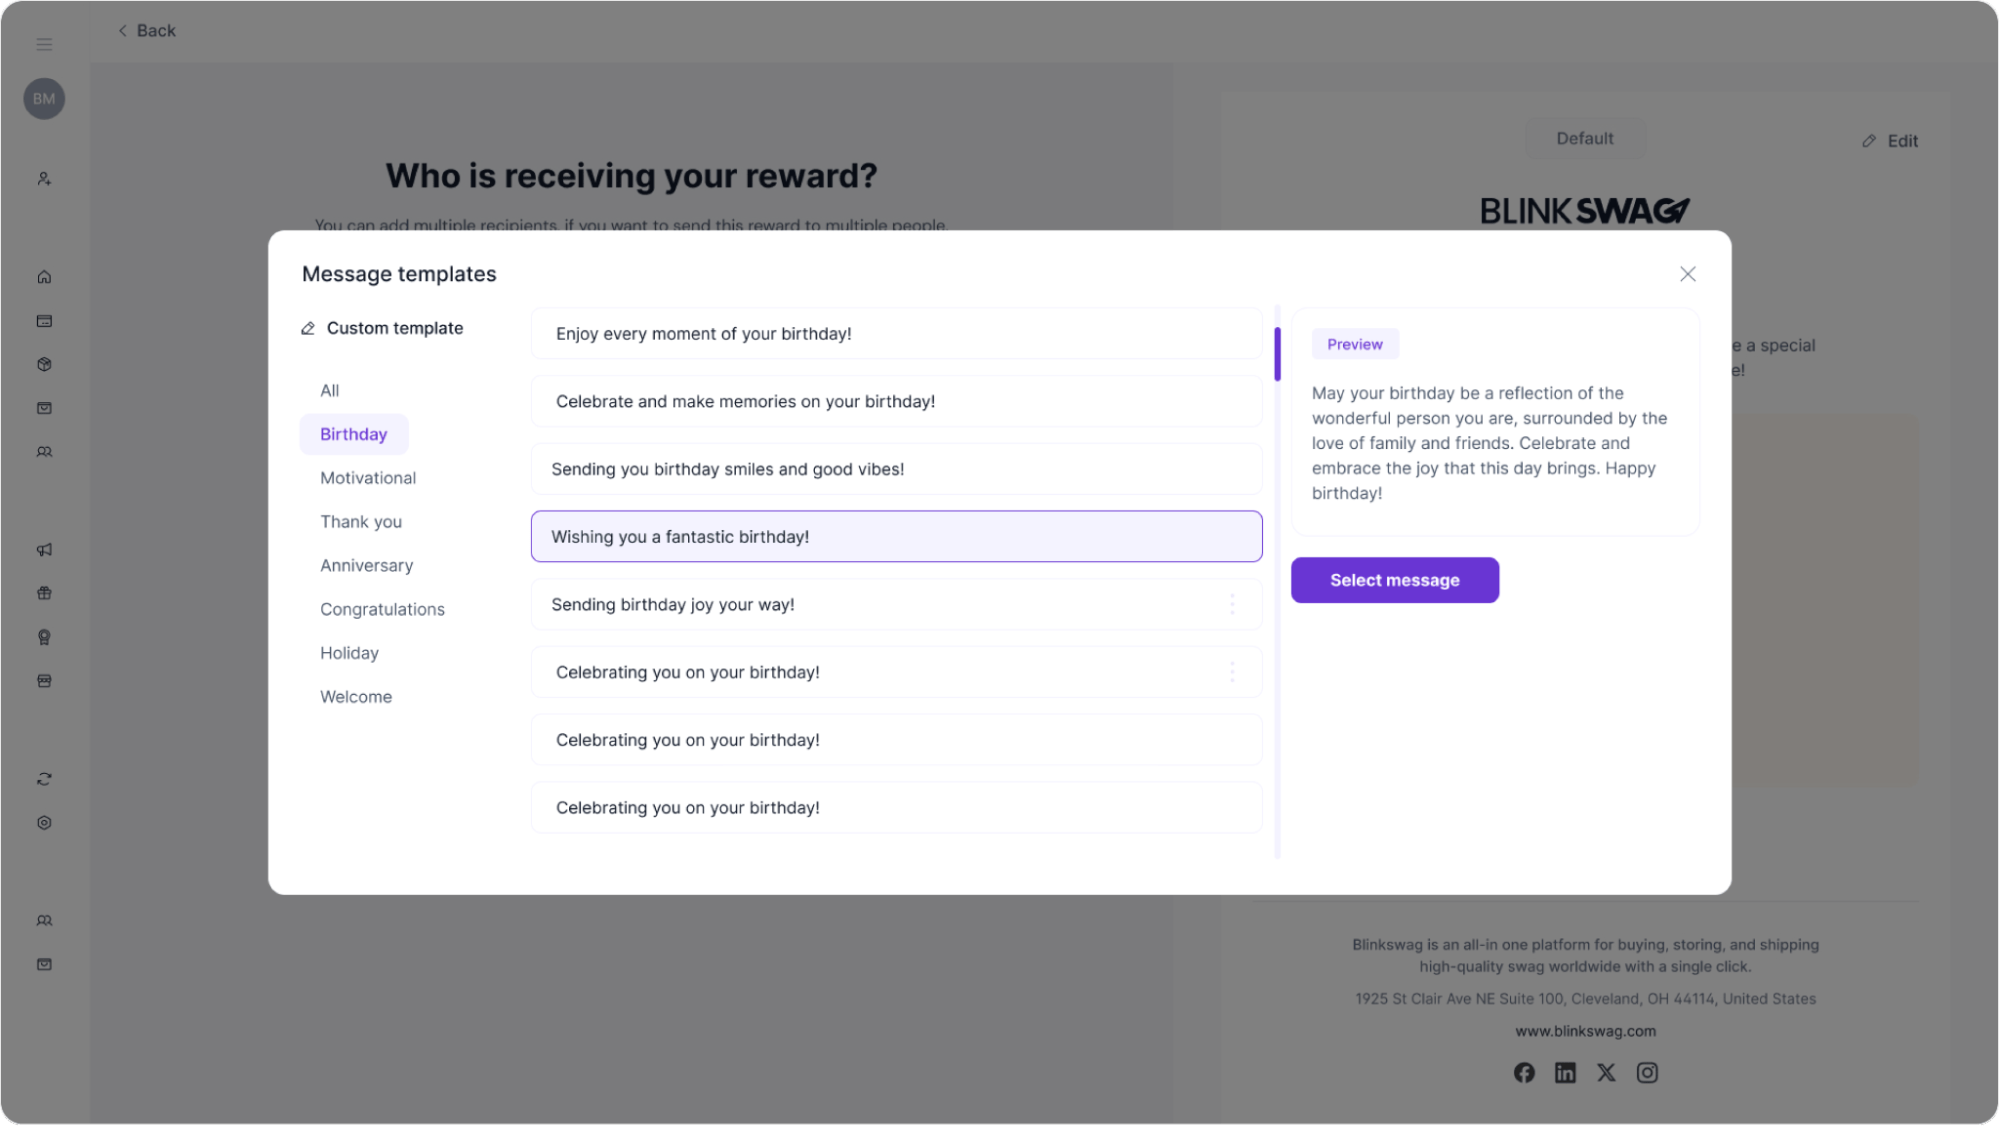
- Choose a Category: You can select from various categories, such as Birthday, Thank You, Motivational, and others. For example, if your reward is for a birthday, you can choose the Birthday category to find relevant templates.
- Select a Template: Browse through the available templates in the chosen category. When you find one that resonates with your message, click on it to preview the content.
- Preview the Template: The preview will display the entire message as it will appear in your email. This helps you gauge whether it fits your needs.
- Save Changes: Once satisfied with your email message, click Save Changes to ensure everything is set before sending the reward.
5. AI Rewrite Option: If you want suggestions for your email content, click on Re-write with AI. This feature can help generate alternative wording or enhance your message.
6. Customize the Button Text: You can modify the text that appears on the call-to-action button. The default might be “Redeem now,” but you can change it to something more aligned with your brand or message (up to 20 characters).
7. Save Changes: After making your edits, click Save Changes to apply your customizations to the email.