Manage & Update Contact Information
In the Contacts section of BlinkSwag, you can easily update contact information and manage actions. Each contact is displayed in a card view for quick viewing and easy management. The contact card provides essential information and several management options through the action menu.
Contact Card Overview
Each contact card displays key details such as:
-
Name
-
Email Address
-
Team or Group Tags
-
Company Name
-
Country
Actions Available in the Three-Dot Menu (⋮)
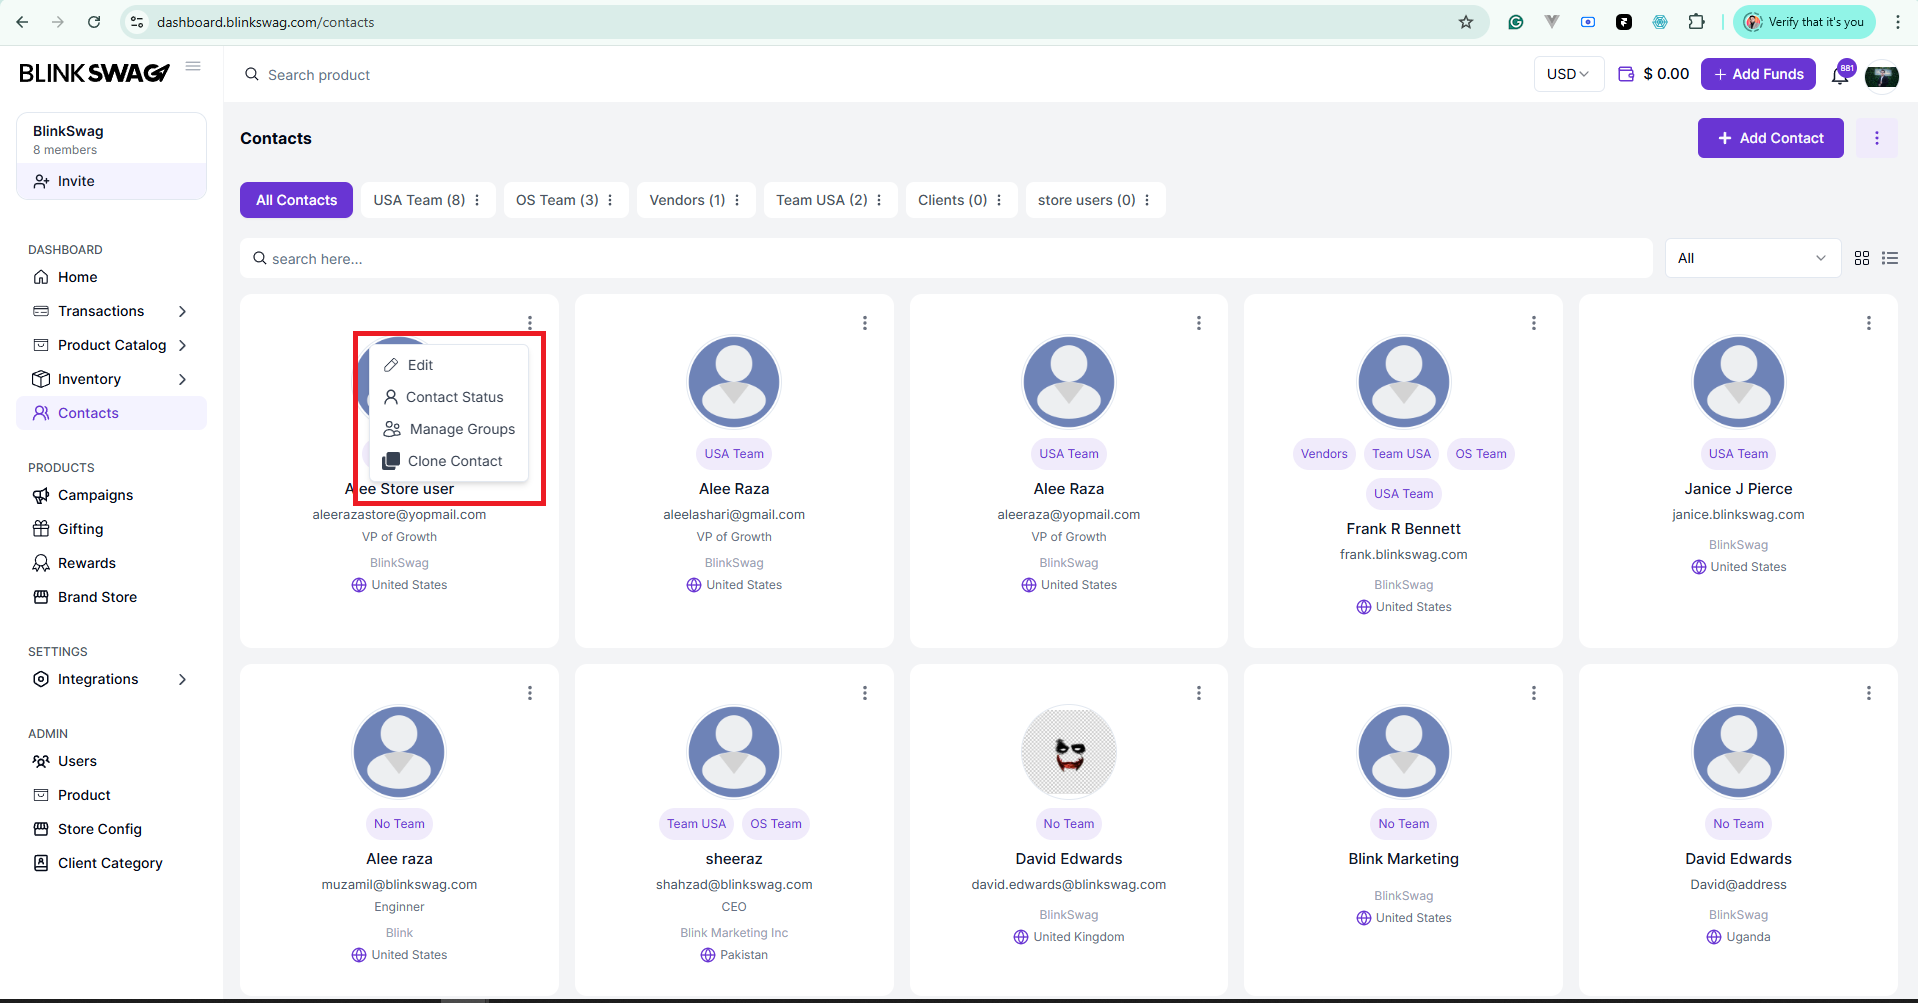
Click the Three-Dot Menu on any contact card to perform the following actions:
| Action | Description |
|---|---|
| Edit Contact | Update or modify contact details such as name, email, company, or tags. |
| Manage Contact Status | Set the contact as Active or Inactive based on your requirements. |
| Manage Groups | Assign or remove the contact from specific groups for better organization. |
| Clone Contact | Create a duplicate of the contact to quickly add a similar entry. |
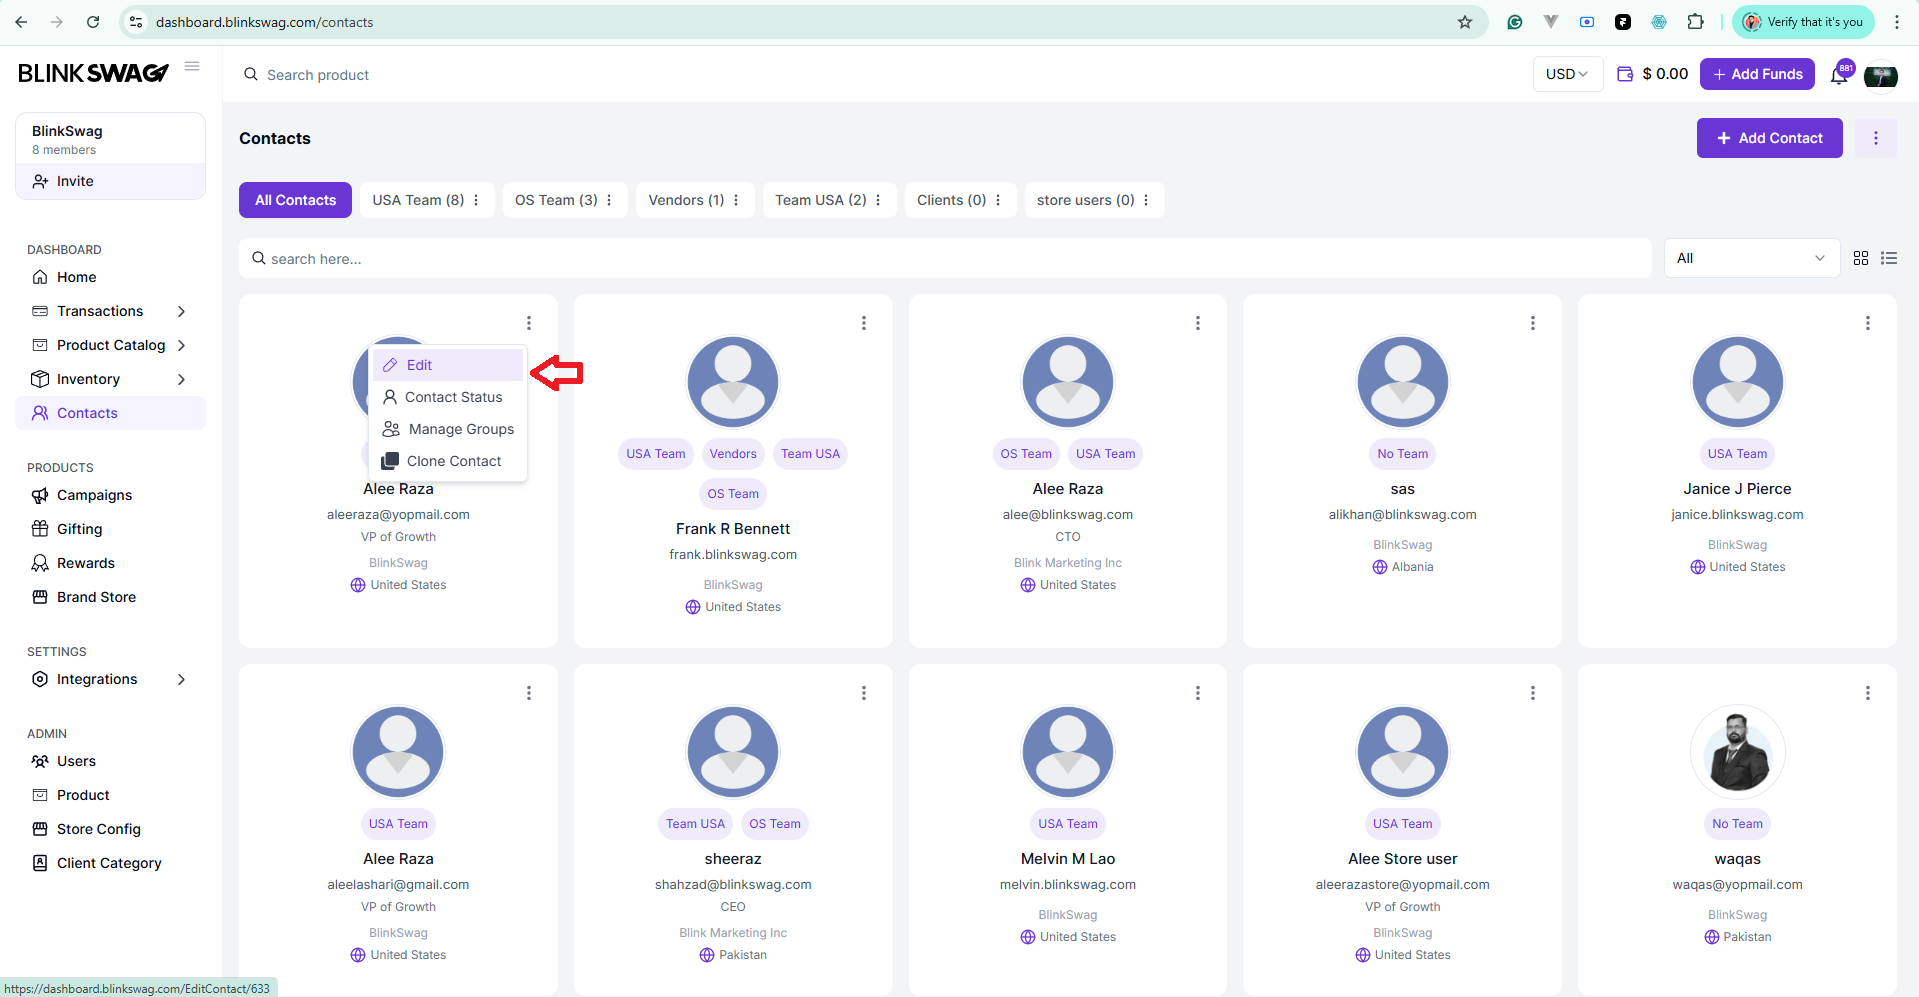
1. Edit Contact
Use this option to update or modify existing contact details.
Example: Change the contact’s name, email address, company information, phone number, or team/group tags.
Steps:
- Click on the Three-Dot Menu (⋮) located on the top-right corner of the contact card.
- Select Edit from the dropdown menu.
- Update the necessary fields — such as name, email, company, tags, or country.
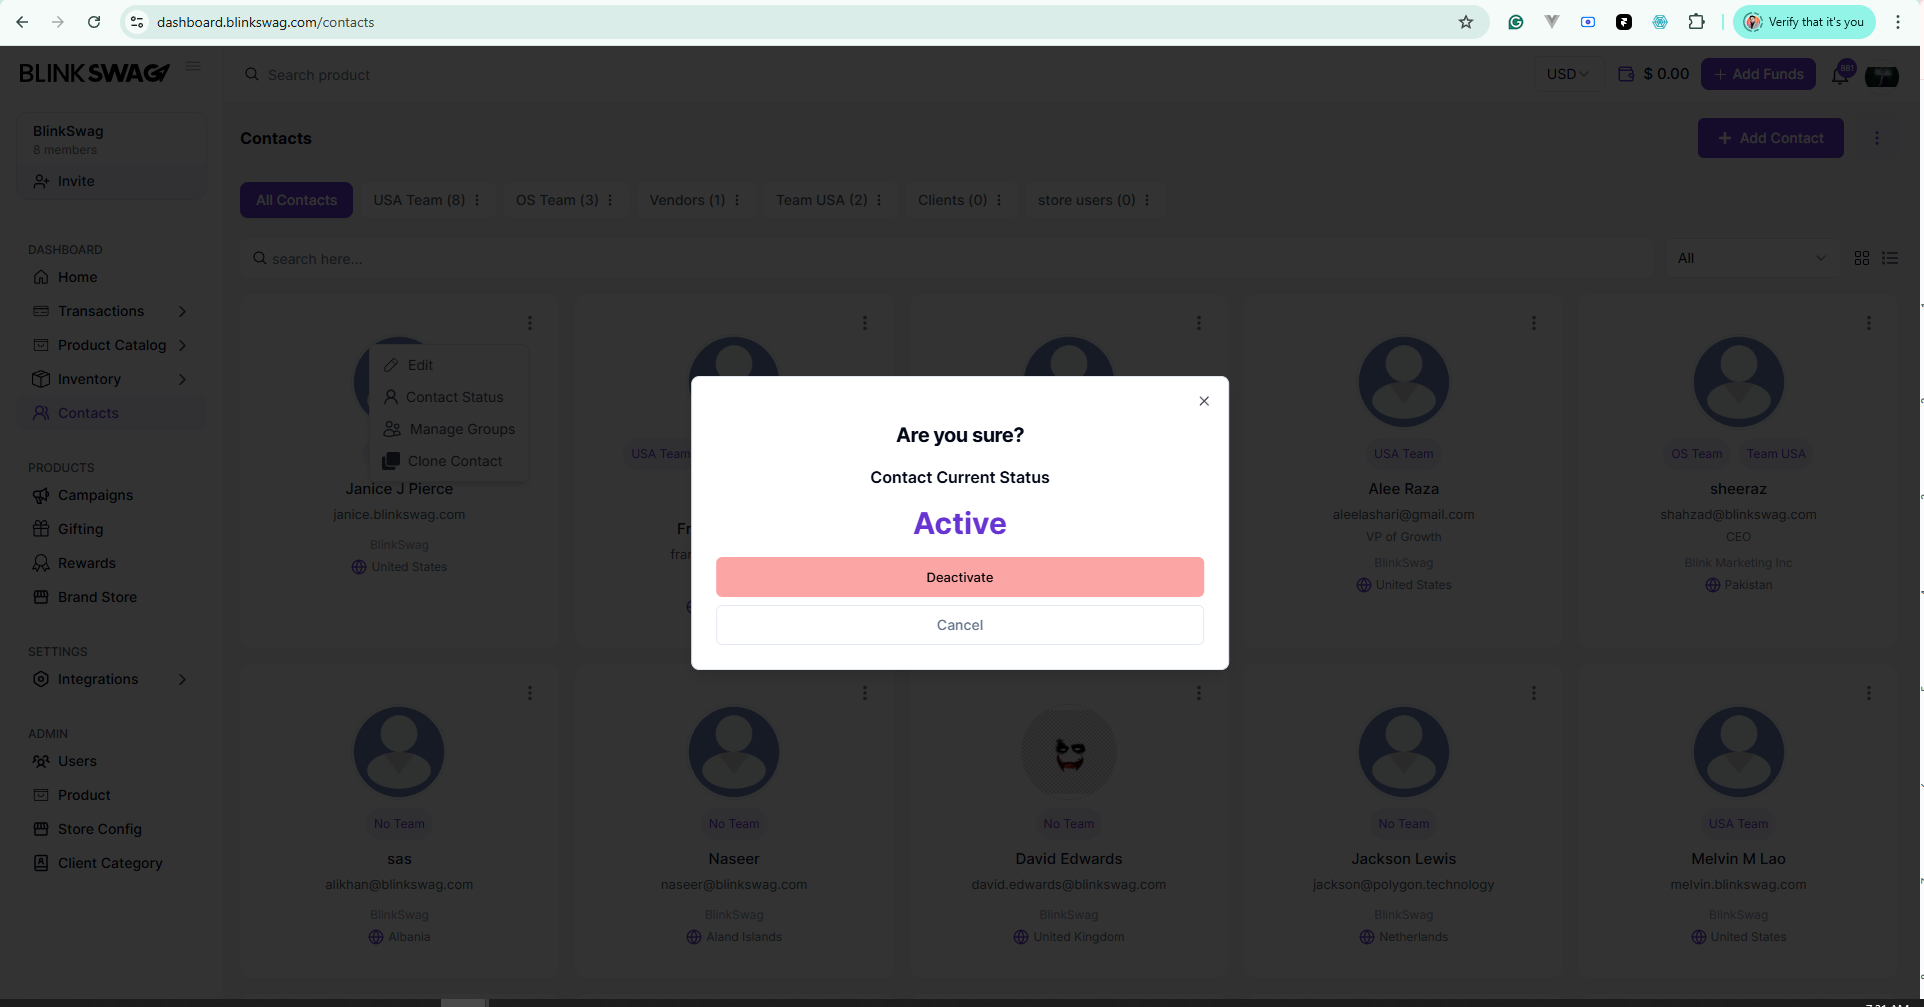
2. Manage Contact Status (Active/Inactive)
Set a contact’s status based on their availability or relevance.
Example: Mark a contact as Inactive if they are no longer part of the campaign or organization.
Steps:
-
Click the Three-Dot Menu on the contact card.
-
Select Manage Status.
-
Choose either Active or Inactive.

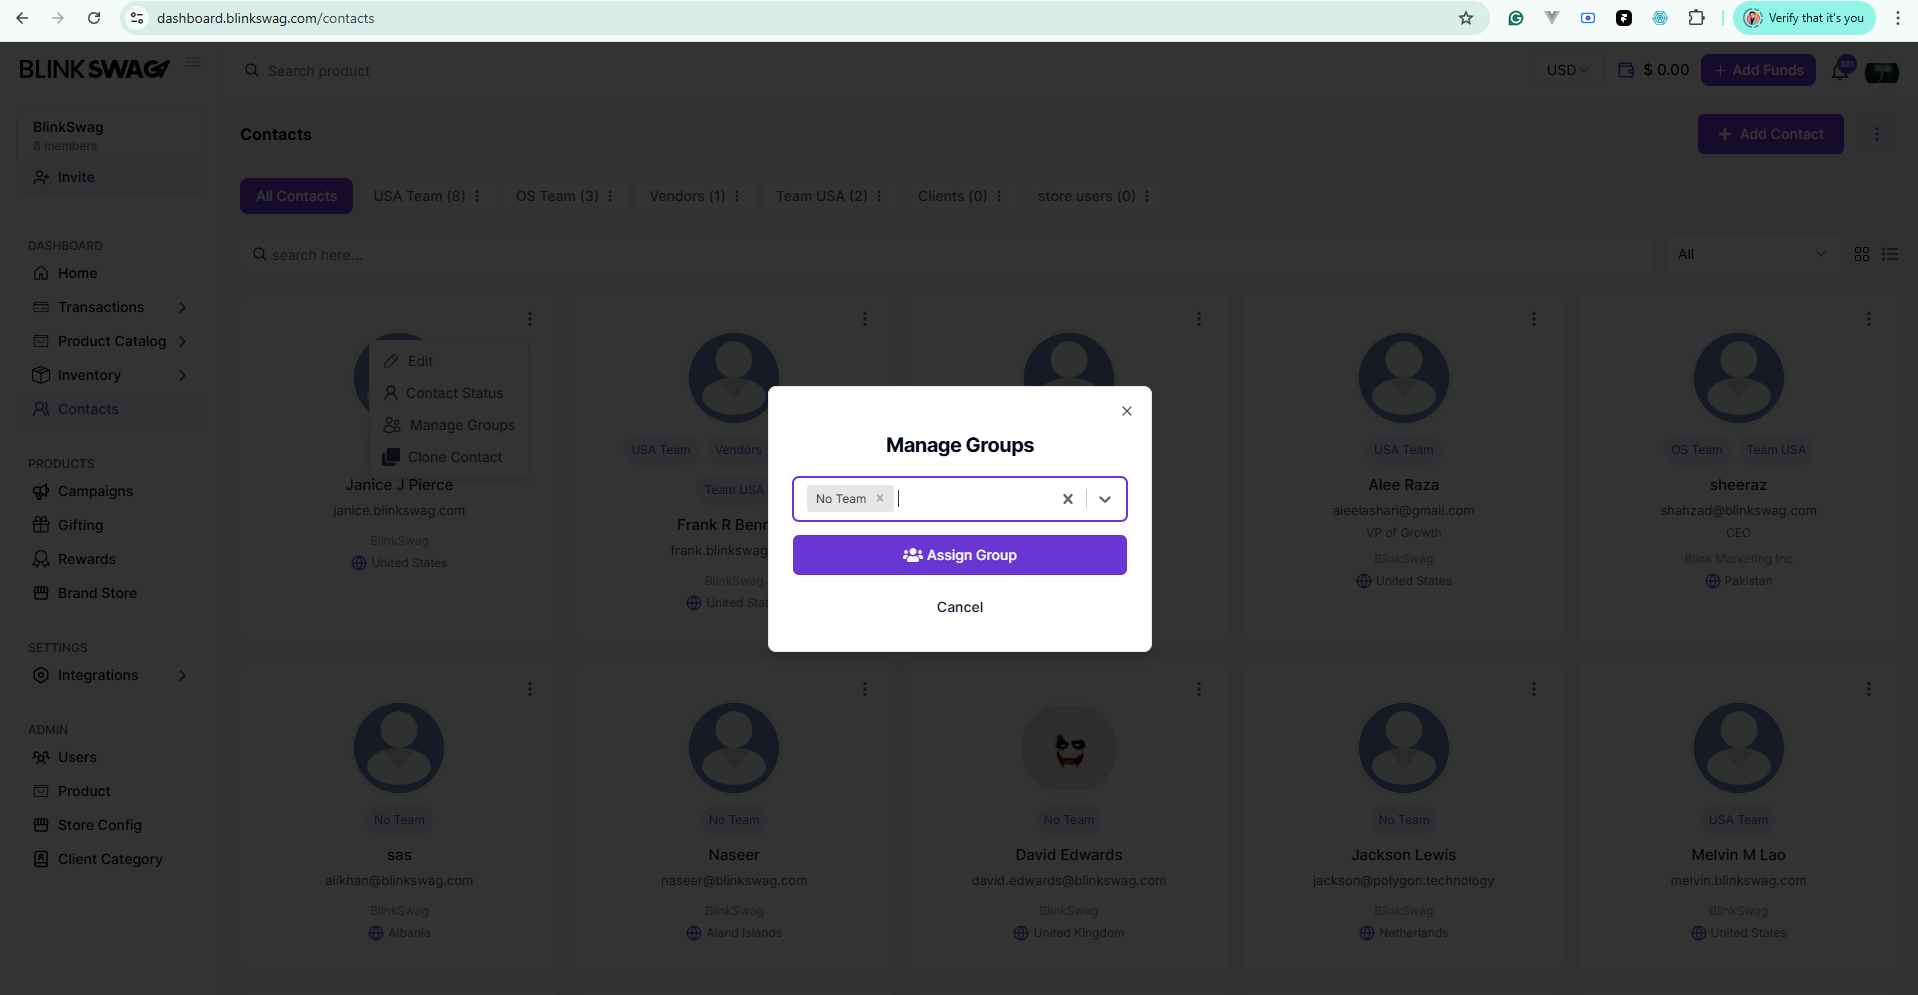
Manage Groups
Assign or remove the contact from specific groups for better organization and targeting.
Example: Add a contact to the “VIP Clients” group or remove them from “Event Attendees.”
Steps:
-
Click the Three-Dot Menu on the contact card.
-
Select Manage Groups.

-
Click the Down Arrow to view available groups.
-
Select or deselect groups to assign or remove the contact.
-
Save changes.
4. Clone Contact
Create a duplicate of an existing contact to quickly add a new entry with similar information.
Example: Use Clone when adding multiple contacts from the same company or team to avoid re-entering similar data.
Steps:
-
Click the Three-Dot Menu on the contact card.
-
Select Clone.

-
Review and update the duplicated contact details as needed.
-
Save the new contact.
? Contacts looking messy? Let’s clean it up! Hit play ⏯ & update like a boss!