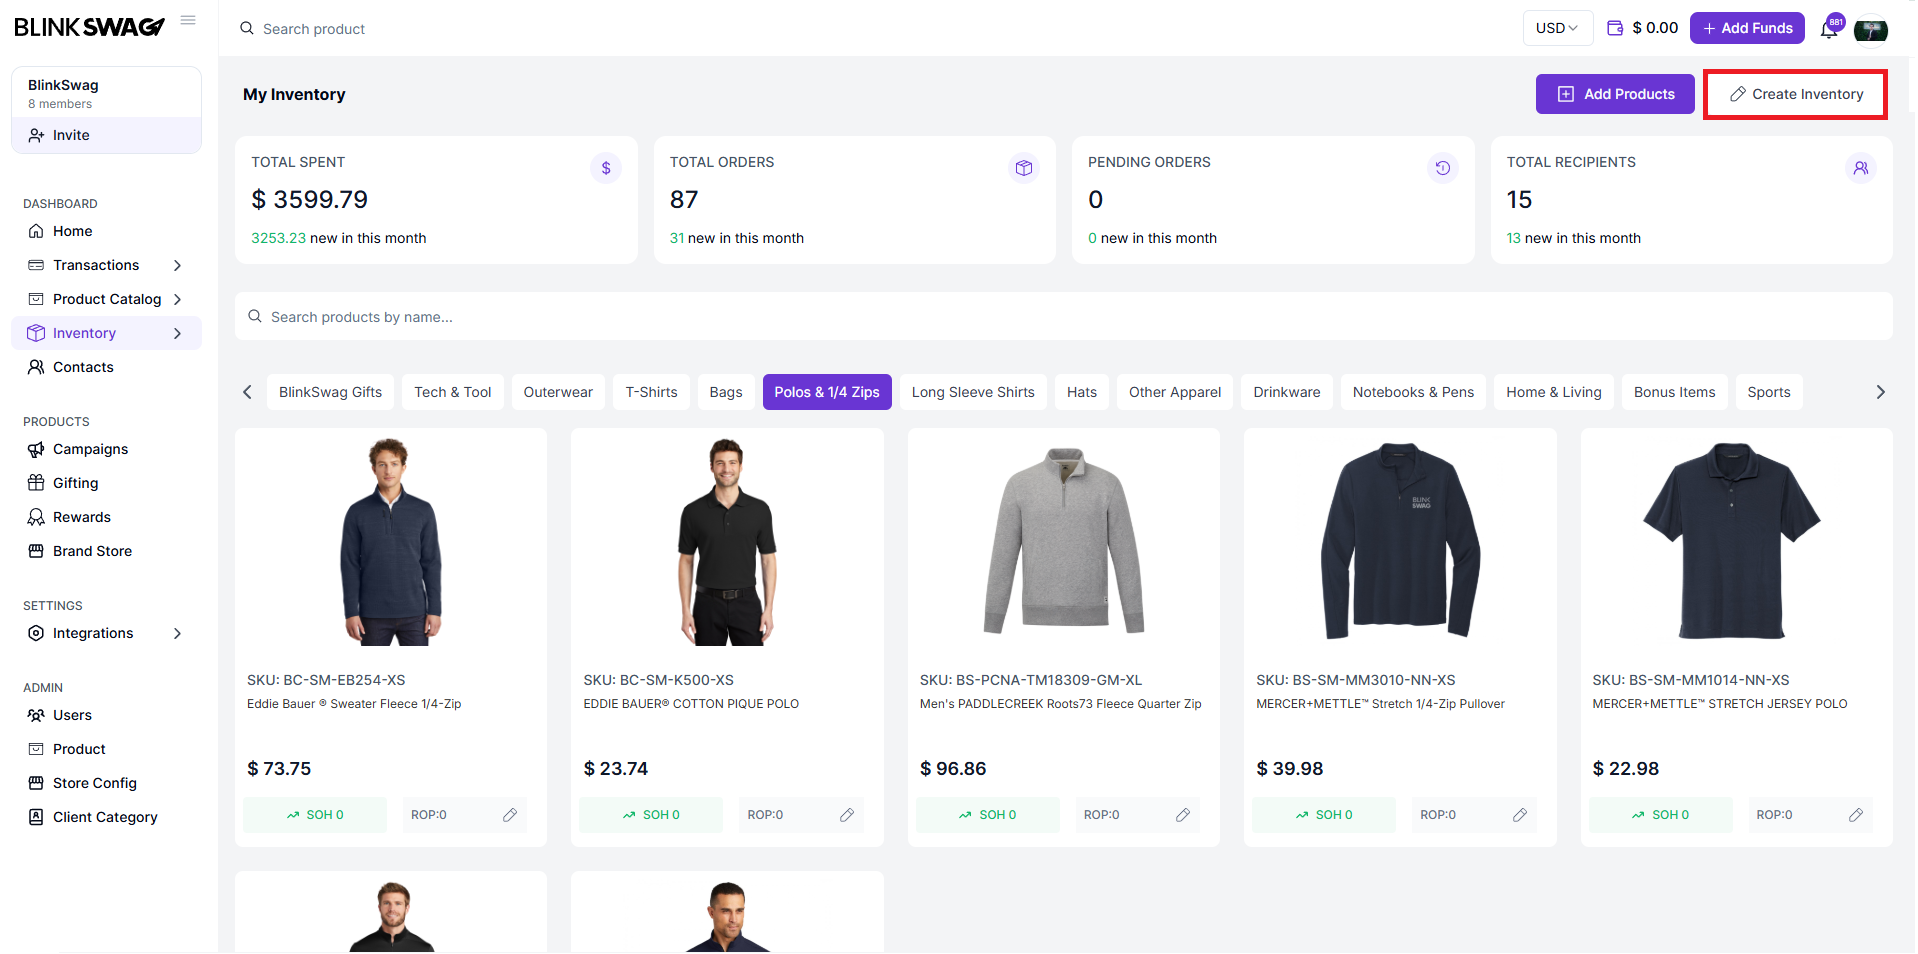
Step 1: Create Inventory
-
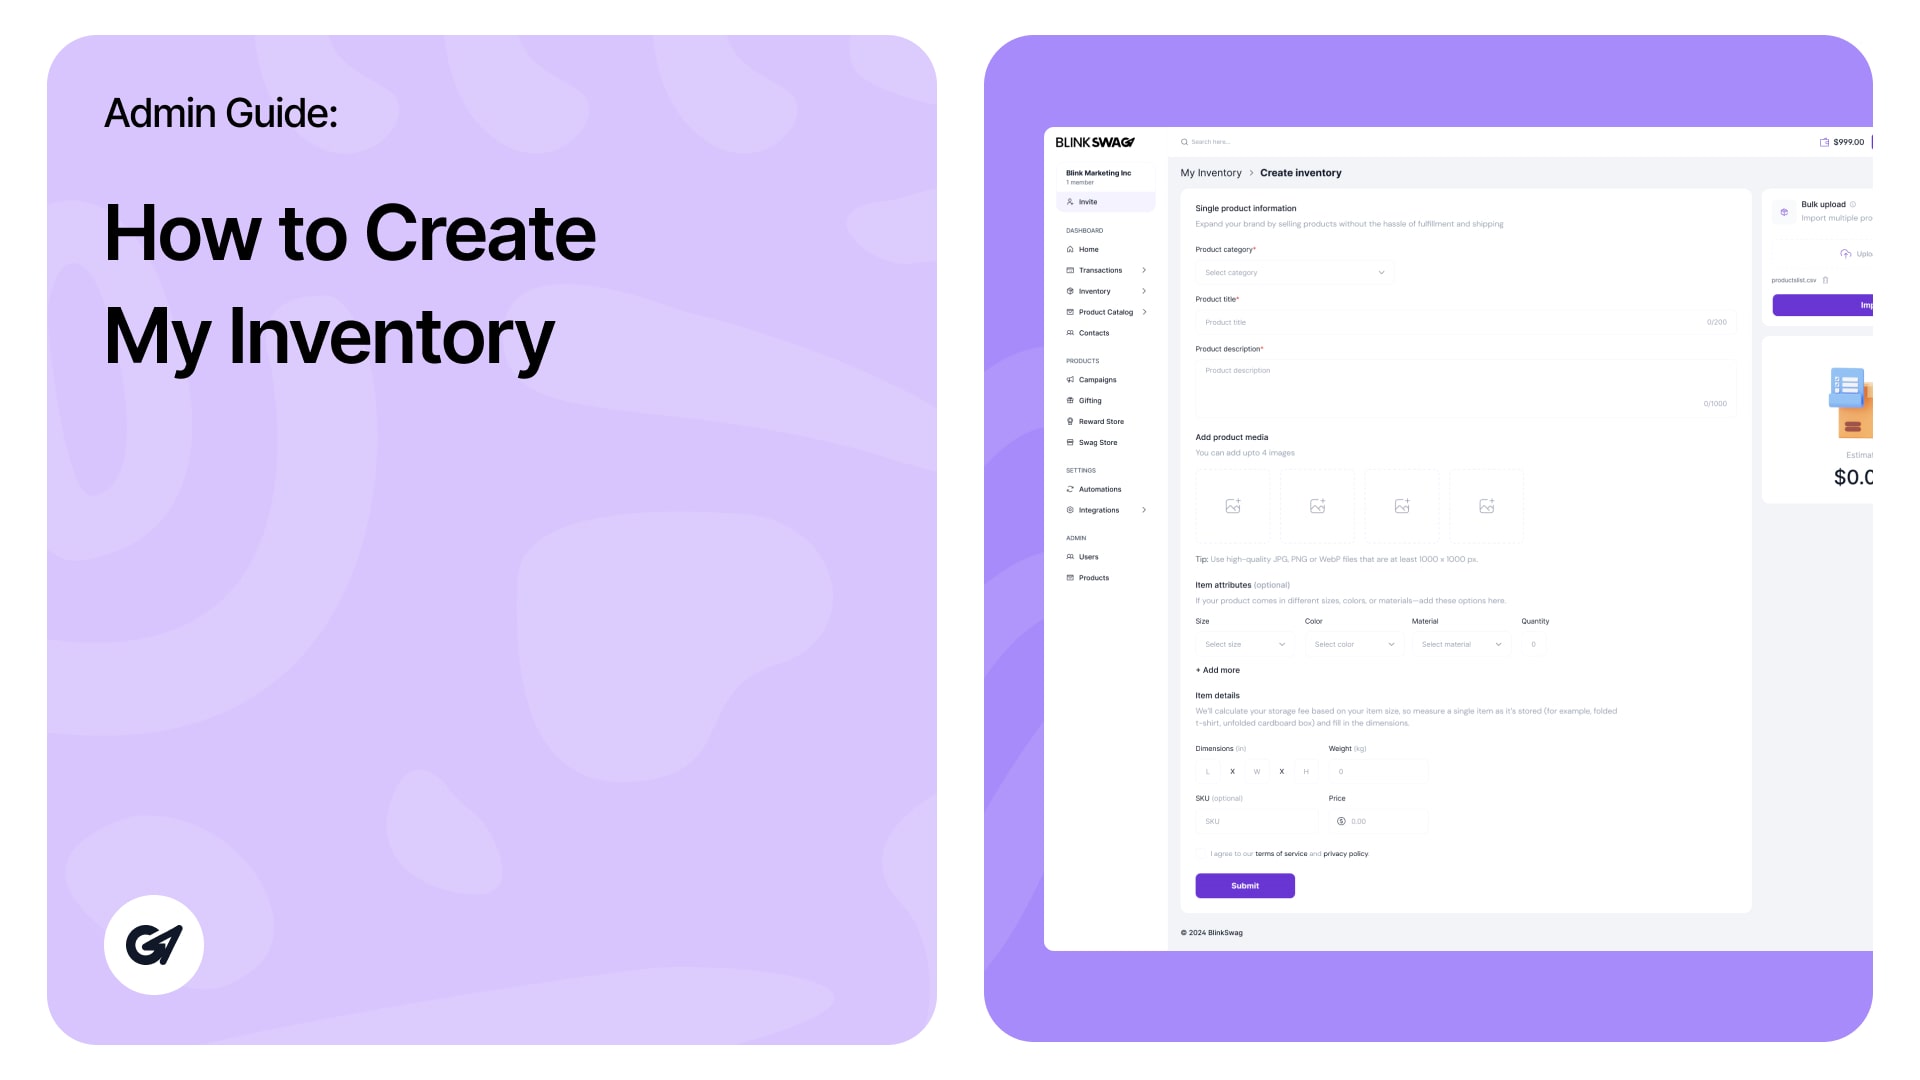
Use the Create Inventory button next to “Add Products.”
Step 2: Fill in Single Product Information
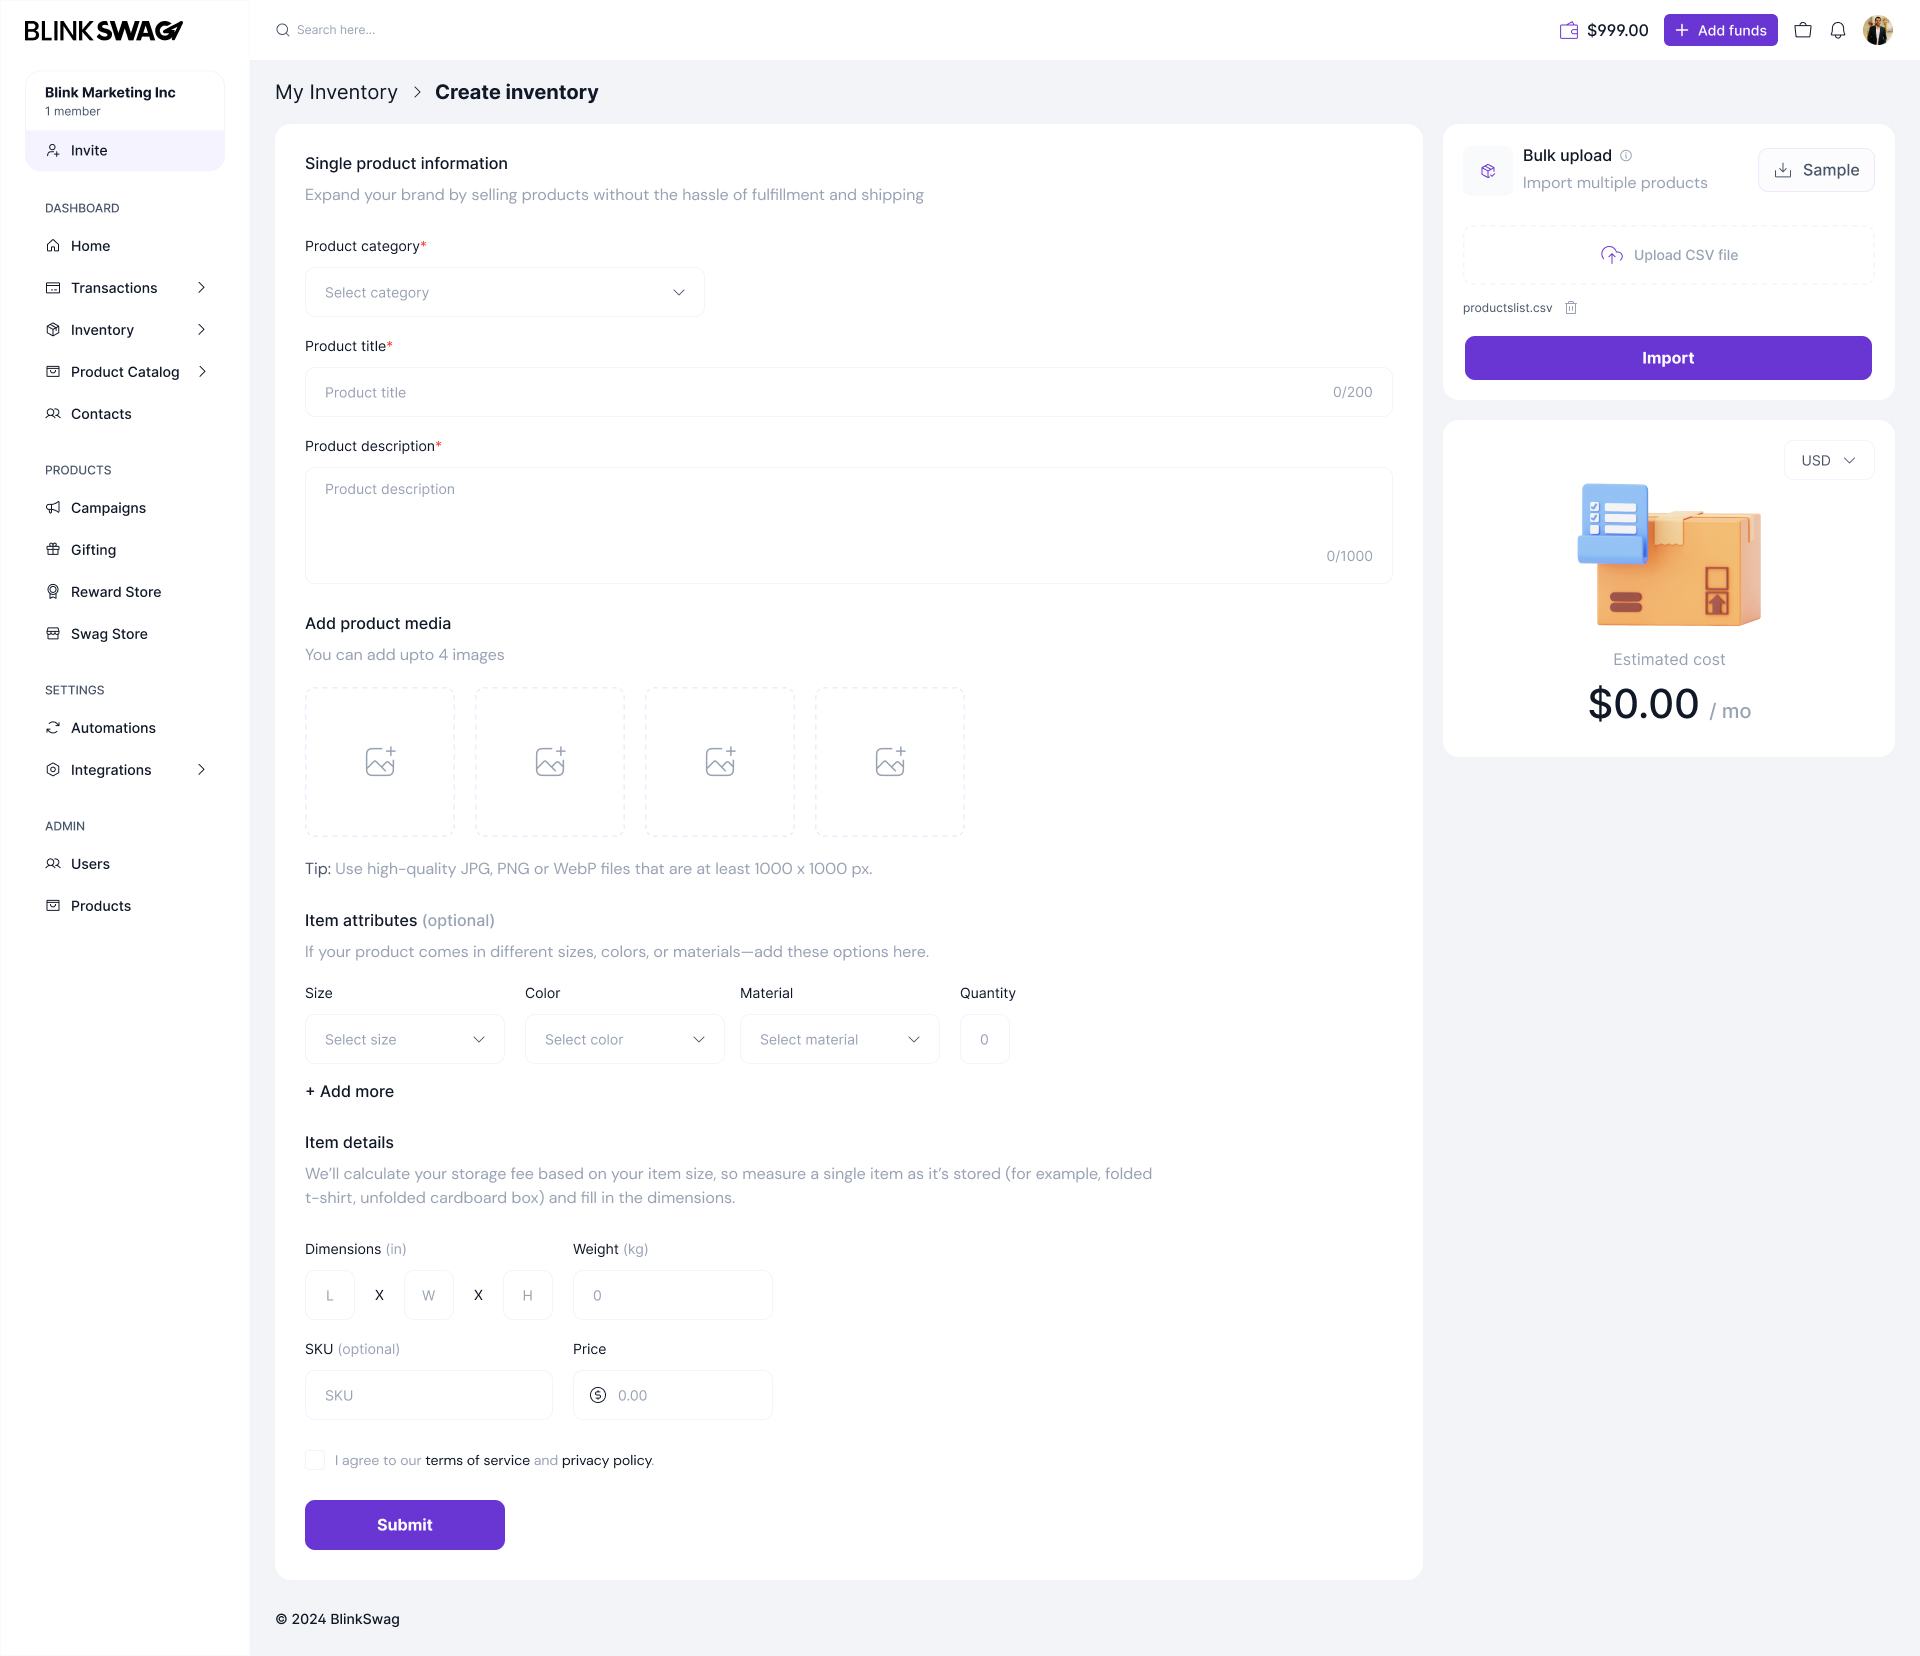
1. Product Category
- Locate the drop-down menu labeled Product Category.
- Click the drop-down and select the category that best fits your product.
2. Product Title
- Enter the name of your product in the Product Title text field.
- Keep the title concise and informative (maximum 150 characters).
3. Product Description
- Write a detailed description of your product in the Product Description text box.
- Highlight key features and use clear language to describe the product.
Step 3: Add Product Media
1. Find the Add Product Media section.
2. Click on the upload area labeled Please Upload Your Logo.
- Upload a high-quality image of your product (minimum resolution: 1000×1000 px).
- Supported formats: JPG, PNG, or WebP.
Step 4: Add Item Attributes (Optional)
1. Size
- Select a product size from the Size drop-down (if applicable).
2. Color
- Choose the product’s color from the Select Color drop-down menu.
3. Material
- Specify the material of your product in the Select Material field.
4. Quantity
- Enter the number of units available for this product in the Quantity field.
Note: This section is optional. Use it only if your product comes in multiple sizes, colors, or materials.
Step 5: Fill in Item Details
1. Width, Length, Height, and Weight
- Measure the product and enter the dimensions:
- Width: The product’s width (e.g., when folded or packaged).
- Length: The length of the product.
- Height: The product’s height.
- Weight: The weight of the product.
- Ensure these details are accurate for storage calculations.
2. SKU (Optional)
- Enter a unique Stock Keeping Unit (SKU) code for the product. This step is optional but useful for inventory management.
3. Price
- Set the selling price of the product in the Price field.
Step 6: Agree to Terms
1. Scroll down to the bottom of the page.
2. Check the box for I agree to our Terms of Use and Privacy Policy to confirm your agreement.
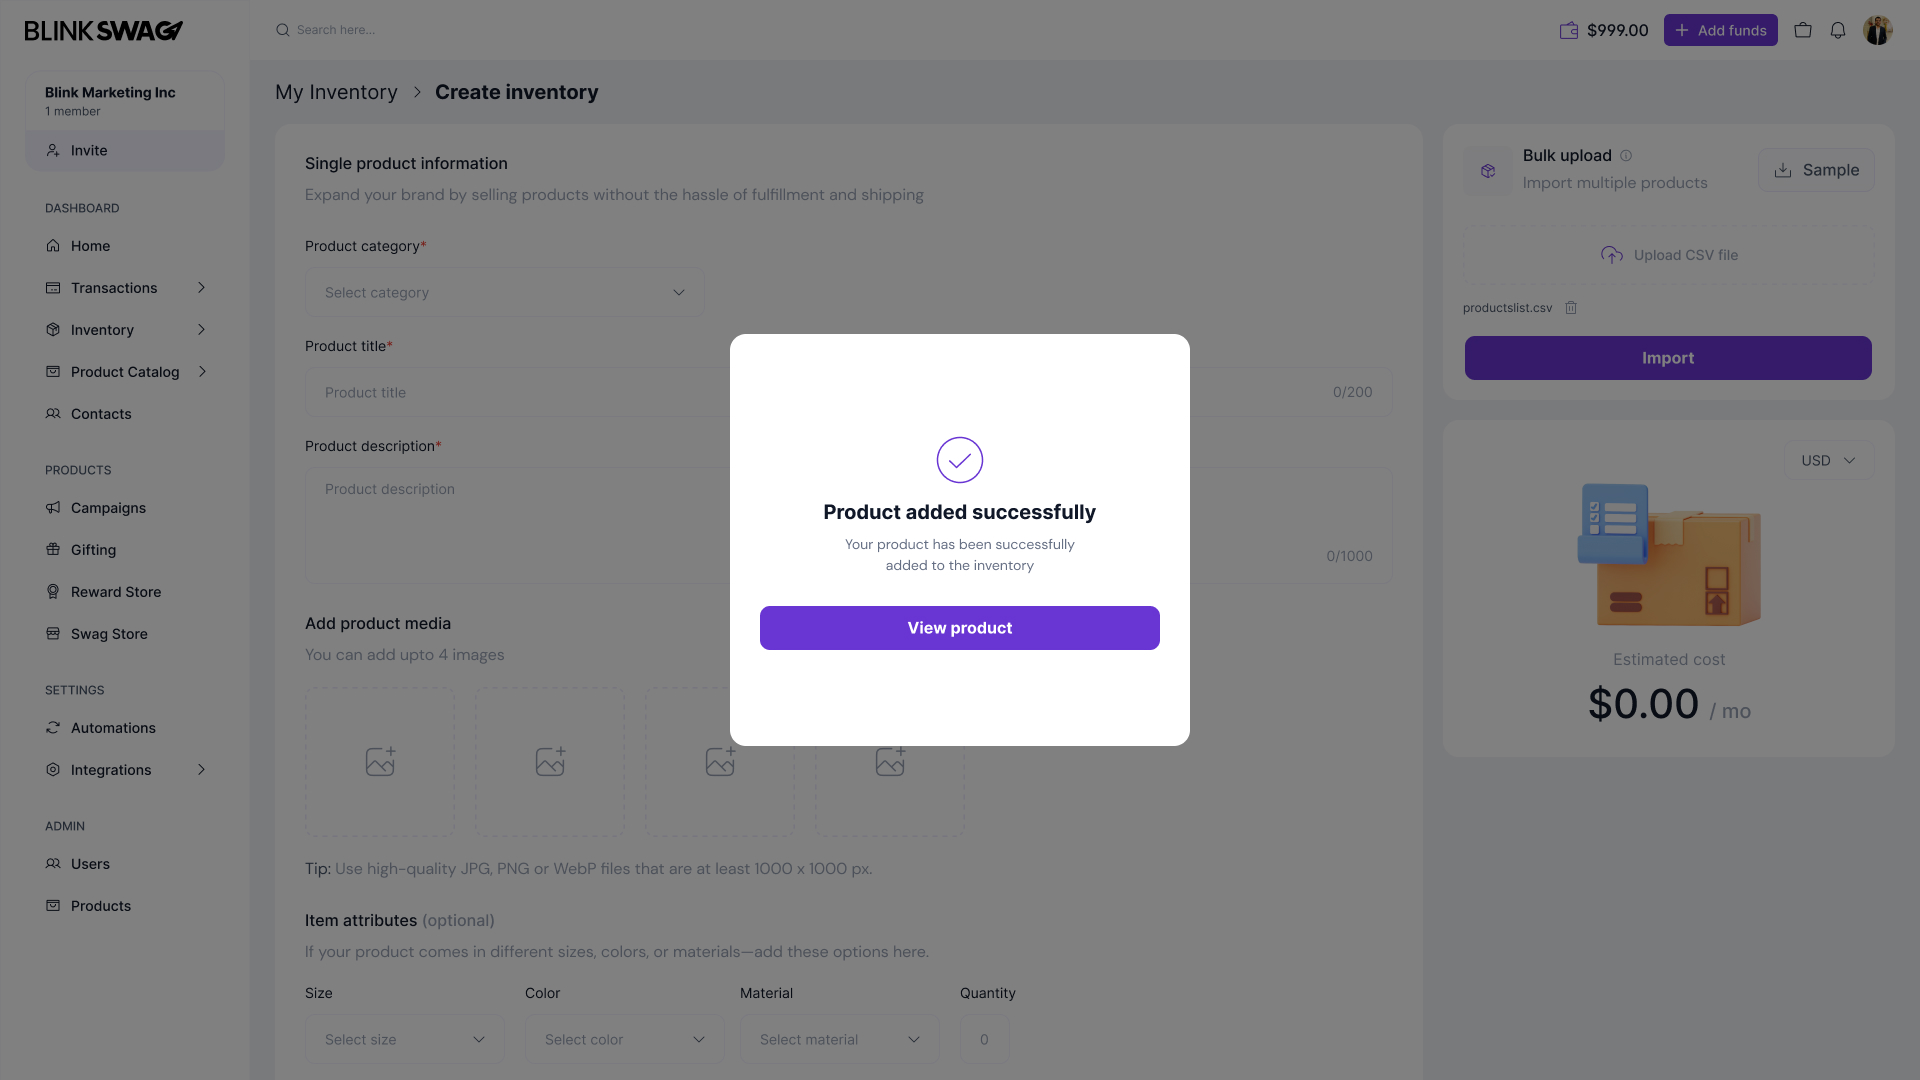
Step 7: Submit the Product
1. Double-check all the details you’ve entered to ensure accuracy.
2. Click the Submit button at the bottom of the form.
- Your product will now be added to the BlinkSwag inventory.
