Creating a Workflow for “Reward Link” Automation
To set up an automated reward link workflow for sending Reward Links, Follow the same steps as the gift workflow, with a few small changes for the reward link. See the steps below.:
1. Enter Workflow Name: In the Workflow name field, enter a descriptive name, such as “Reward Link Automation.”
2. Select the trigger: When this happens, click Select Trigger to define the action initiating this workflow. It could be when a new contact is added or some other trigger that suits your purpose.
3. Add Custom Criteria (Optional): If necessary, click + Set custom criteria to specify any conditions that must be met for the workflow to be triggered.
4. Choose Reward Link: In the Send this section, click the Reward link option. When the workflow is triggered, the system will send the recipient a reward link.
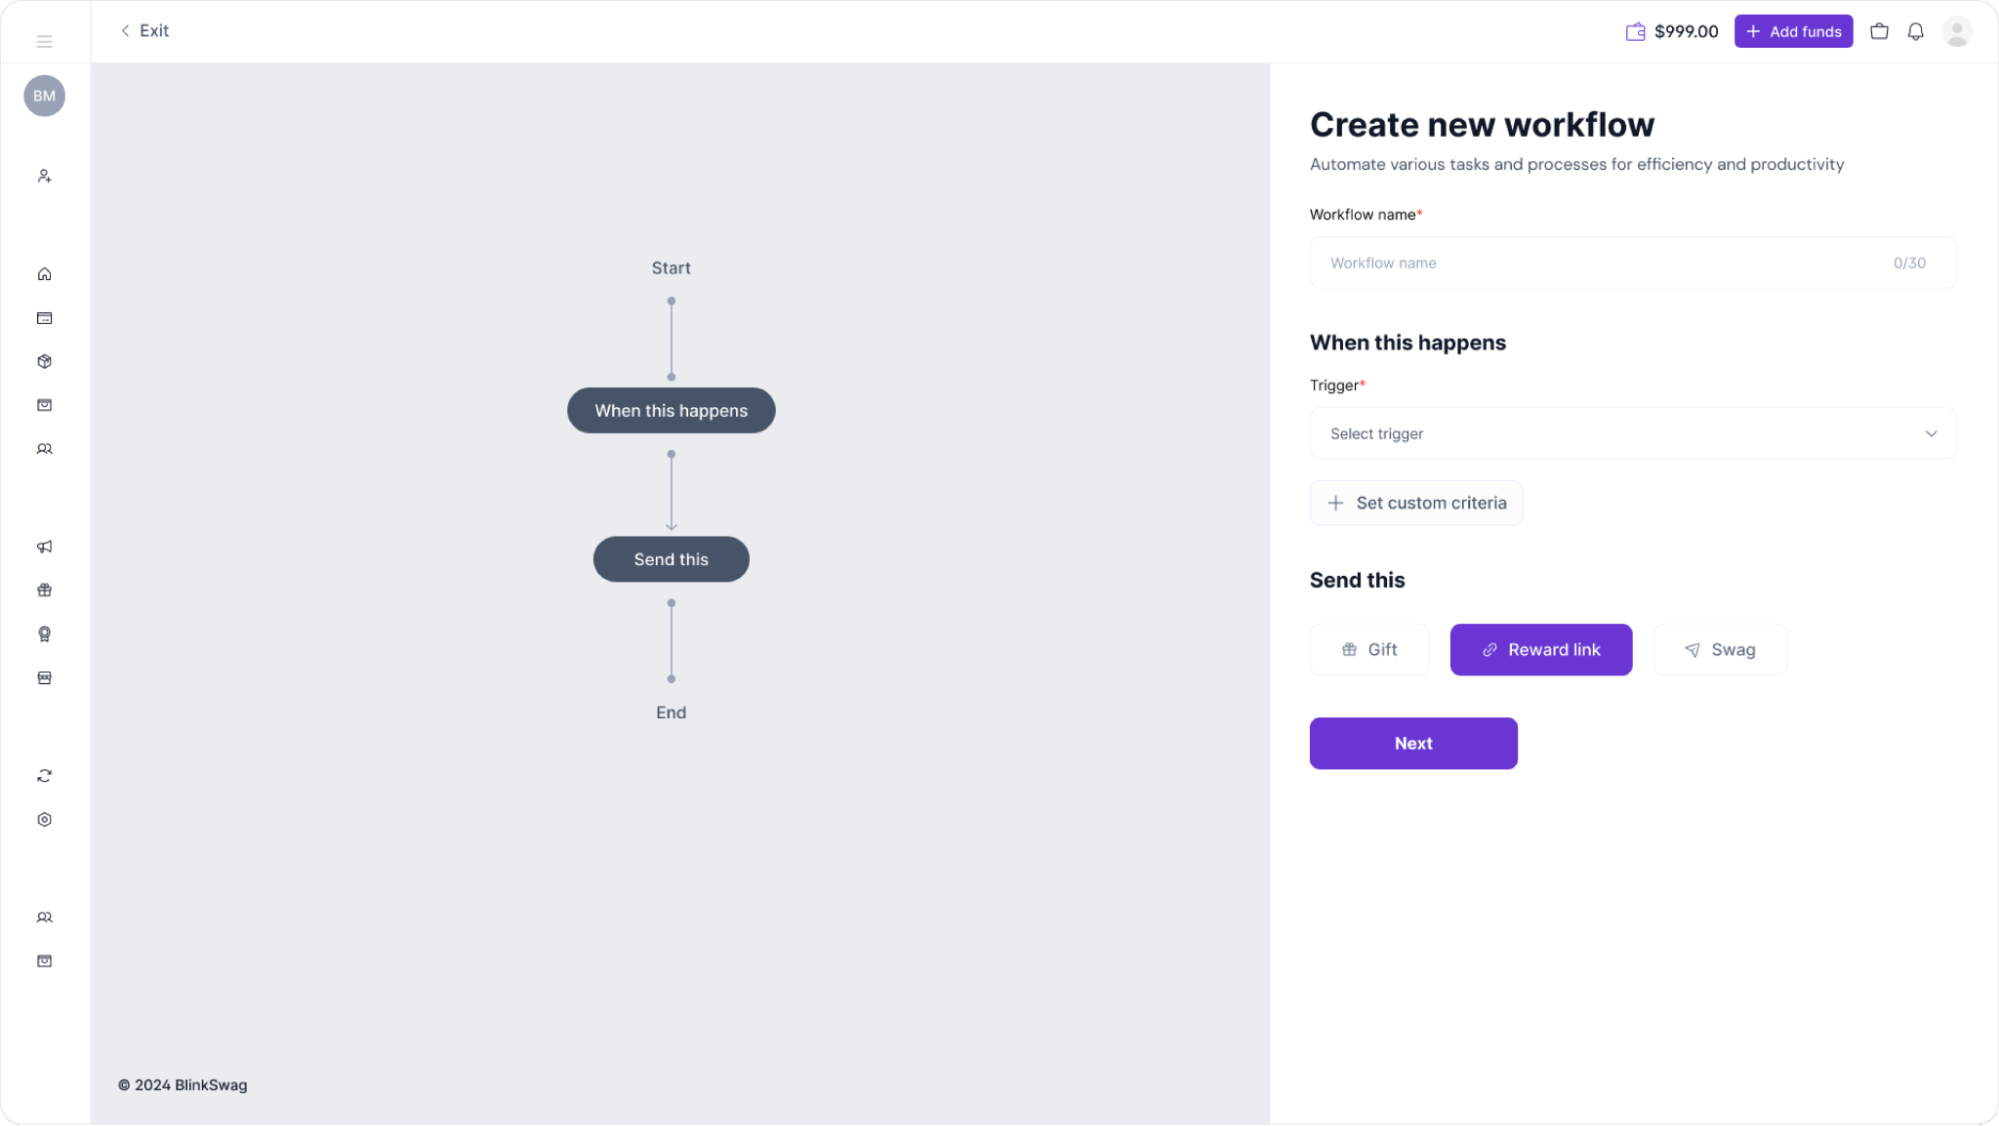
5. Click “Next”: Once you have filled out all these fields and are ready, click the Next button to proceed to the next stage, where you will set up the reward link details.
Step 2: Select a Reward Link Campaign
In this step, you’ll choose your workflow’s specific reward link campaign.
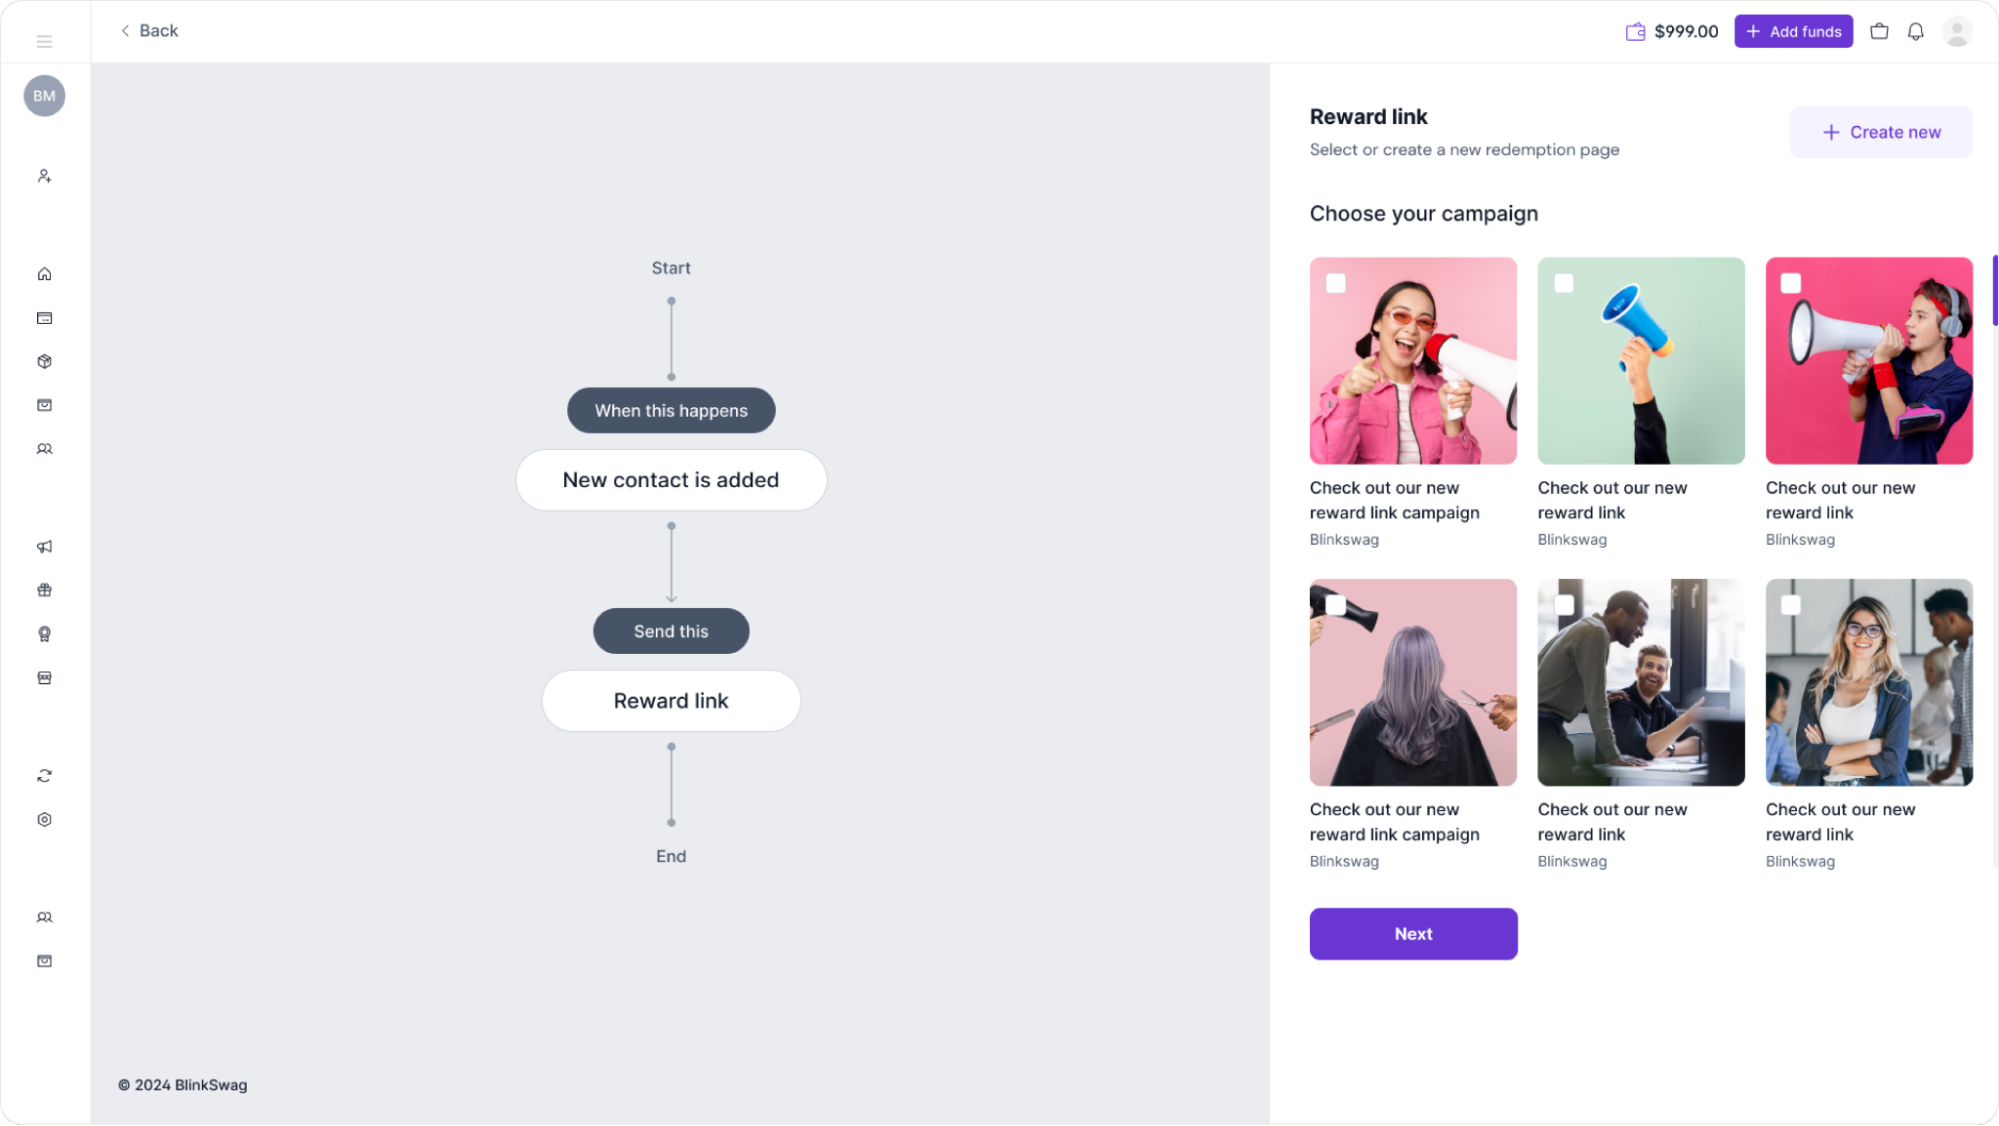
1. Choose Your Campaign: On the right side, you’ll see a list of available reward link campaigns, each with a visual preview. Select the campaign you’d like to use by clicking on the checkbox in the top-left corner of the campaign image. For example, you might select “Check out our new reward link campaign” by Blinkswag.
2. Create a New Campaign (Optional): If none of the existing campaigns meet your needs, you can create a new one by clicking the + Create new button in the top-right corner.
3. Proceed by clicking “Next.”: Once you’ve selected the appropriate campaign, click the Next button to continue to the next step in configuring the reward link workflow.
Step 3: Select a Redeem Page for the Reward Link
You’ll choose a specific redemption page for the reward link recipients in this step.
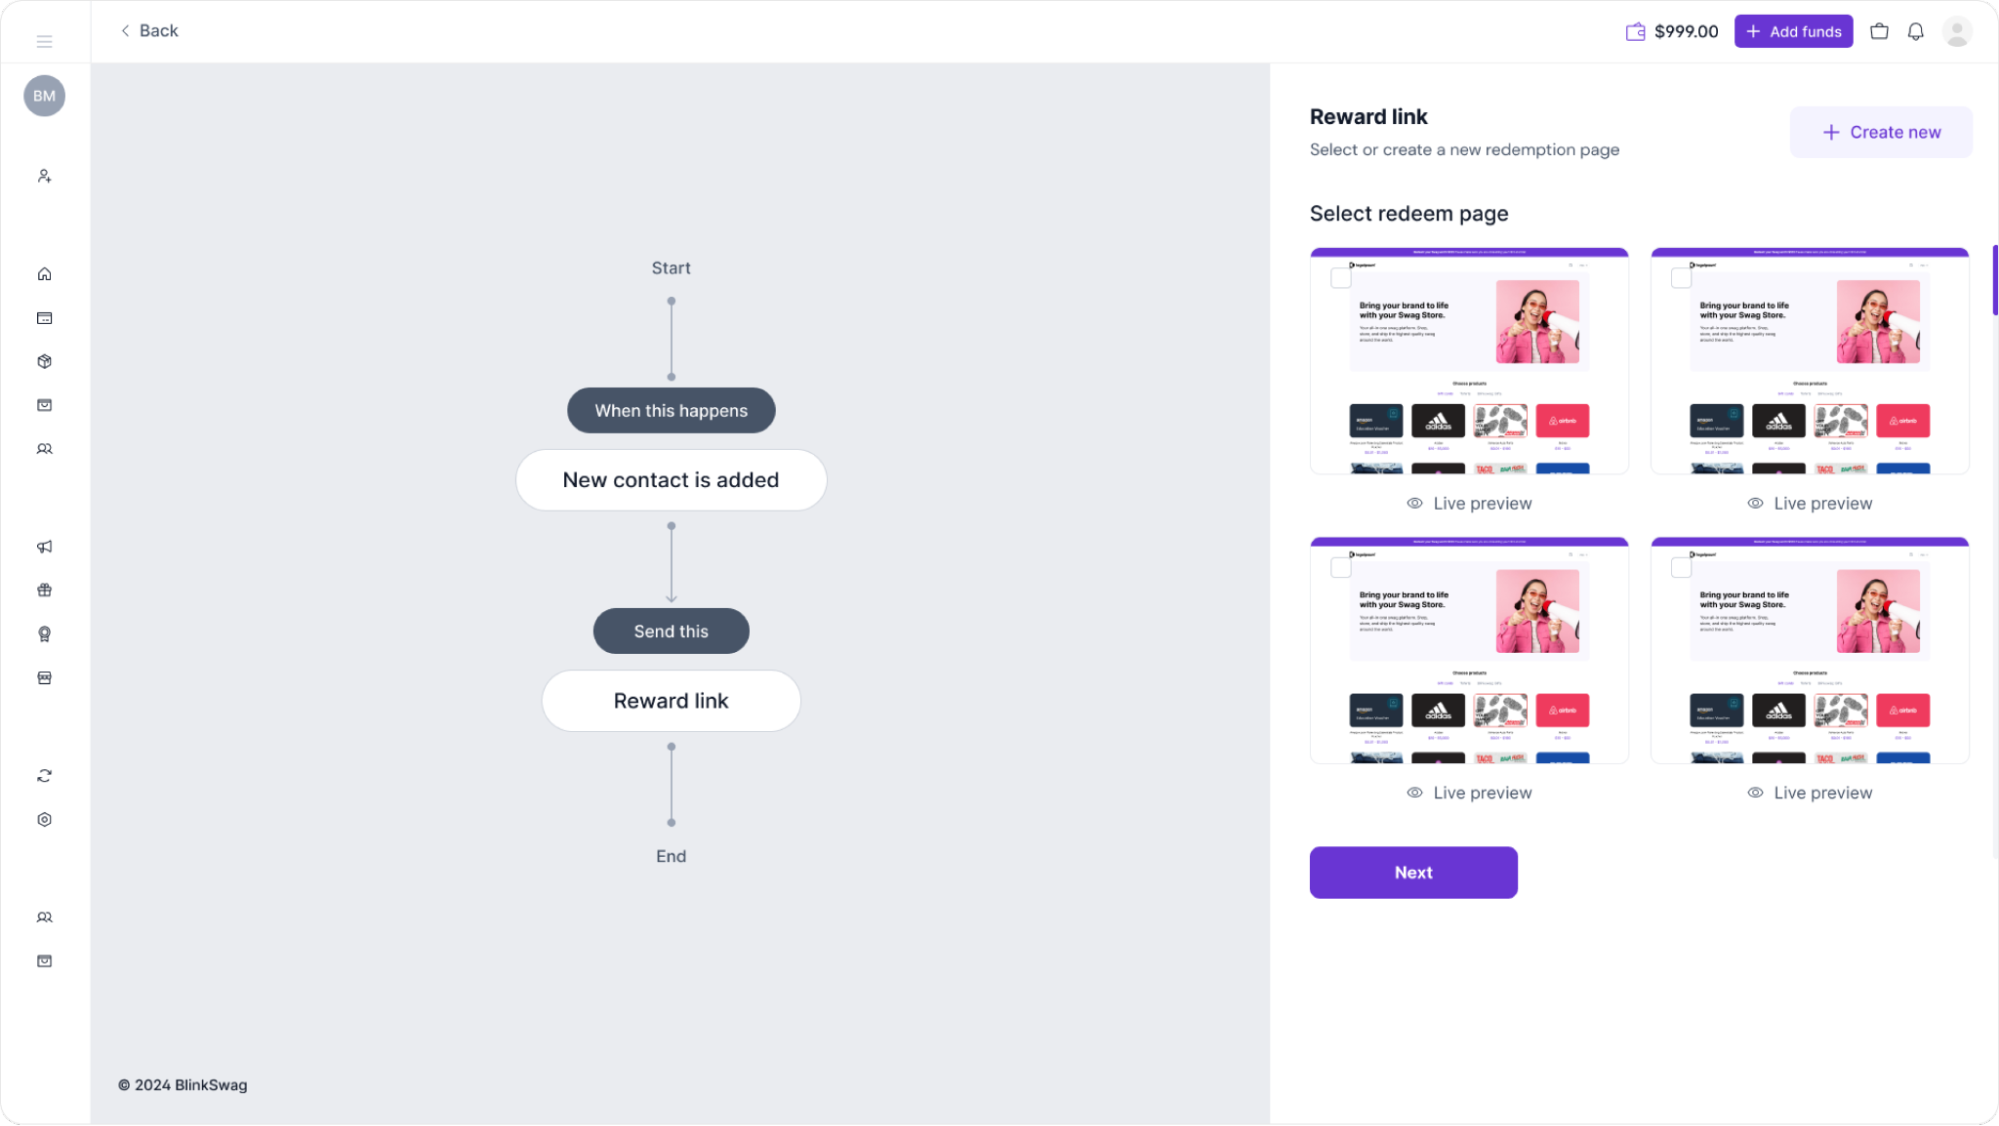
1. Choose Redeem Page: On the right, you’ll see various options for redeeming pages, each showing a preview of what the page will look like. Review these options and select the one that best suits your branding and the reward experience you want to provide.
2. Live Preview: To examine any redeem page in more detail, click on Live preview under the page image to see how it will appear to recipients.
3. Create a New Page (Optional): If no existing pages match your needs, click the + Create new button at the top to create a custom redeem page.
4. Proceed by clicking “Next.”: After selecting the appropriate redeem page, click the Next button to continue with the workflow configuration.
Step 4: Set the Budget for the Reward Link
In this final configuration step, you’ll define the budget for the reward link to control spending per recipient.
1. Select Currency Type: Under Currency type, choose the currency in which you want to set the budget (e.g., USD – United States Dollars).
2. Set the Amount Limit: In the Amount limit field, enter the maximum amount for the reward link. This is the value that each recipient will have available to redeem.
3. Save the Budget Settings: Once you’ve set the currency and amount limit, click the Save button to finalize the budget for the reward link.
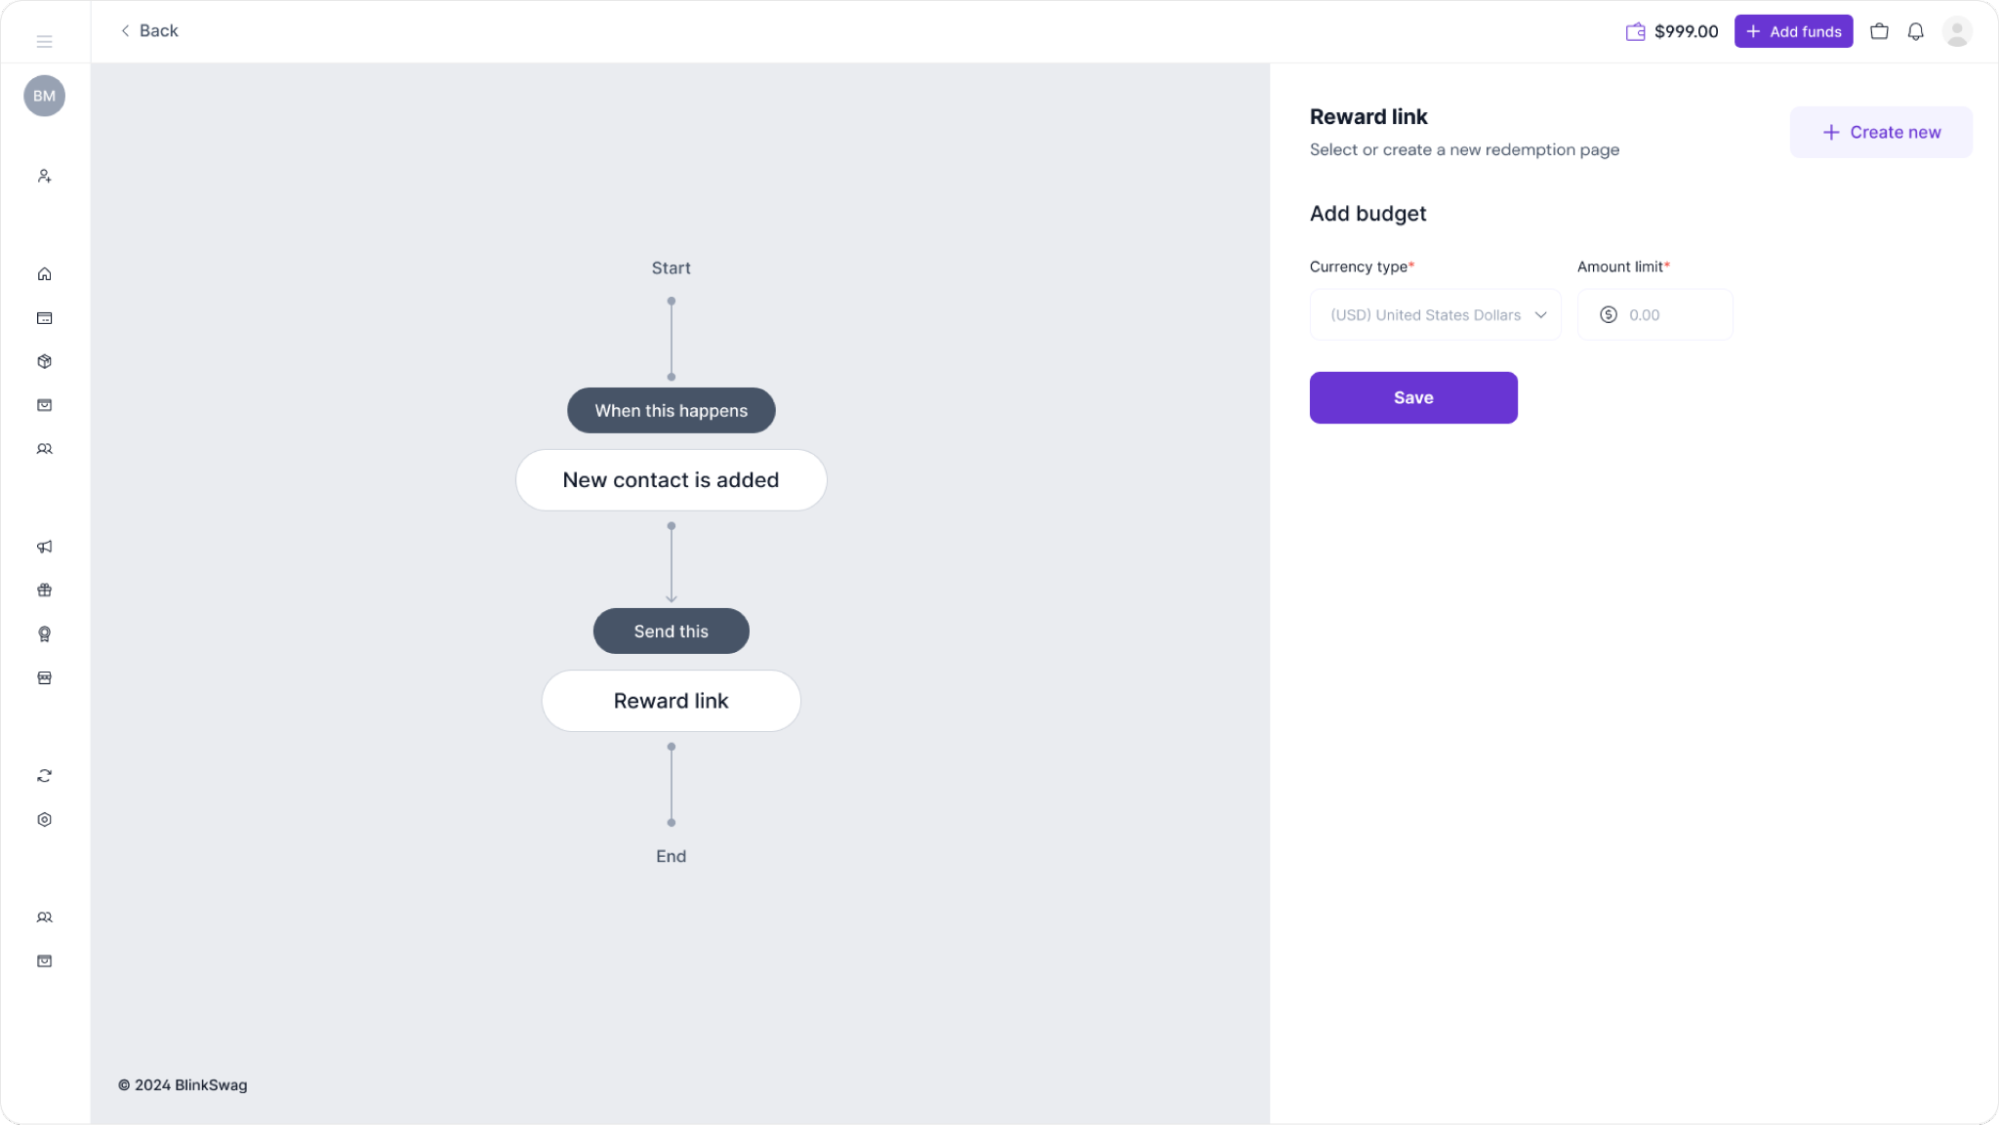
This completes the setup for the reward link workflow. The workflow now configures to send reward links with a specified budget to recipients based on the trigger you set.
