Step 1: Start Creating a New Workflow
To create a new automated gift workflow, go to the Automation section in your BlinkSwag dashboard. In the top-right corner of the screen, you’ll see a button labeled +Create workflow (highlighted in a red box). Click this button to start setting up a new workflow.

Step 2: Configure the Workflow Settings
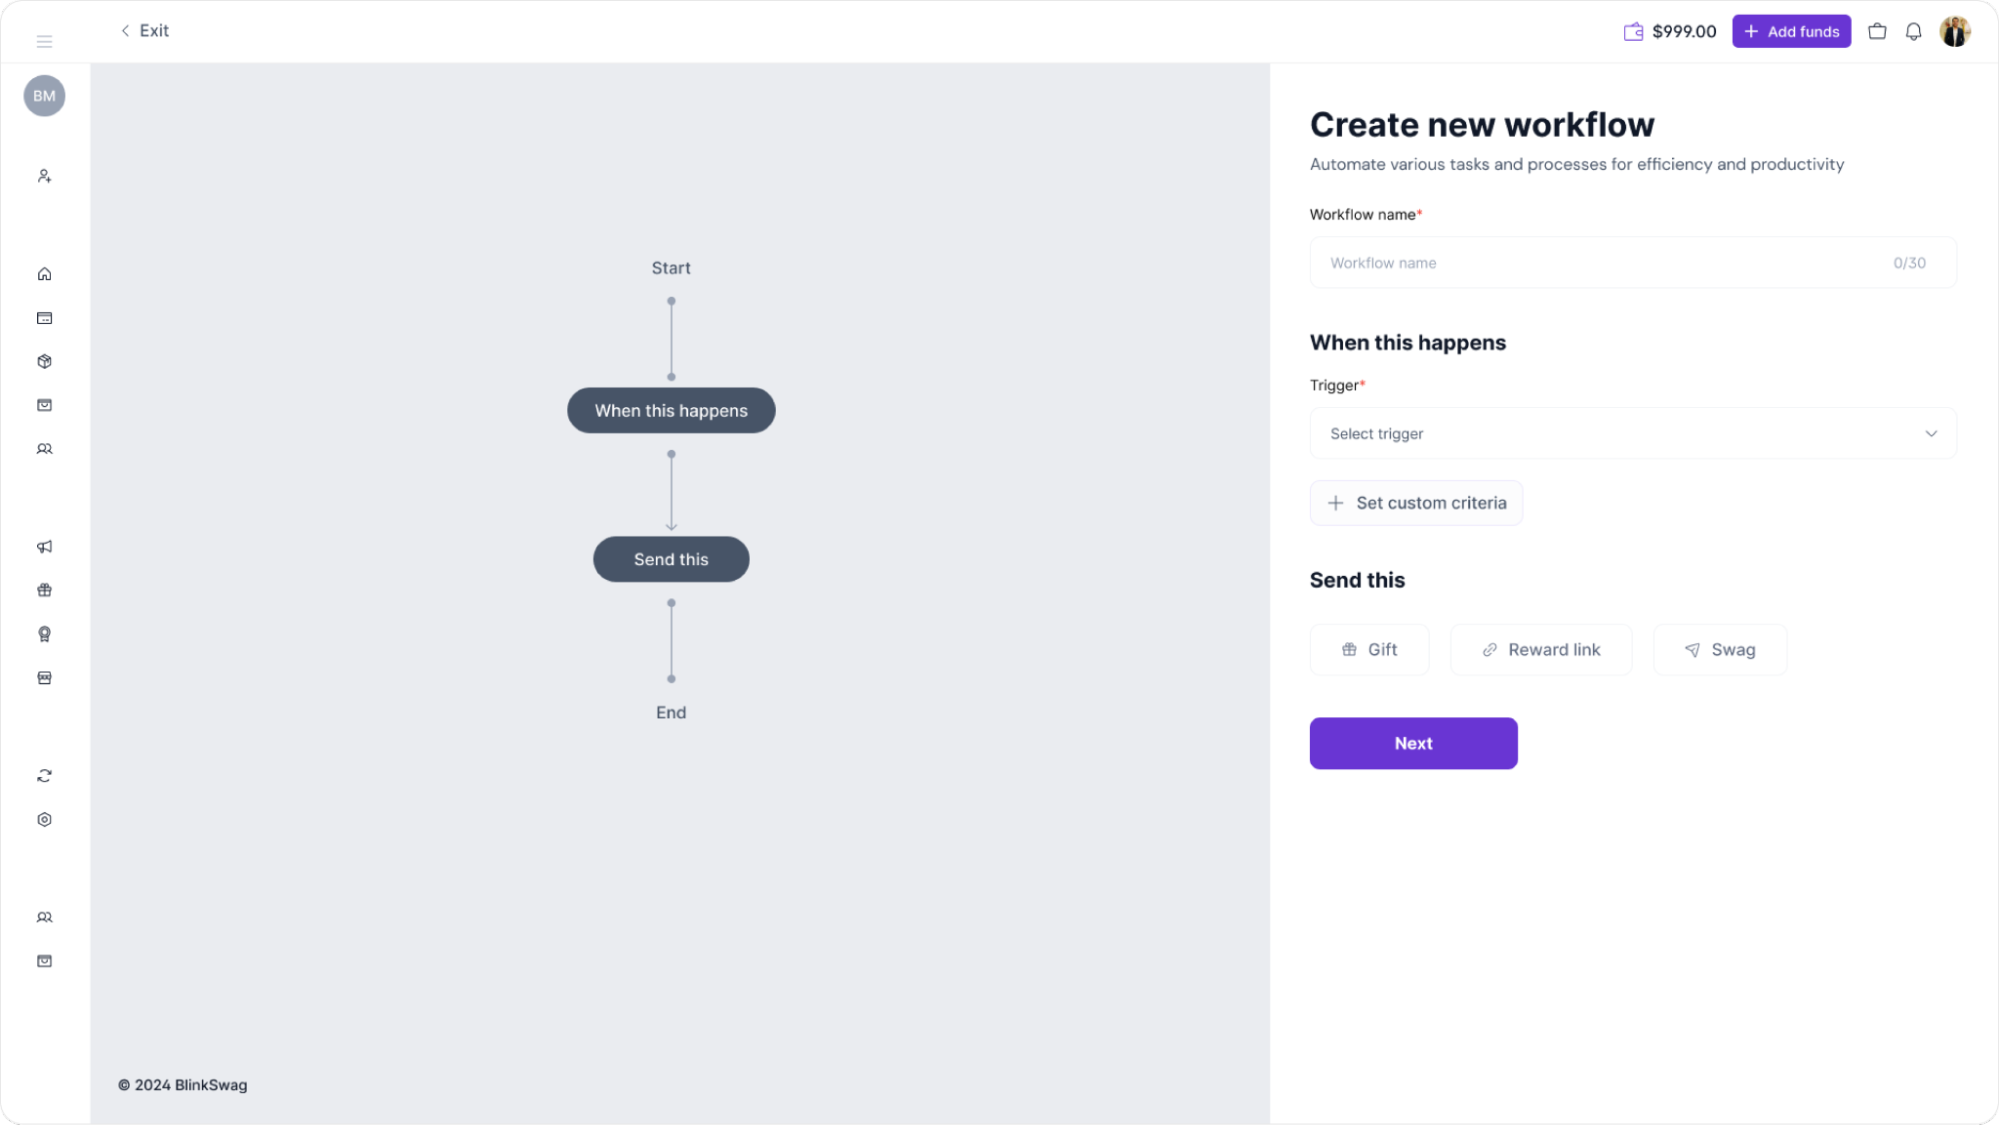
In this step, you’ll configure the basic settings of your new workflow.
1. Name Your Workflow: On the right side, enter a descriptive name for your workflow in the Workflow name field.
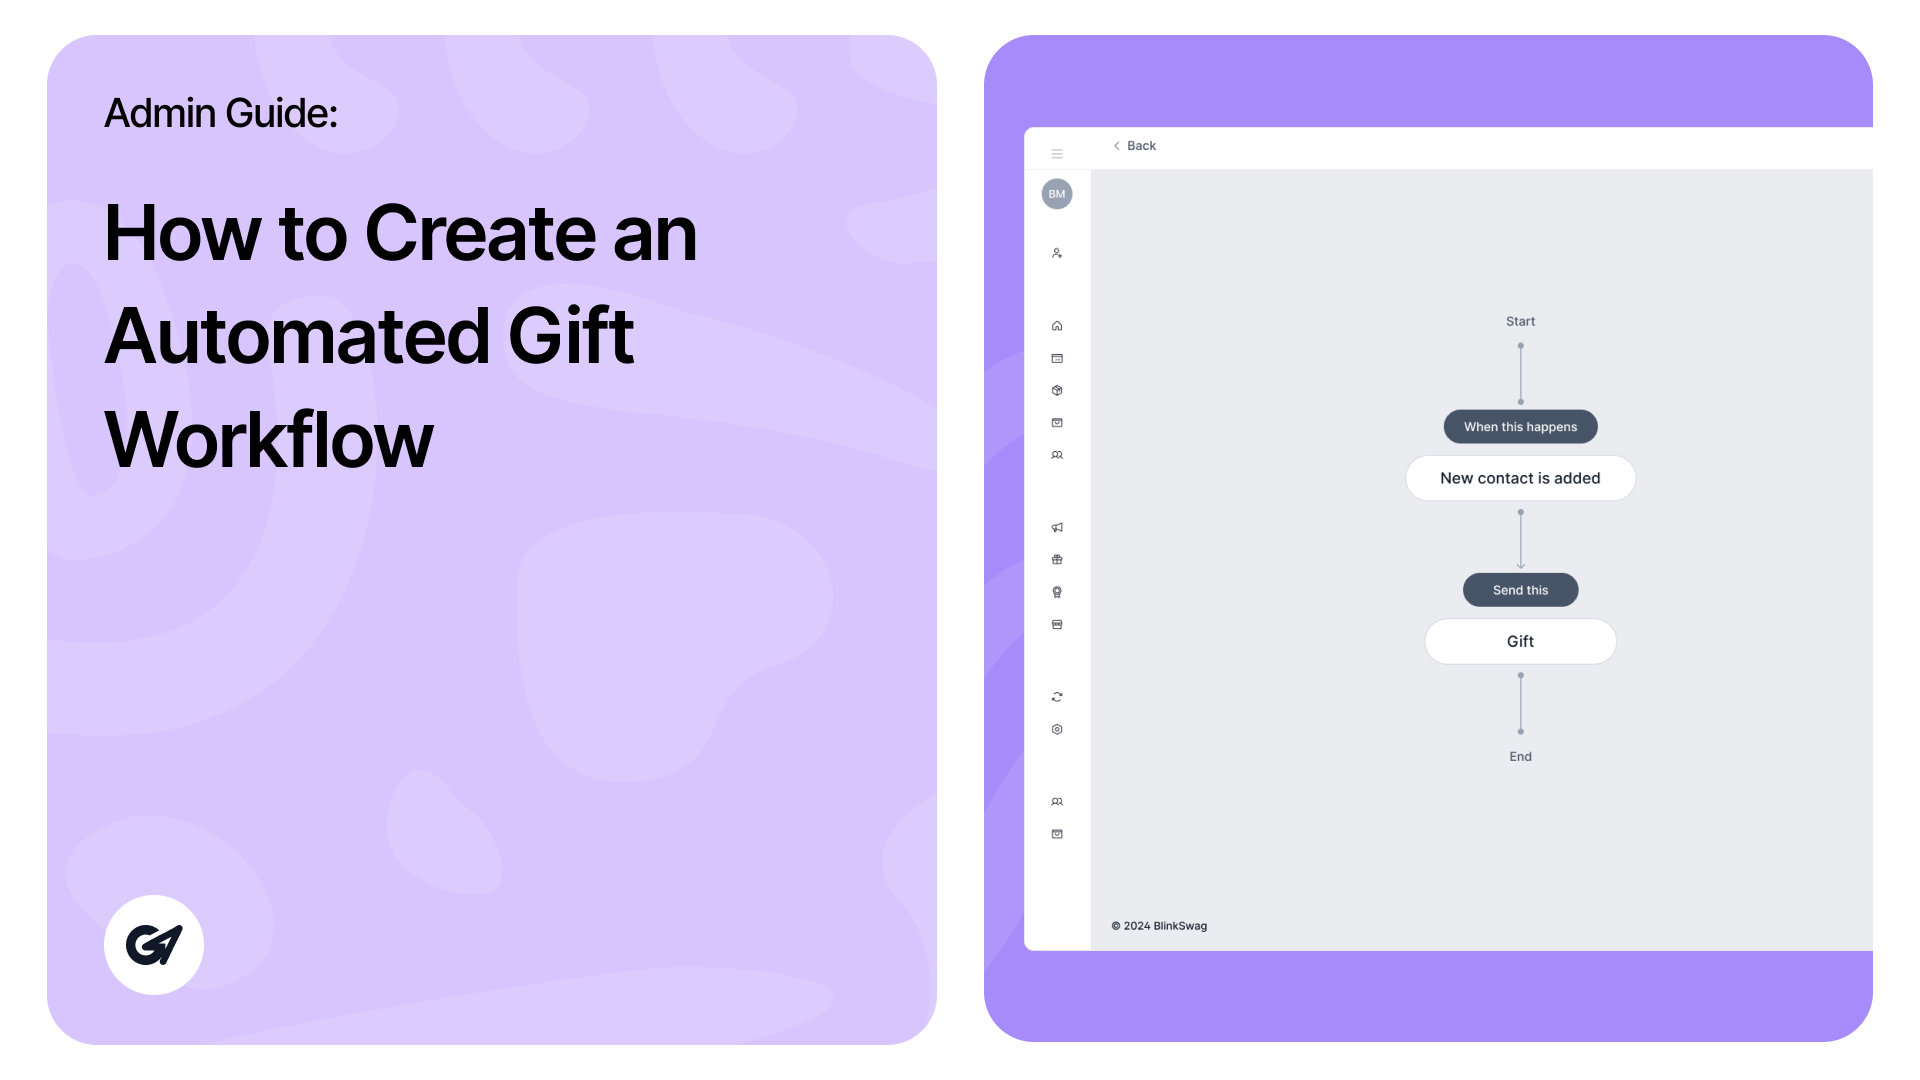
2. Set a Trigger: When this happens, select a trigger event by clicking the Select trigger dropdown. This defines when the workflow will activate.
-
- Choose a Trigger: You’ll see several trigger options:
- A new contact is added
- New address has added
- Contact is having a work anniversary
- Contact is having a birthday
- Choose a Trigger: You’ll see several trigger options:
Choose the option that best fits the purpose of your workflow. For instance, if you want the workflow to activate on a contact’s birthday, select Contact is having a birthday.
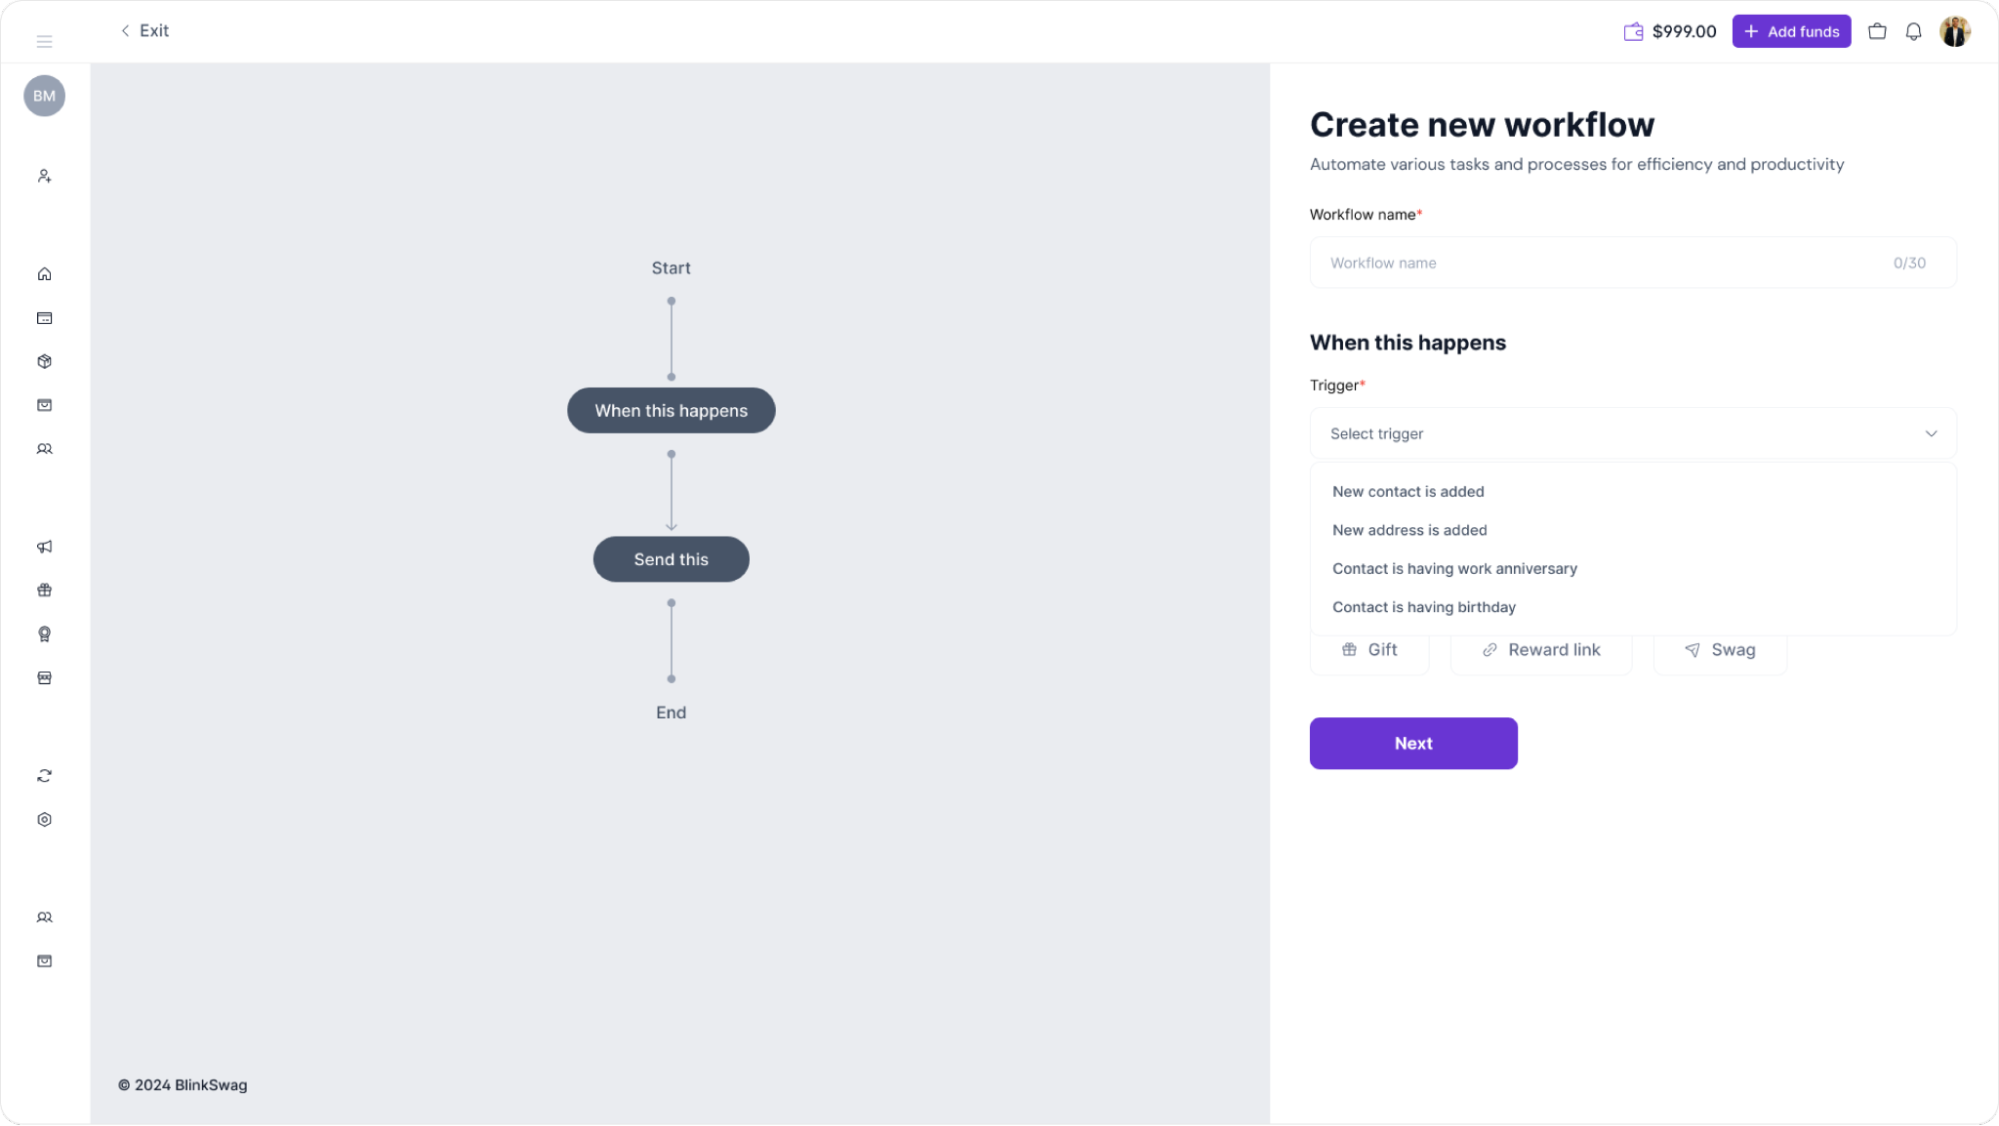
3. Set Custom Criteria (Optional): If needed, click + Set custom criteria to add specific conditions for this workflow.
4. Choose What to Send: Under Send this, you have options like Gift, Reward link, and Swag. Select Gift for this workflow by clicking on the corresponding button.
5. Select Gift.
Once these fields are configured, click the Next button to proceed.
Step 3: Select Products for the Automated Gift Workflow
Now that you’ve set the trigger and chosen to send a gift, it’s time to select the specific product(s) you want to include in this workflow.
Click on “Select products”: On the right side of the screen, there’s a purple Select products button. Click this button to choose the gift items sent when the workflow is triggered.
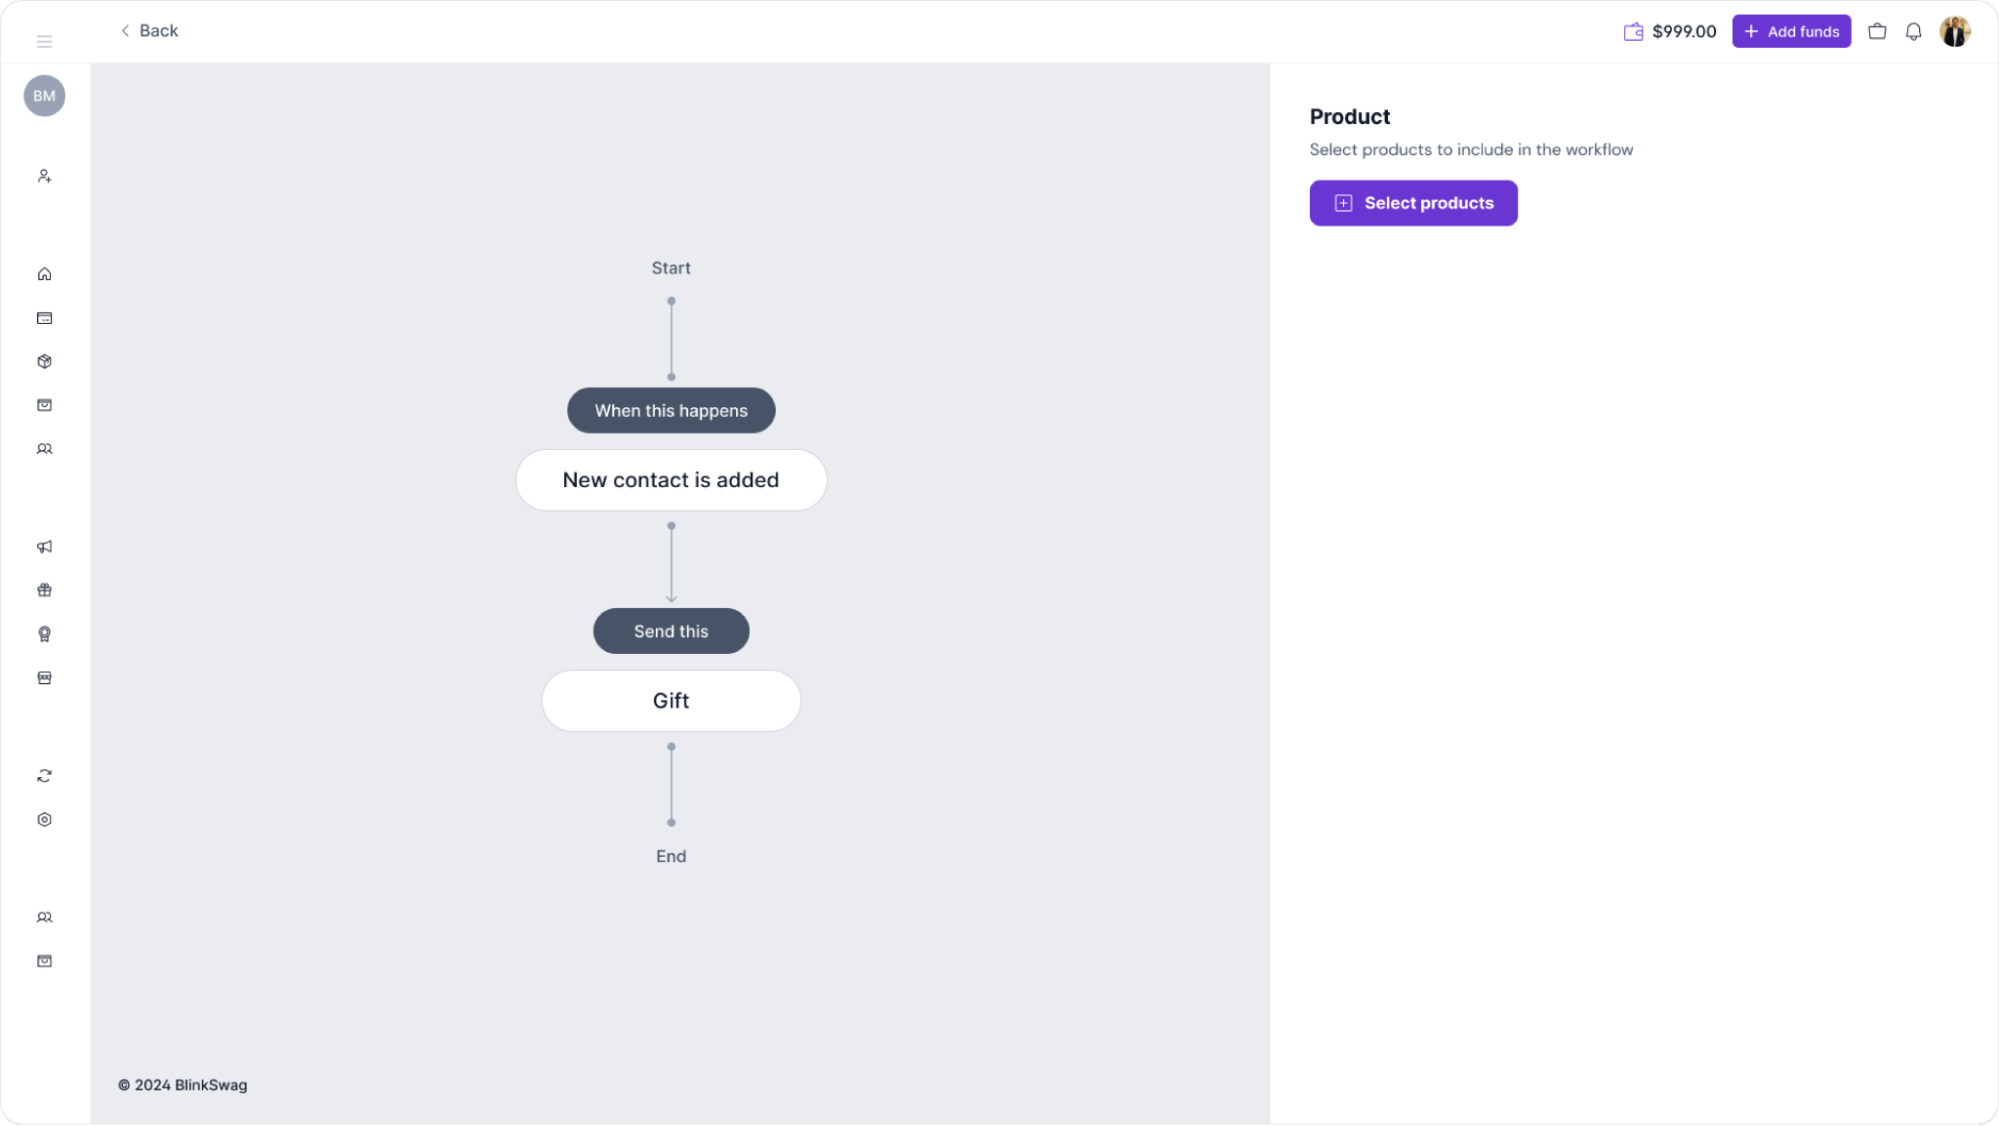
Step 4: Choose the Specific Gift Product
Now, you’ll select the exact gift product you want to send as part of this workflow.
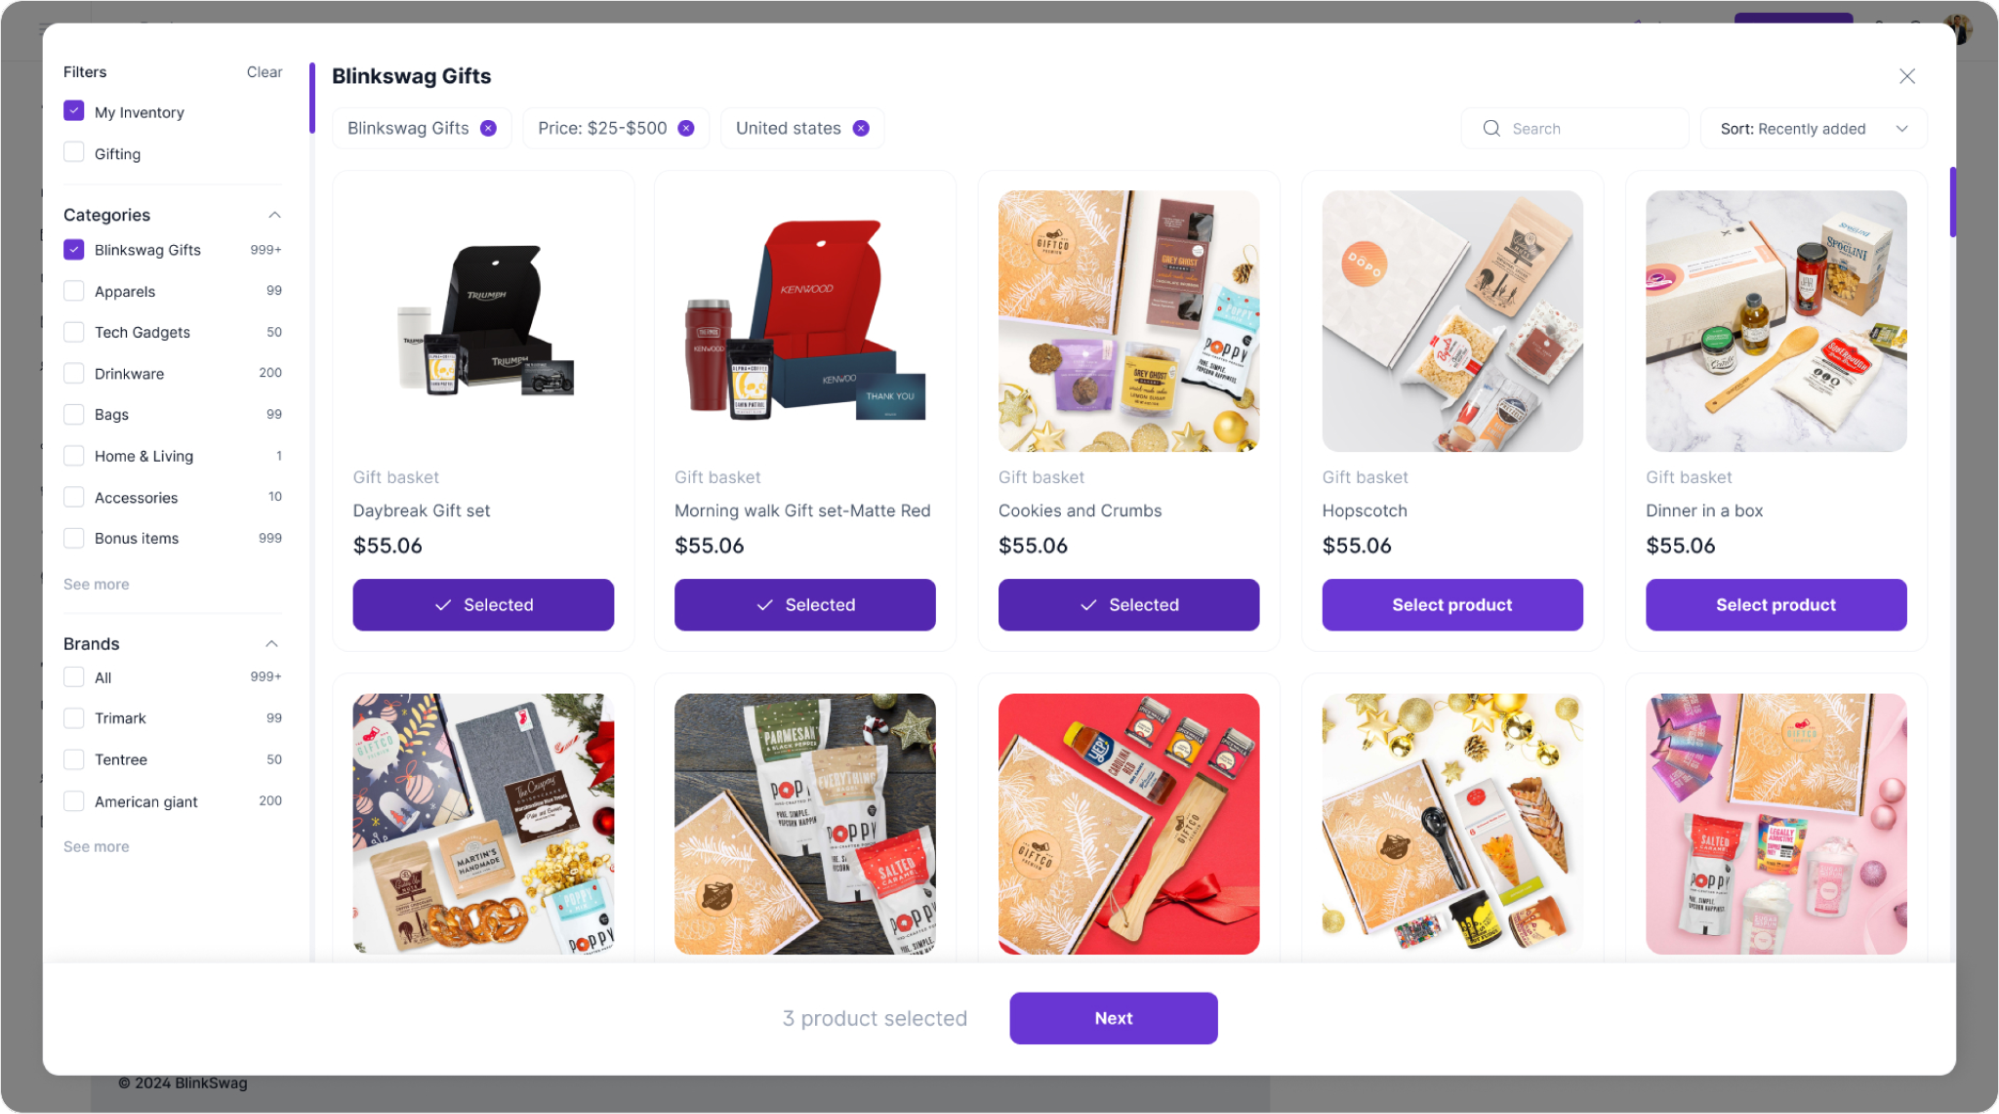
1. Browse the Gift Options: In the BlinkSwag Gifts section, you’ll see various gift baskets and items available for selection.
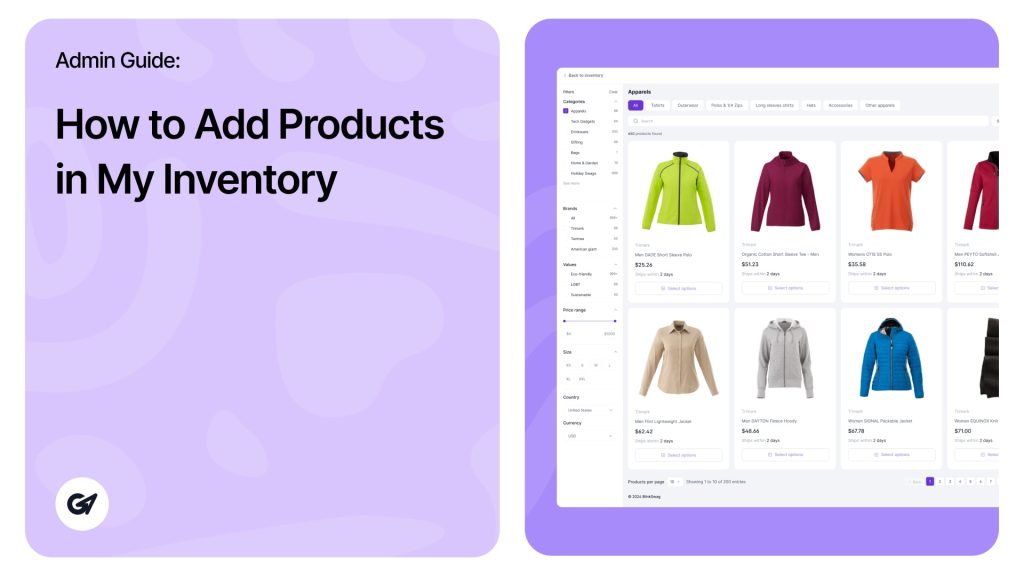
2. Filter Options (Optional): Use the filters on the left to narrow down products by Categories, Brands, or Price Range if needed.
3. Select a Product: When you find the desired gift, click the Select Product button below the product image. For example, you can choose options like “Daybreak Gift Set” or “Cookies and Crumbs.”
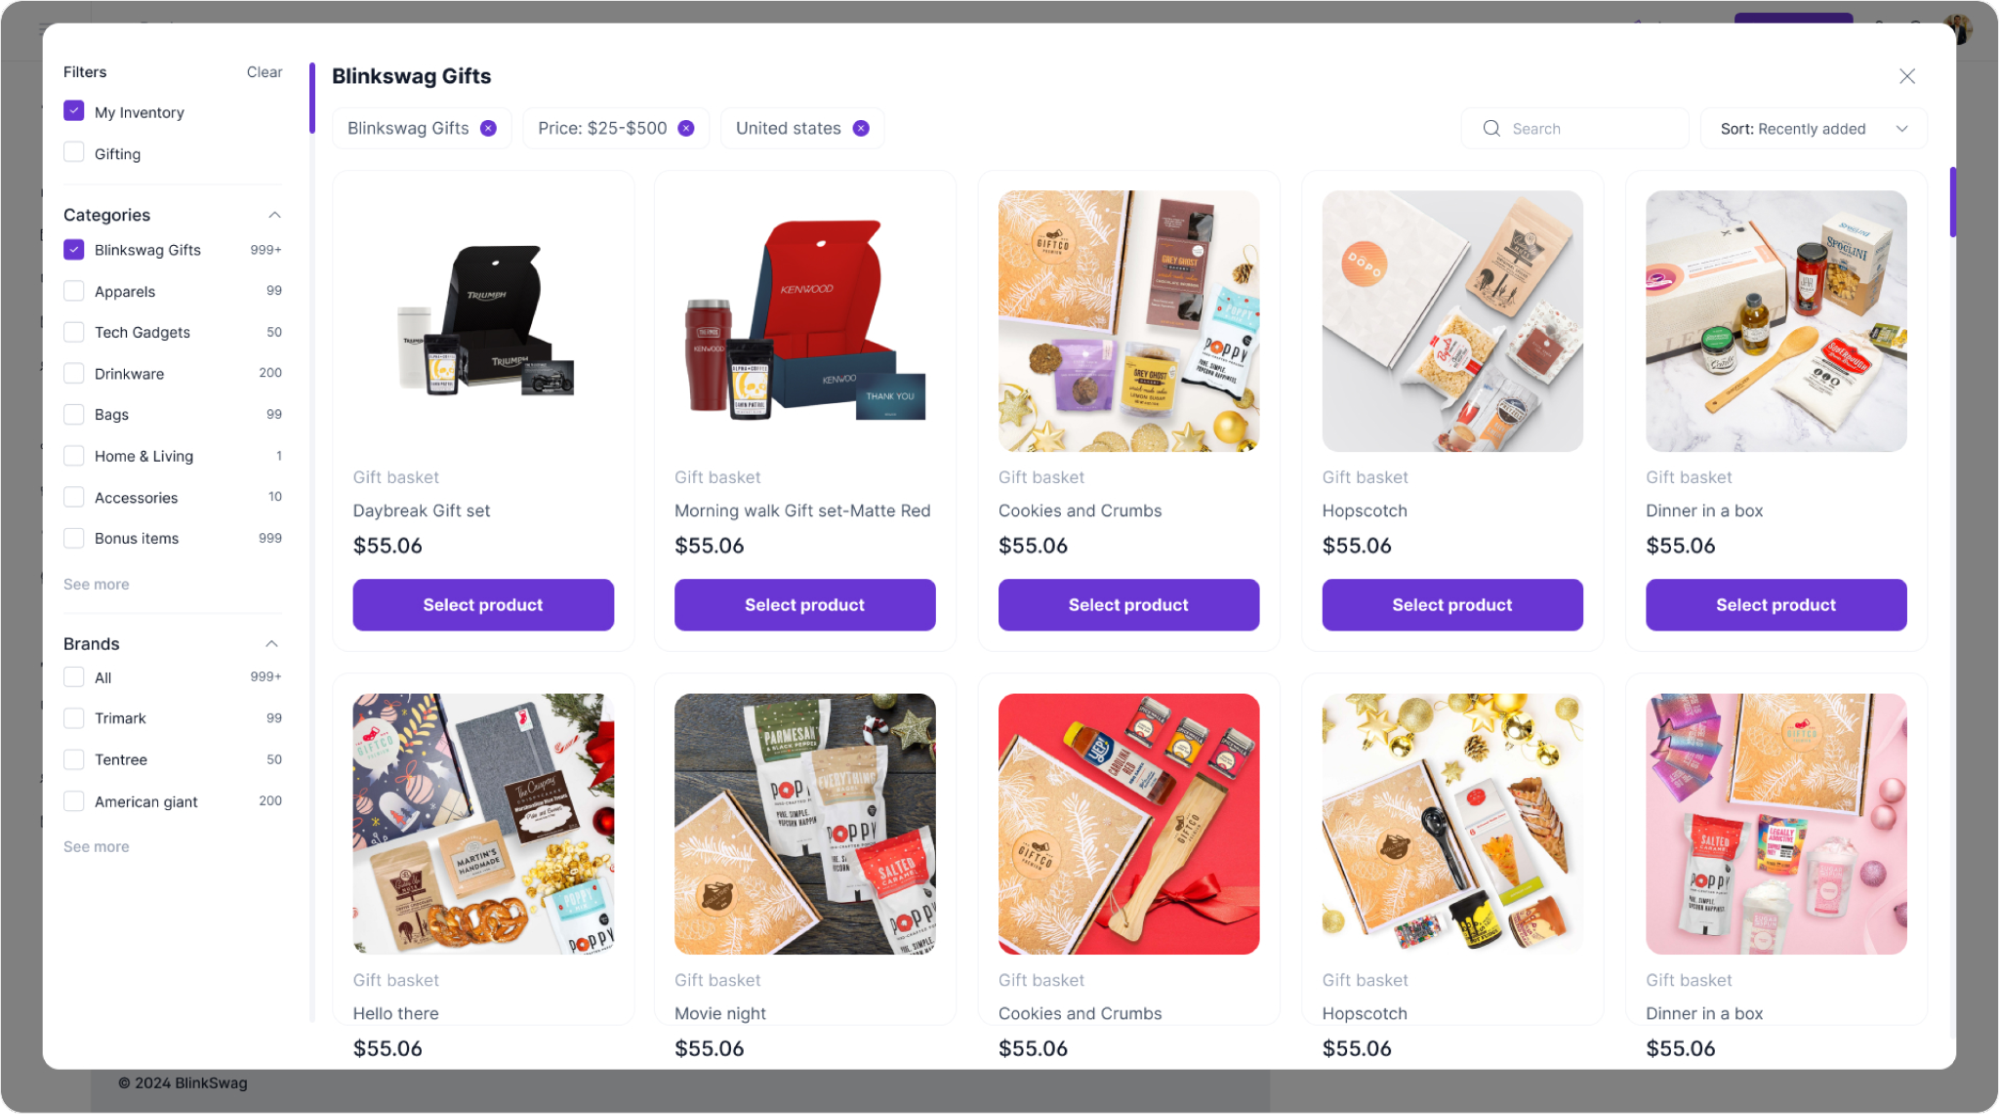
4. Proceed by clicking “Next.”: Click the Next button to confirm your selections and move forward in the workflow setup.
Step 5: Review and Confirm Selected Products
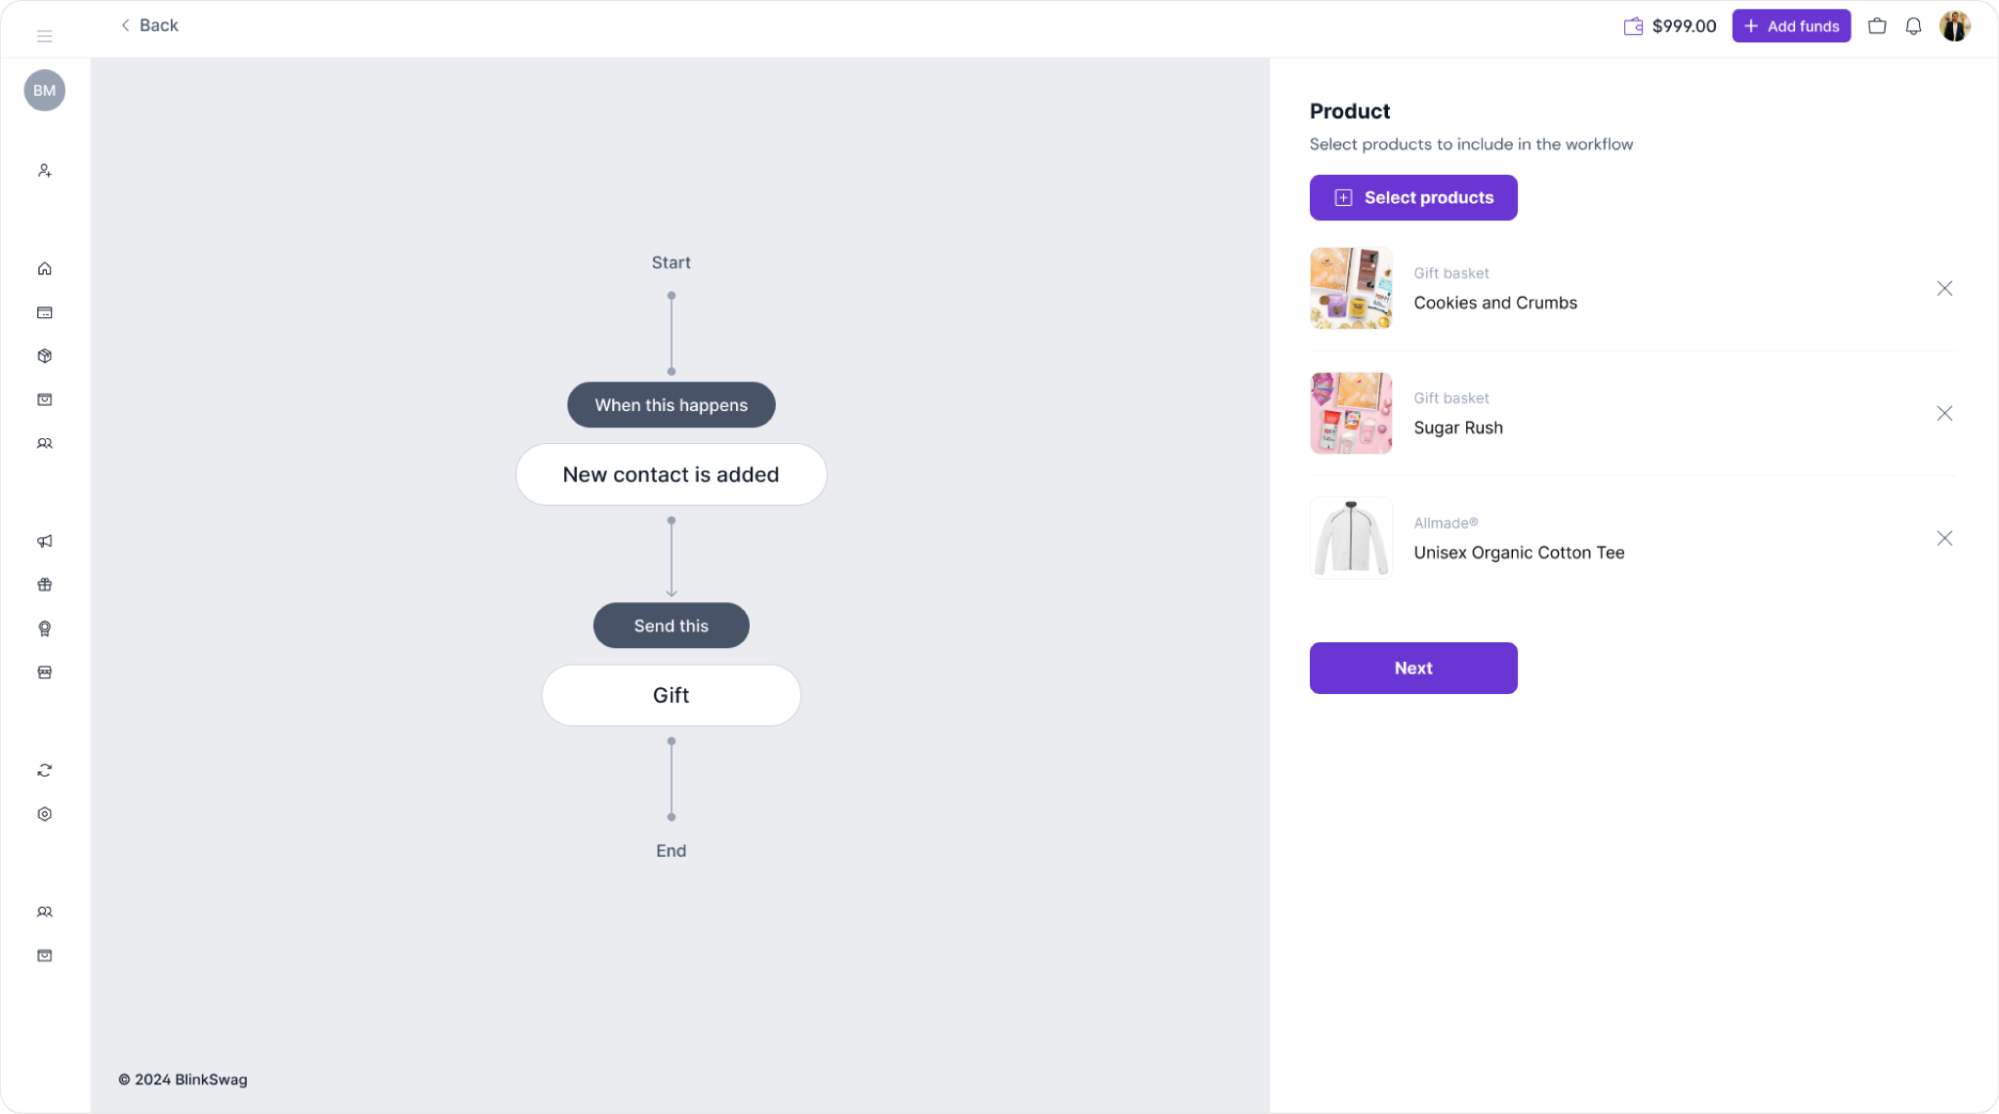
In this step, you’ll review the selected products sent when the workflow is triggered.
1. View Selected Items: On the right side of the screen, you’ll see a list of the products you chose, such as “Cookies and Crumbs,” “Sugar Rush,” and “Unisex Organic Cotton Tee.”
2. Remove Items if Needed: To remove a product, click the X icon next to its name.
3. Proceed by clicking “Next.”: After reviewing and confirming the items, click the Next button to finalize the product selection and proceed to the final steps of the workflow configuration.
Step 6: Customize the Greeting Message
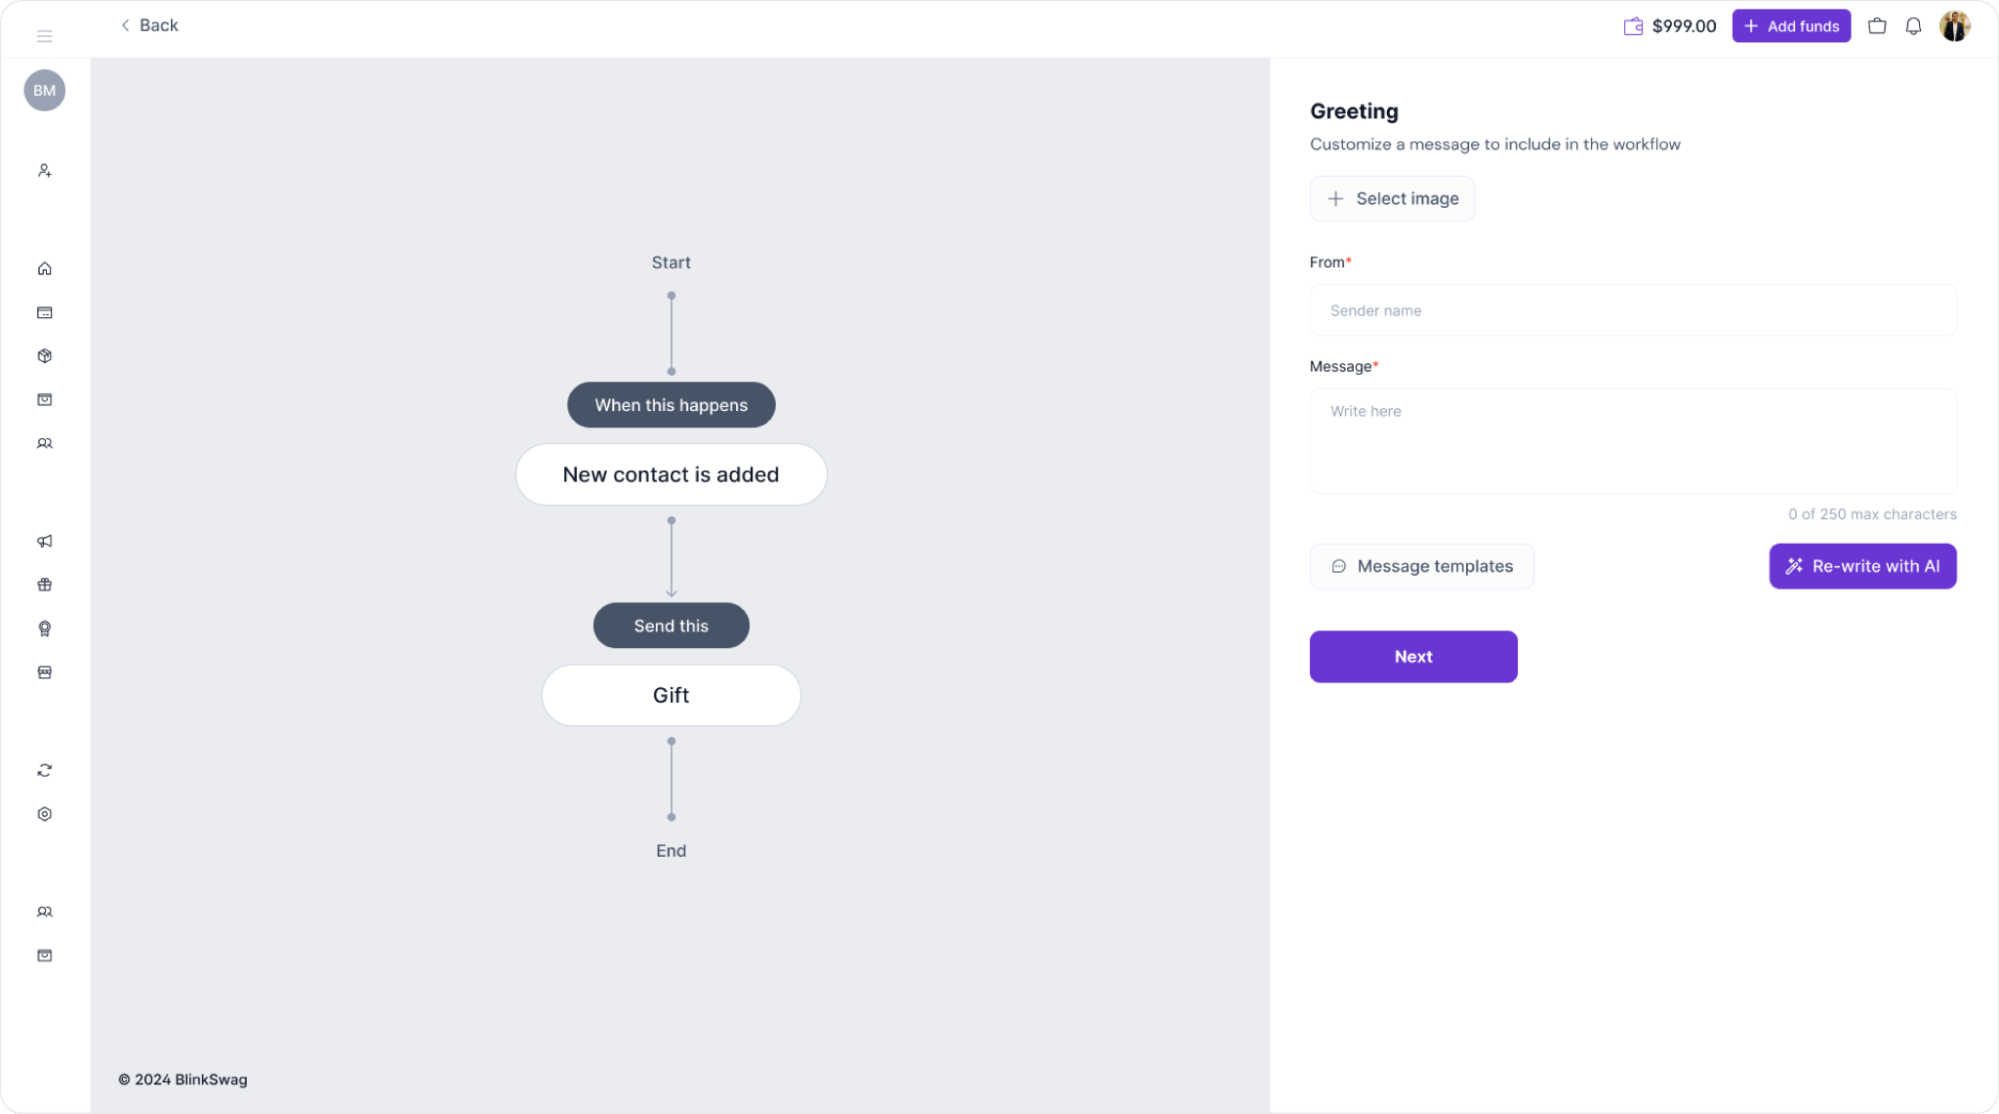
In this step, you can personalize the message that will accompany the gift.
1. Select an Image (Optional): Click + Select image if you’d like to add an image to the greeting. This image will be included in the message.
2. Sender’s Name: In the From field, enter the name of the sender. This will appear as the sender of the gift message.
Step 7: Finalize the Greeting Message
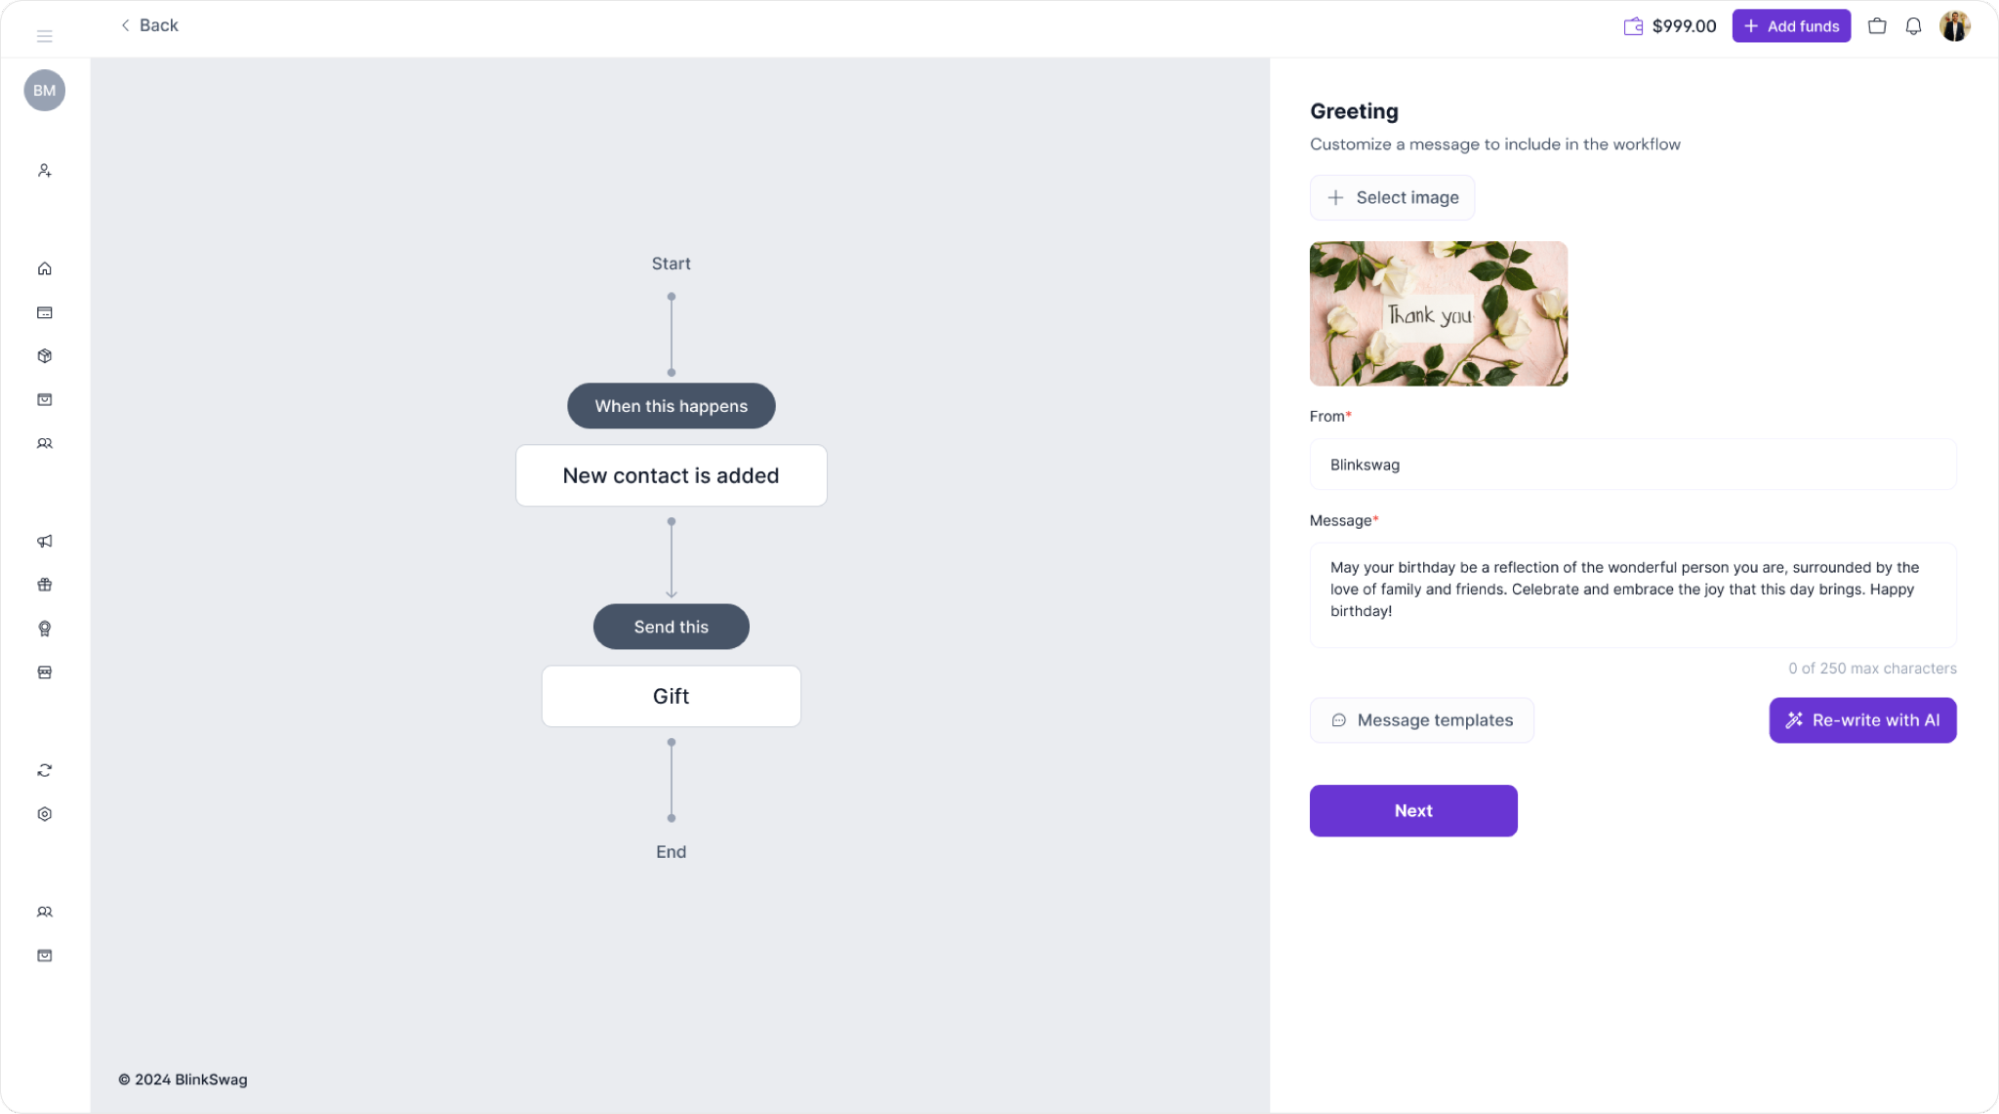
In this step, you’ll review the final details of your greeting message before completing the setup.
1. Verify the Image: Ensure that the selected image (e.g., a “Thank you” note with flowers) appears as desired. This image will accompany the greeting.
2. Review Sender and Message:
- From: Double-check the sender’s name, such as “BlinkSwag,” to ensure it’s correctly entered.
- Message: Confirm the content of your message. For example: “May your birthday be a reflection of the wonderful person you are, surrounded by the love of family and friends. Celebrate and embrace the joy that this day brings. Happy birthday!”
3. Proceed by clicking “Next.”: When everything looks good, click the Next button (highlighted with a red box) to proceed to the final step in the workflow setup.
Step 8: Finalize and Save the Workflow
This is the final step, where you’ll configure the recipient details and complete the workflow setup.
1. Sending Internationally?: BlinkSwag offers worldwide delivery, so if you intend to send gifts internationally, review the option under Sending internationally? to confirm this capability.
2. Enable Product Swap (Optional): Toggle the Product swap option to enable it if you want to allow recipients the flexibility to swap for a gift of equal or lesser value. This ensures a better recipient experience by allowing substitutions if needed.
3. Save the Workflow: To complete the setup, click the Save workflow button (highlighted in purple). This will activate the workflow based on your set trigger and configurations.
Your workflow is now ready to go! This concludes the setup process.
Step 9: Workflow Creation Confirmation
Congratulations! Your workflow has been created successfully.
1. Confirmation Message: You’ll see a message stating, “Workflow created successfully,” indicating that your new workflow is active and ready to operate according to your configured settings.
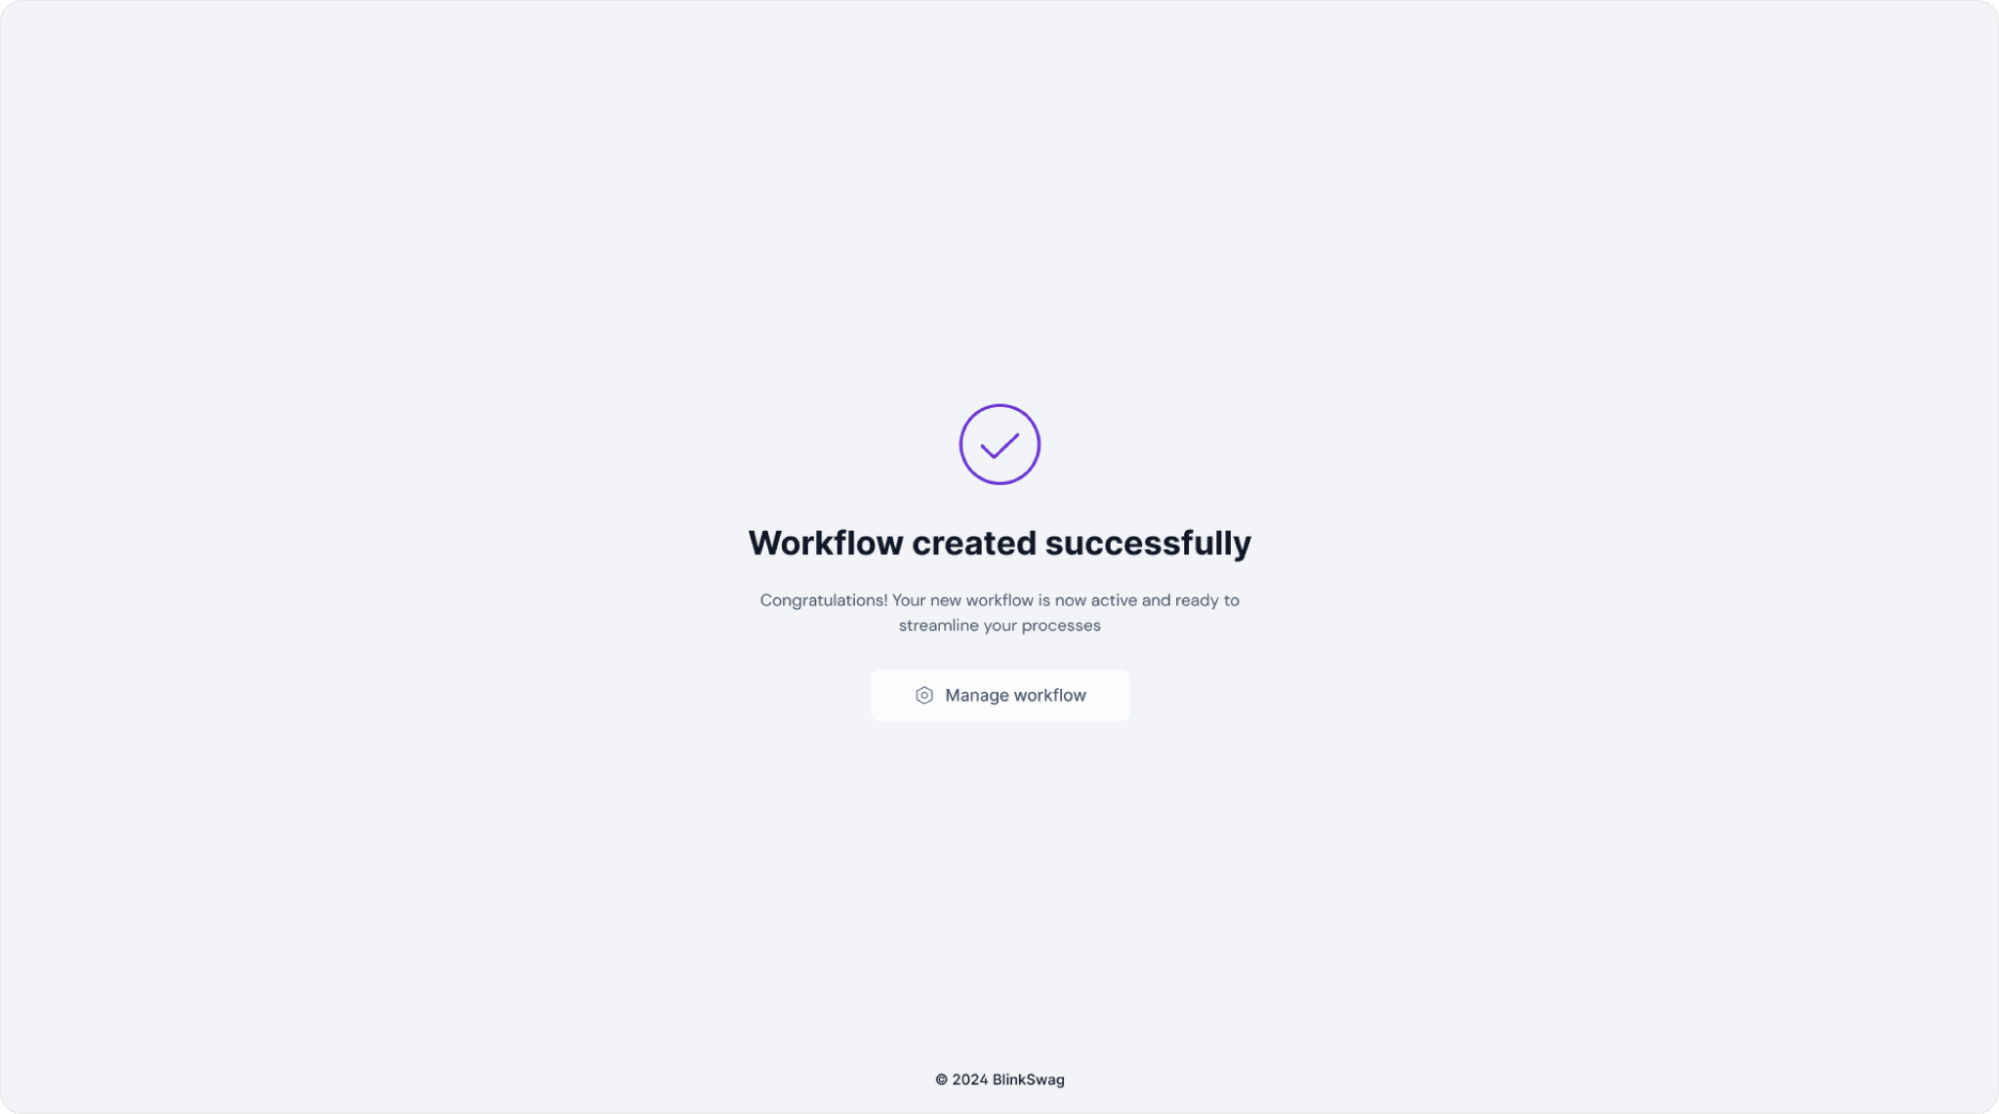
2. Manage Workflow: To make adjustments or review the workflow settings, click the Manage workflow button.
