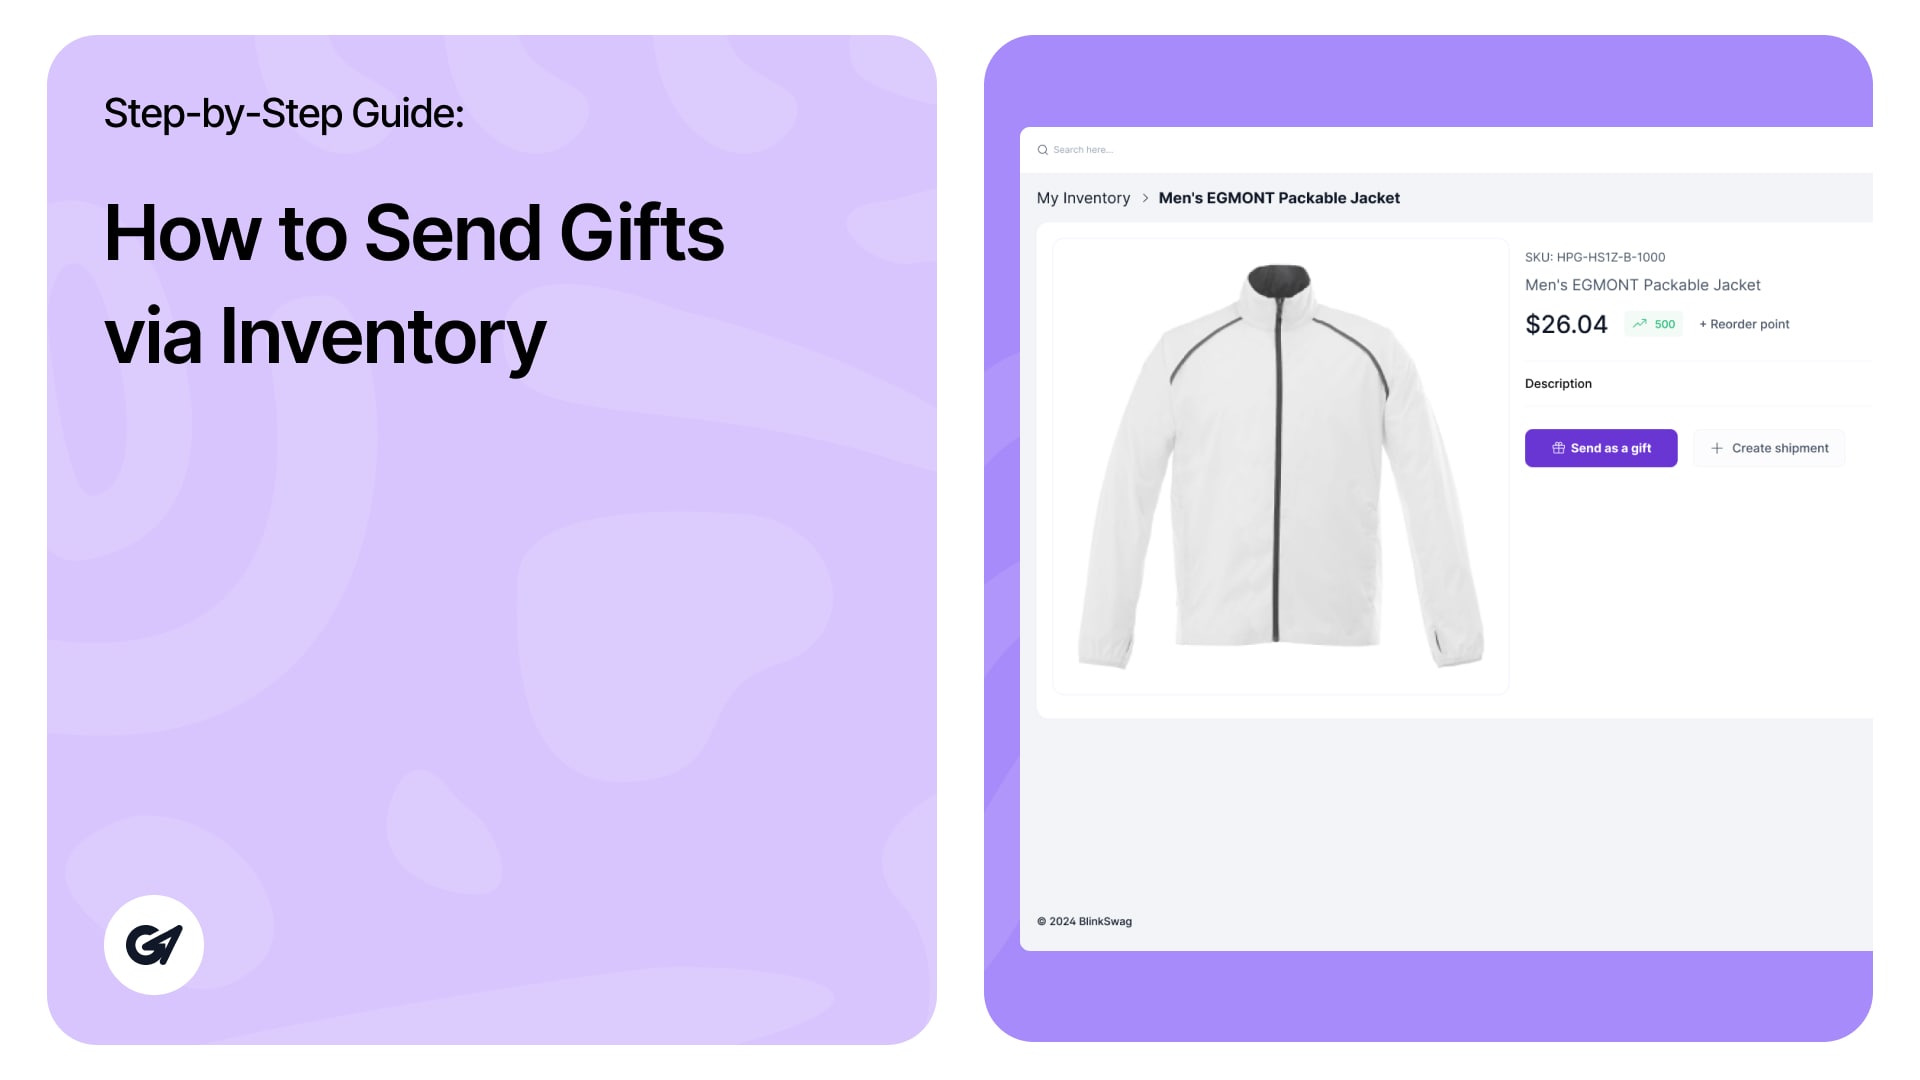
In the previous guide on inventory management, we learned how to view detailed information about a selected product, including options to send it as a gift or add it to the cart. In this guide, we will send gifts via inventory, ensuring a seamless and efficient gifting experience. Let’s explore the steps to ensure your gifts easily reach their recipients.
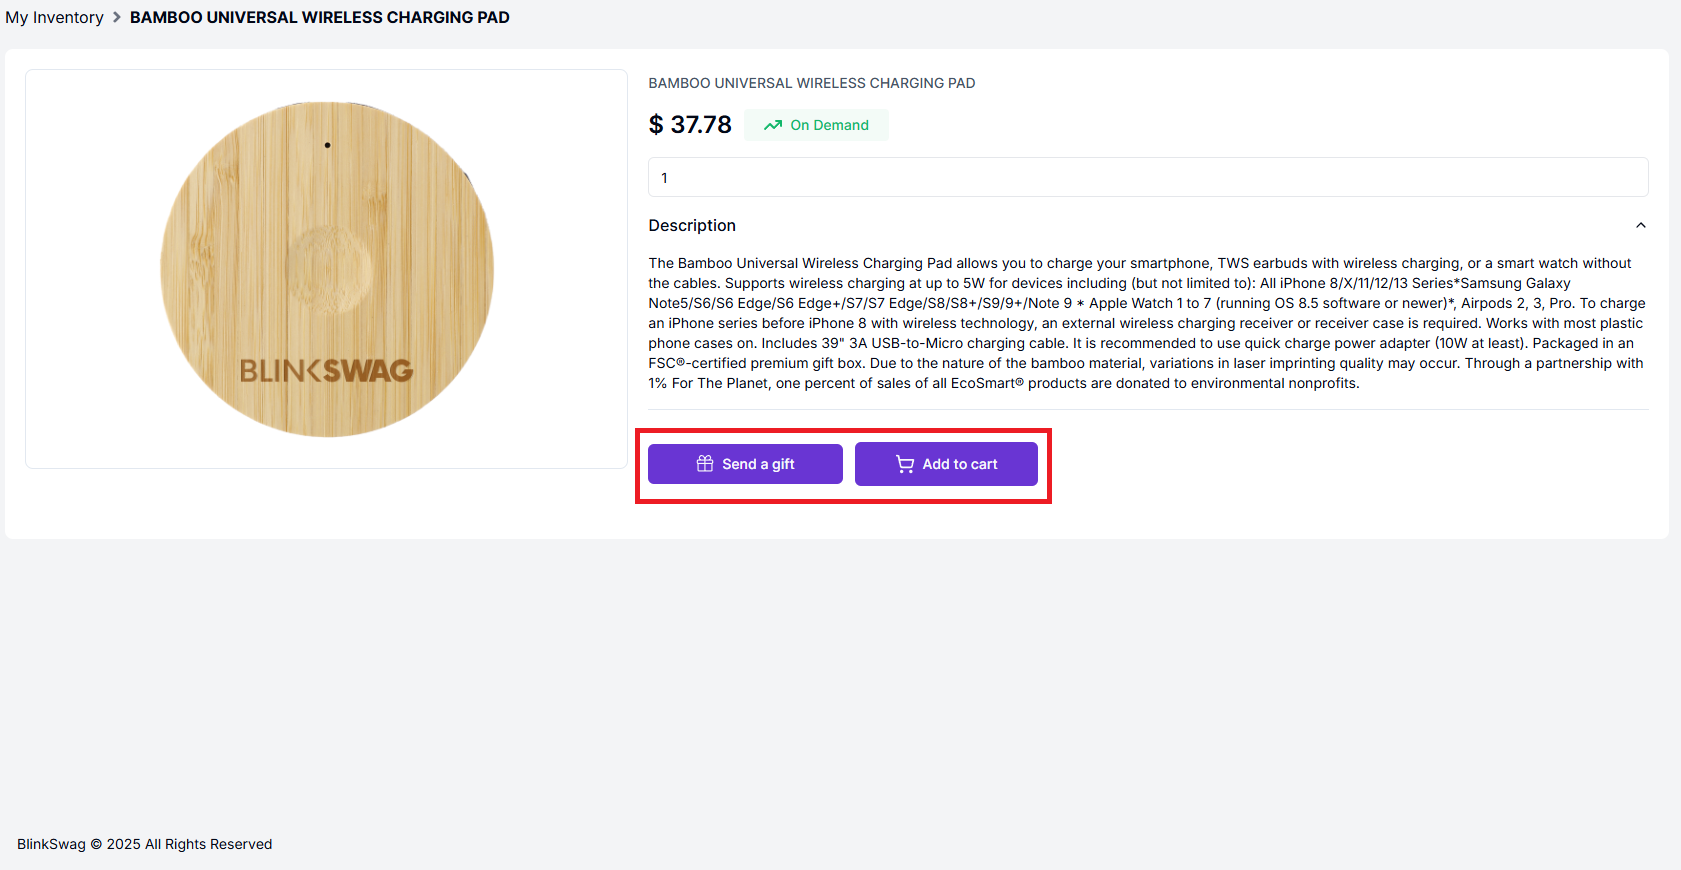
Send Gifts from Your Inventory
If you choose to send a gift, you can design a personalized Gift Email, which will be sent to the client you select.
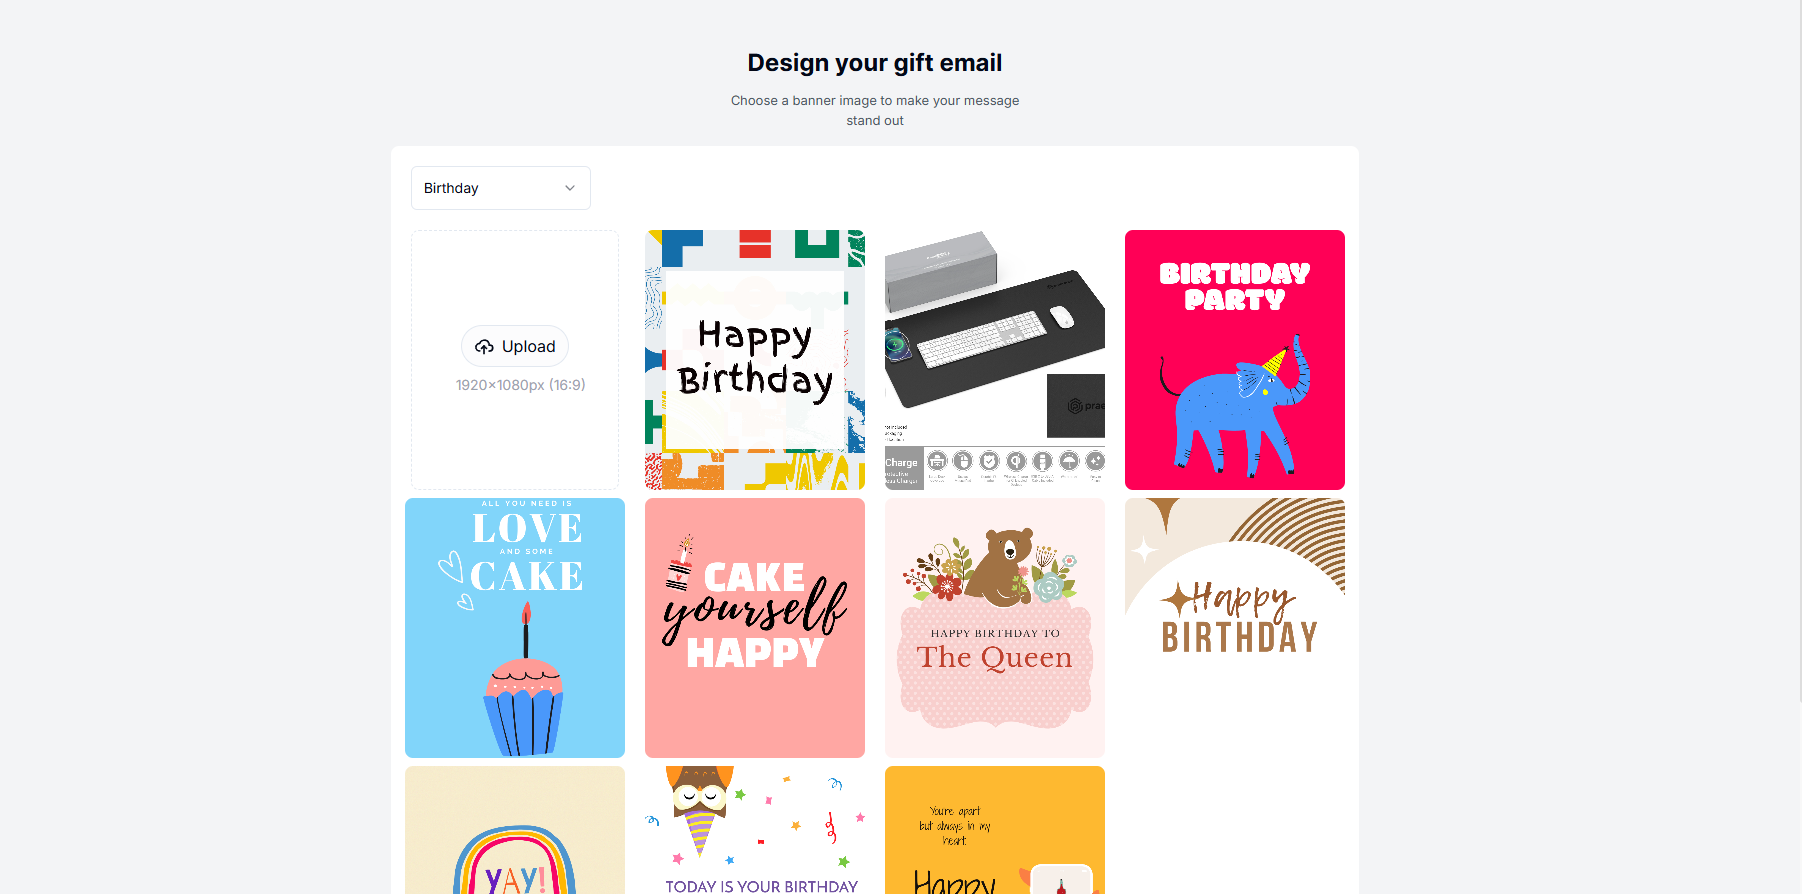
Designing the Gift Email
1. You will be prompted to design your gift email.
2. Choose a banner image to personalize your email.
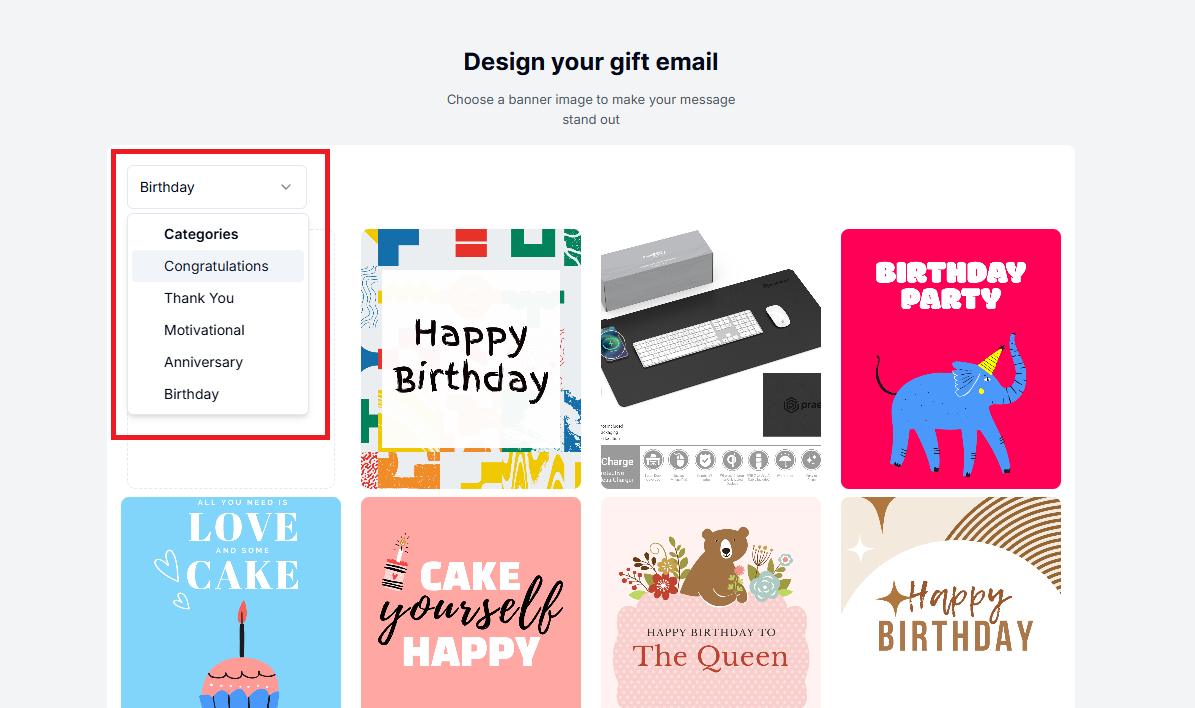
3. There are multiple categories available, including:
- Birthday
- Congratulations
- Thank You
- Motivational
- Anniversary
Choosing a Banner Image
- Select a category from the drop-down menu.
- Browse through the available banner images.
- Click on the image you wish to use.
Personalizing the Gift Email Message
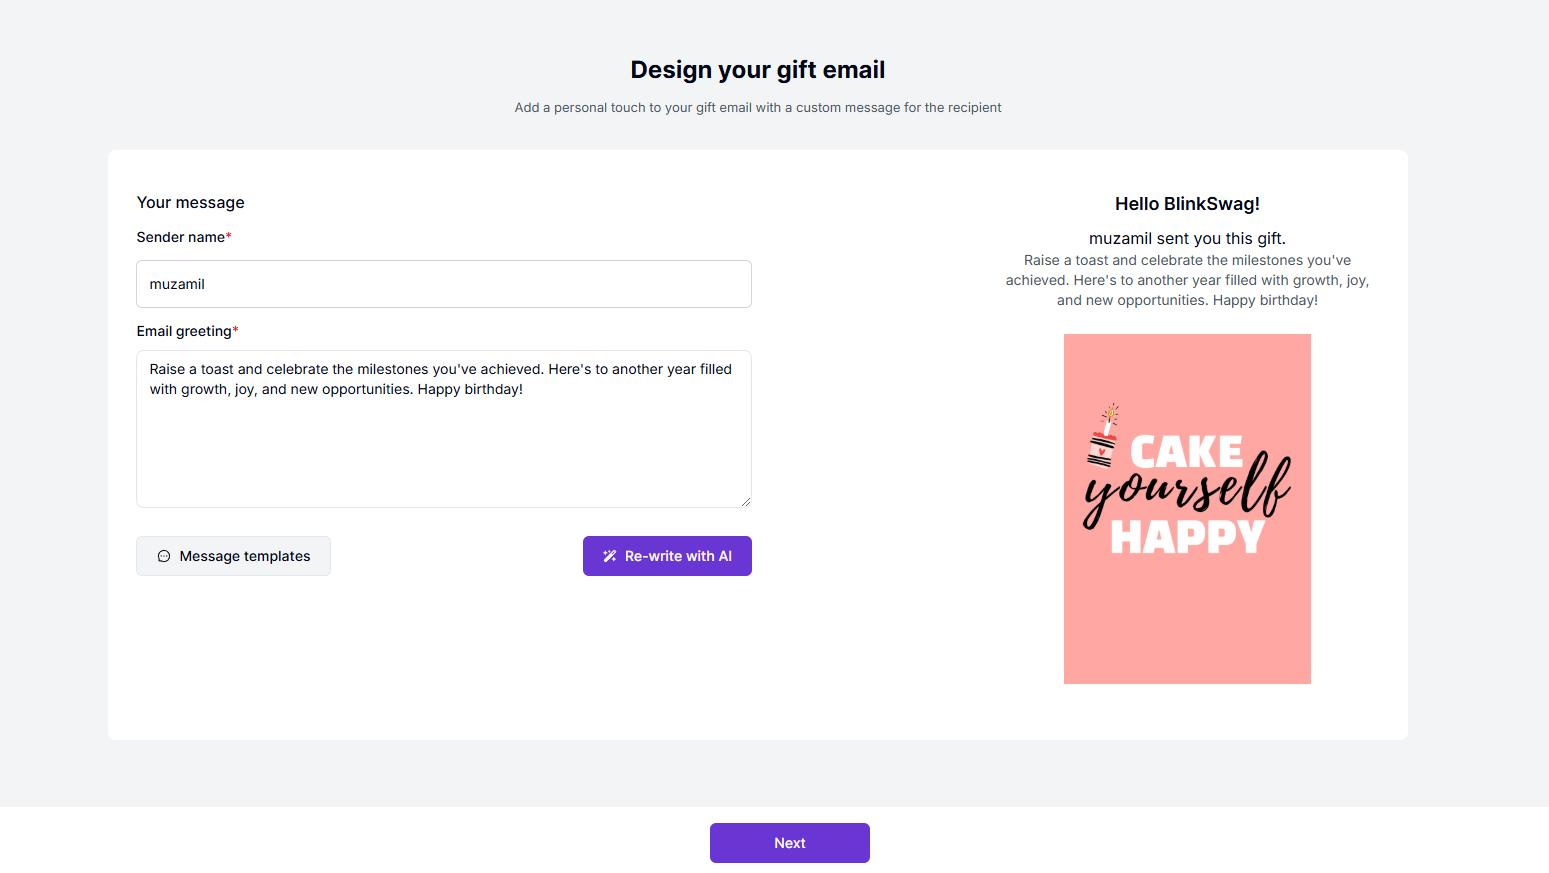
1. Enter the Sender Name:
- Fill in the name you want the recipient to see in the “Sender Name” field.
2. Write an Email Greeting:
- Type a personalized message in the provided text box.
- The message should celebrate the recipient and fit the occasion.
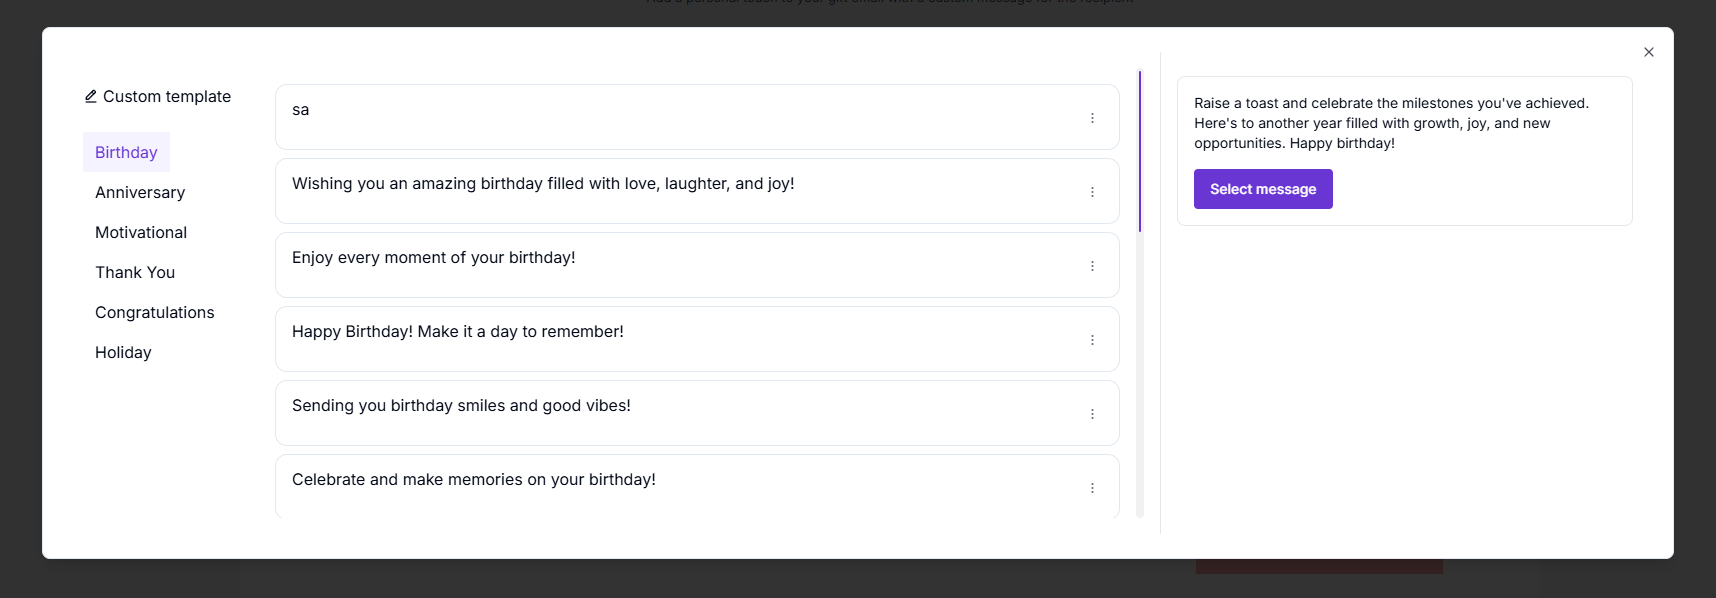
3. Use Message Templates (Optional):
- Click on the “Message templates” button to choose from pre-written messages.
4. Enhance with AI (Optional):
- Click “Re-write with AI” to generate an improved or alternative message.
5. Preview the Email:
- The email preview on the right shows how your message and design will appear to the recipient.
6. Proceed to the Next Step:
- Once satisfied, click the “Next” button to finalize your gift email.
Adding Recipient Details
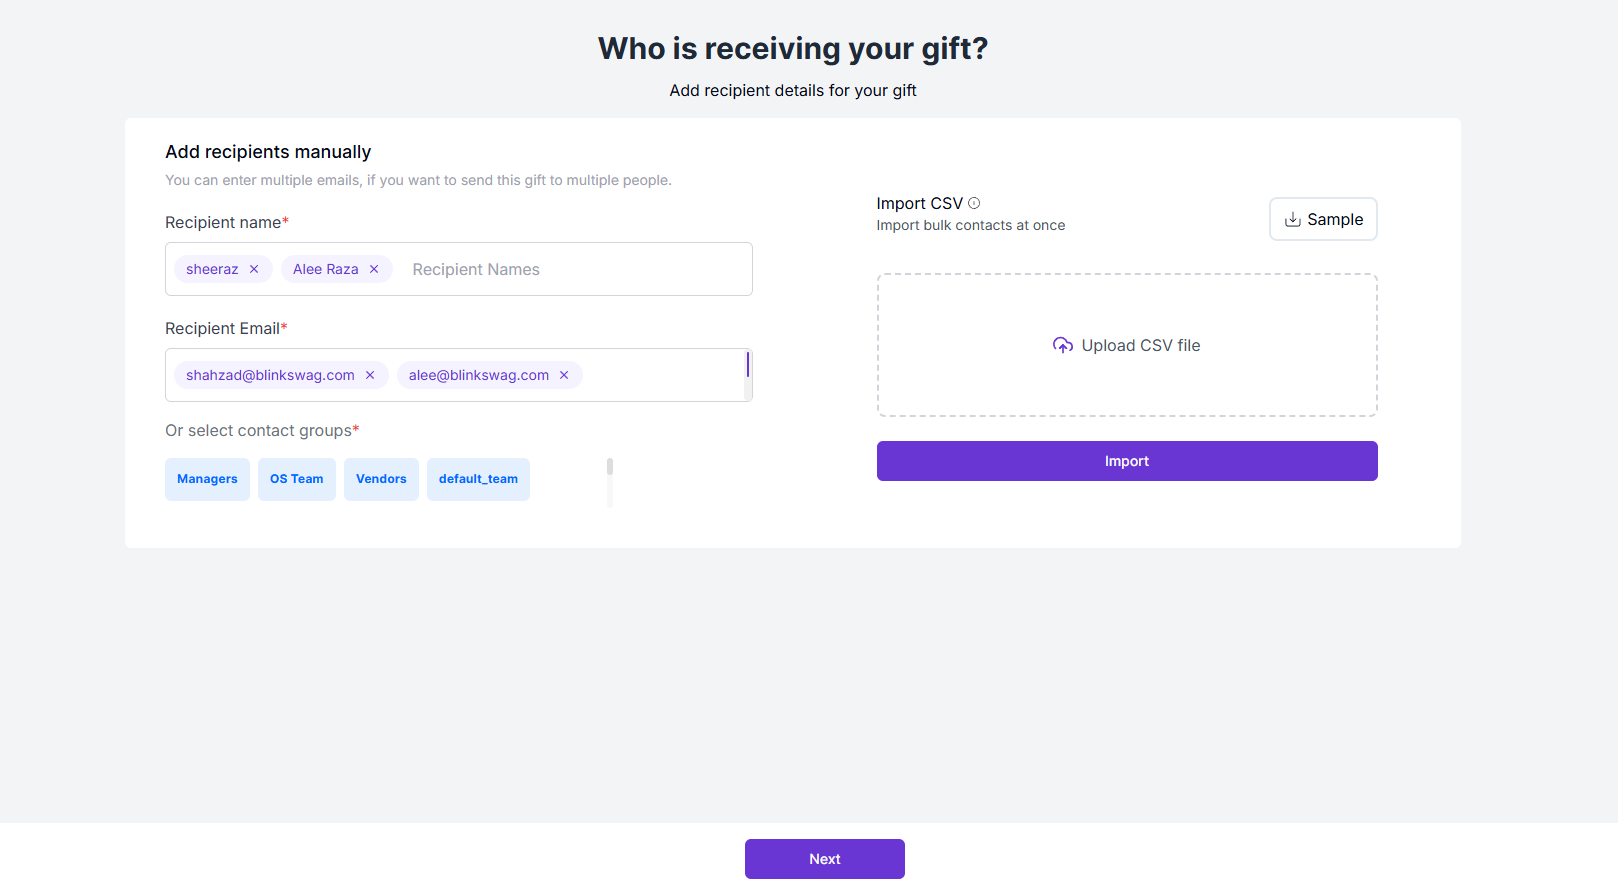
1. Manually Enter Recipients:
- In the Recipient Name field, type the name(s) of the recipient(s).
- In the Recipient Email field, enter the email address(es) of the recipient(s).
- You can send the gift to multiple recipients by adding multiple names and emails.
2. Select a Contact Group (Optional):
- Choose from predefined contact groups, such as:
- Managers
- OS Team
- Vendors
- Default Team
- This is useful for bulk sending to specific teams.
3. Import Contacts via CSV (Optional):
- Click “Upload CSV file” to import a list of recipients in bulk.
- A Sample CSV file is available for reference.
4. Confirm and Proceed:
- After adding recipients, click “Next” to move to the final step.
Review and Send the Gift
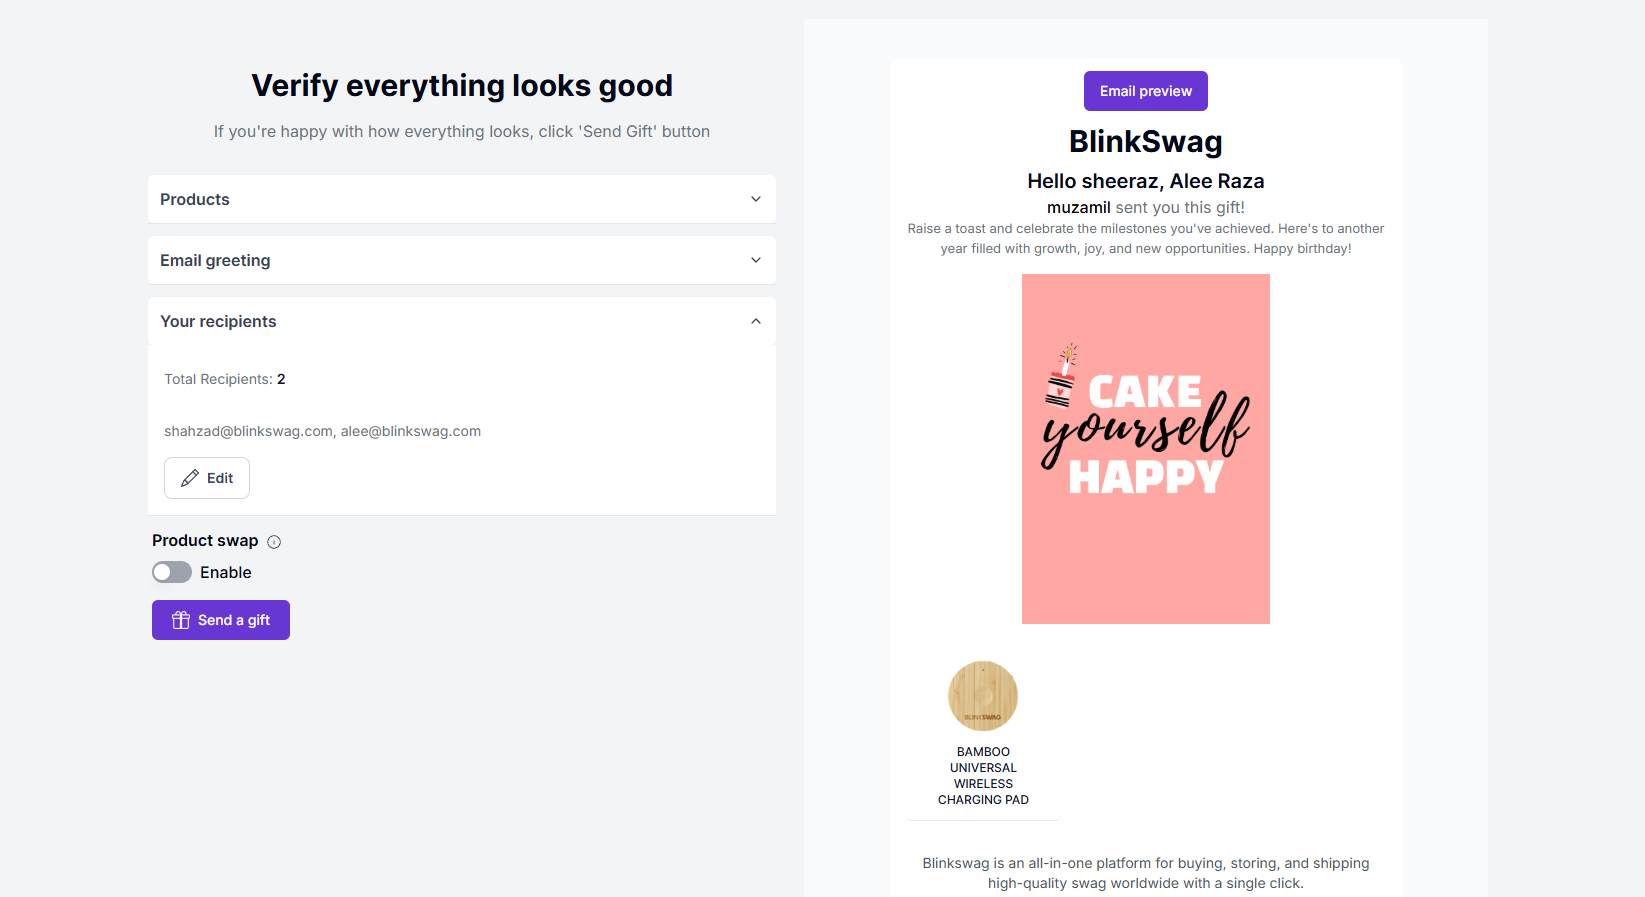
1. Verify Product Selection:
- Ensure the correct product is selected.
- Click on the Products dropdown if changes are needed.
2. Check the Email Greeting:
- Review the personalized message to confirm accuracy.
- Click on the Email Greeting dropdown to make modifications if needed.
3. Confirm Recipient Details:
- The recipients’ names and emails will be displayed.
- If changes are required, click Edit to update recipient details.
4. Enable Product Swap (Optional):
- Toggle the Product Swap option if you want recipients to choose a different product.
5. Preview the Email:
- A preview of the gift email is displayed on the right side.
- Confirm the email design, message, and recipient details.
6. Send the Gift:
- Once everything looks good, click “Send a Gift” to finalize and send the email.
